Grandma's Crisco Pie Crust Recipe
Whether you're a fan of sweet or savory pies, this Crisco pie crust recipe is sure to be a hit. Thanks to my Grandma's famous recipe, it's easy and quick to put together, and you can fill it with whatever your heart desires. Get ready to whip up the flakiest, tastiest Crisco pie crust that'll have your friends and family asking for the recipe!
This post may contain affiliate links.
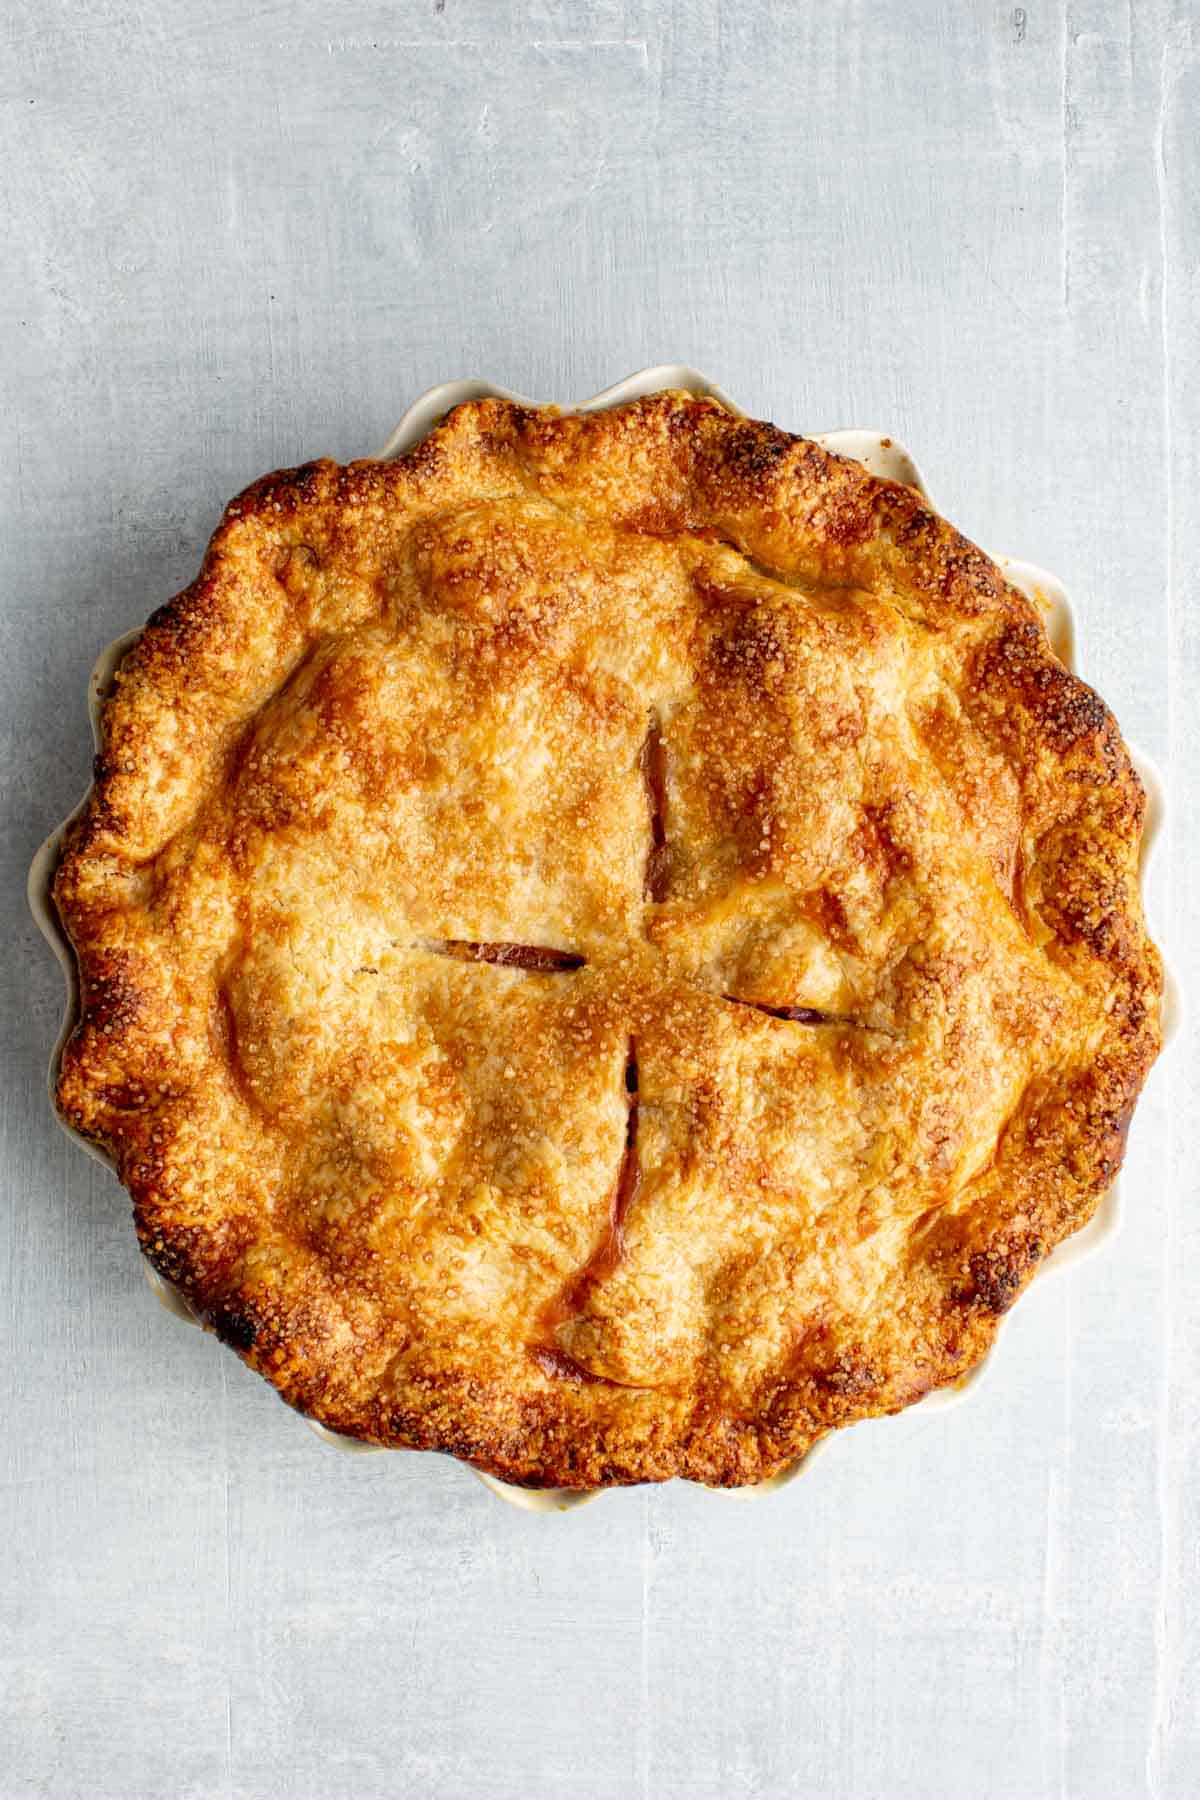
This Crisco pie crust recipe has been passed down through generations in my family. It's more than just a recipe - it's a precious heirloom that carries fond memories of shared laughter, stories, and the delicious aroma of pie filling our kitchen during the holiday seasons.
It has a perfect balance of lightness and richness, which was perfected over time by the loving hands of my grandma, Ro. She is our family's pie making queen!
This pie crust recipe is just the thing you need for any season, but it really shines during the holidays and especially Thanksgiving. With this recipe, you can create the ideal pie crust that is incredibly versatile. Whether you use it for a summer blueberry pie, a homemade peach pie, a classic apple pie for Thanksgiving, or even a chicken pot pie, this crust provides the perfect base.
Compared to my flaky pie crust recipe, which is made with a blend of butter AND shortening, this Crisco pie crust is made with only shortening and has a slightly different texture.
It's still flaky and golden brown on the outside, but its interior is light and tender due to the extra fat content in the shortening. It's how my grandma always made hers (sometimes with butter-flavored shortening) and what most of my family members prefer.
The holiday season is all about warmth, love, and delicious comfort food. And what could be more comforting than a perfectly flaky pie fresh out of your oven?
I'm excited to continue the tradition and share it with all of you today!
Love pies? Try this Creamy Cranberry Pie with Gingersnap Crust, a traditional Italian Ricotta Pie or this Savory Pear Galette with Goat Cheese + Walnuts!
Why This Recipe Works
- With a simple ingredient list of shelf-stable items, it's easy to whip up in a pinch.
- The secret to making a delicious pie crust lies in the use of shortening, which adds tenderness and makes the dough easy to work with.
- Our easy roll-and-rotate technique ensures a perfectly even circle every time.
- Plus, we have Grandma's trick for a mess-free and non-sticky experience!
- By keeping everything cold, the chunks of fat melt to create steam pockets, resulting in an irresistibly flaky crust!
- Whether you prefer savory or sweet fillings, this recipe has countless ways to create the perfect crust.
- It's incredibly convenient to freeze or make ahead.
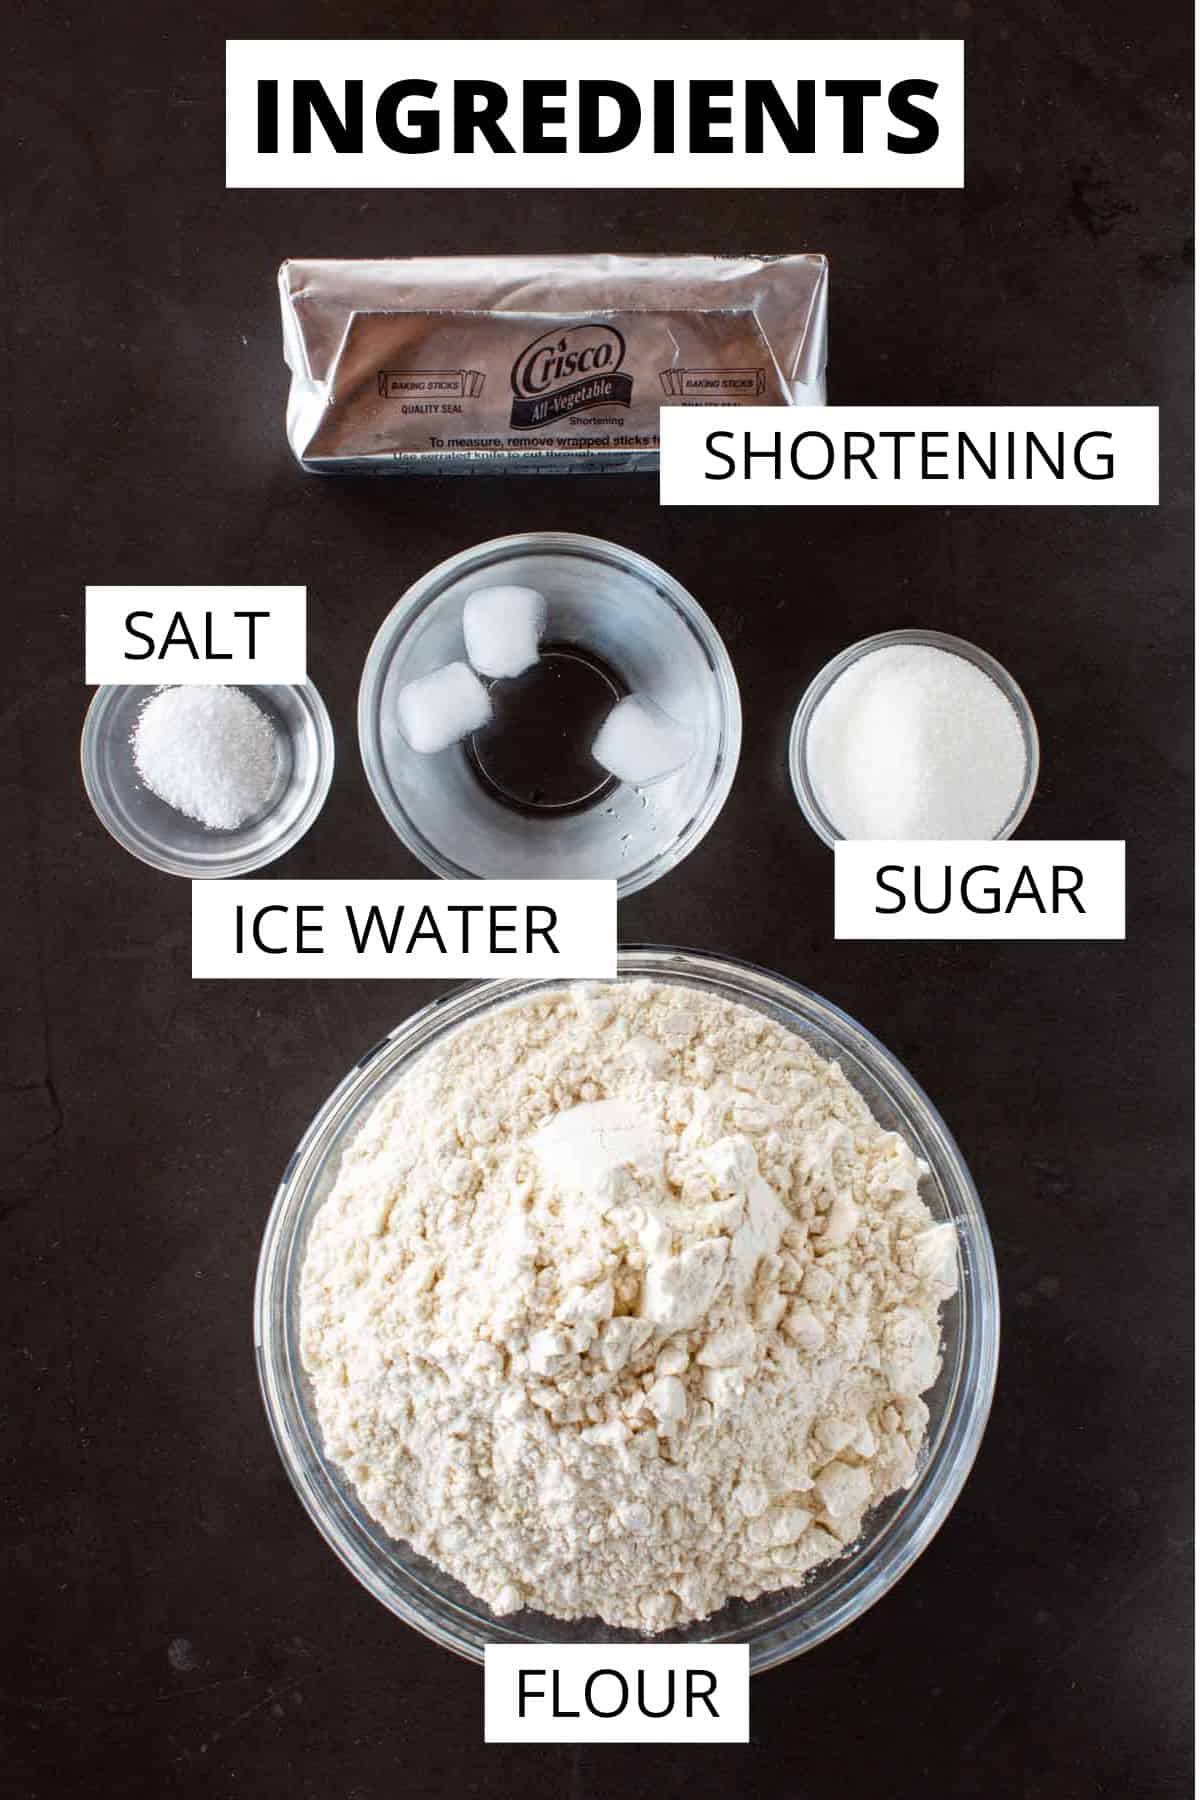
Vegetable Shortening - This is a vegetable oil that has been hydrogenated, which makes it solid at room temperature. Crisco is the most well-known brand of vegetable shortening, which is 100% pure fat, as opposed to butter which contains 20% water. No, it is not the healthiest product, but it's essential for this recipe. Shortening adds structure to the pie crust and makes it super flaky and tender. To substitute, try using an organic non-hydrogenated shortening, lard, tallow, or coconut oil.
Salt - Just a pinch of salt will add flavor to your pie crust and balance out the sweetness of the sugar. Shortening itself has no flavor, so the salt helps give it a little something.
Sugar - This adds a sweet, buttery taste but should be omitted for a savory pie crust.
*Find the full ingredient list in the recipe card below!
Helpful Equipment
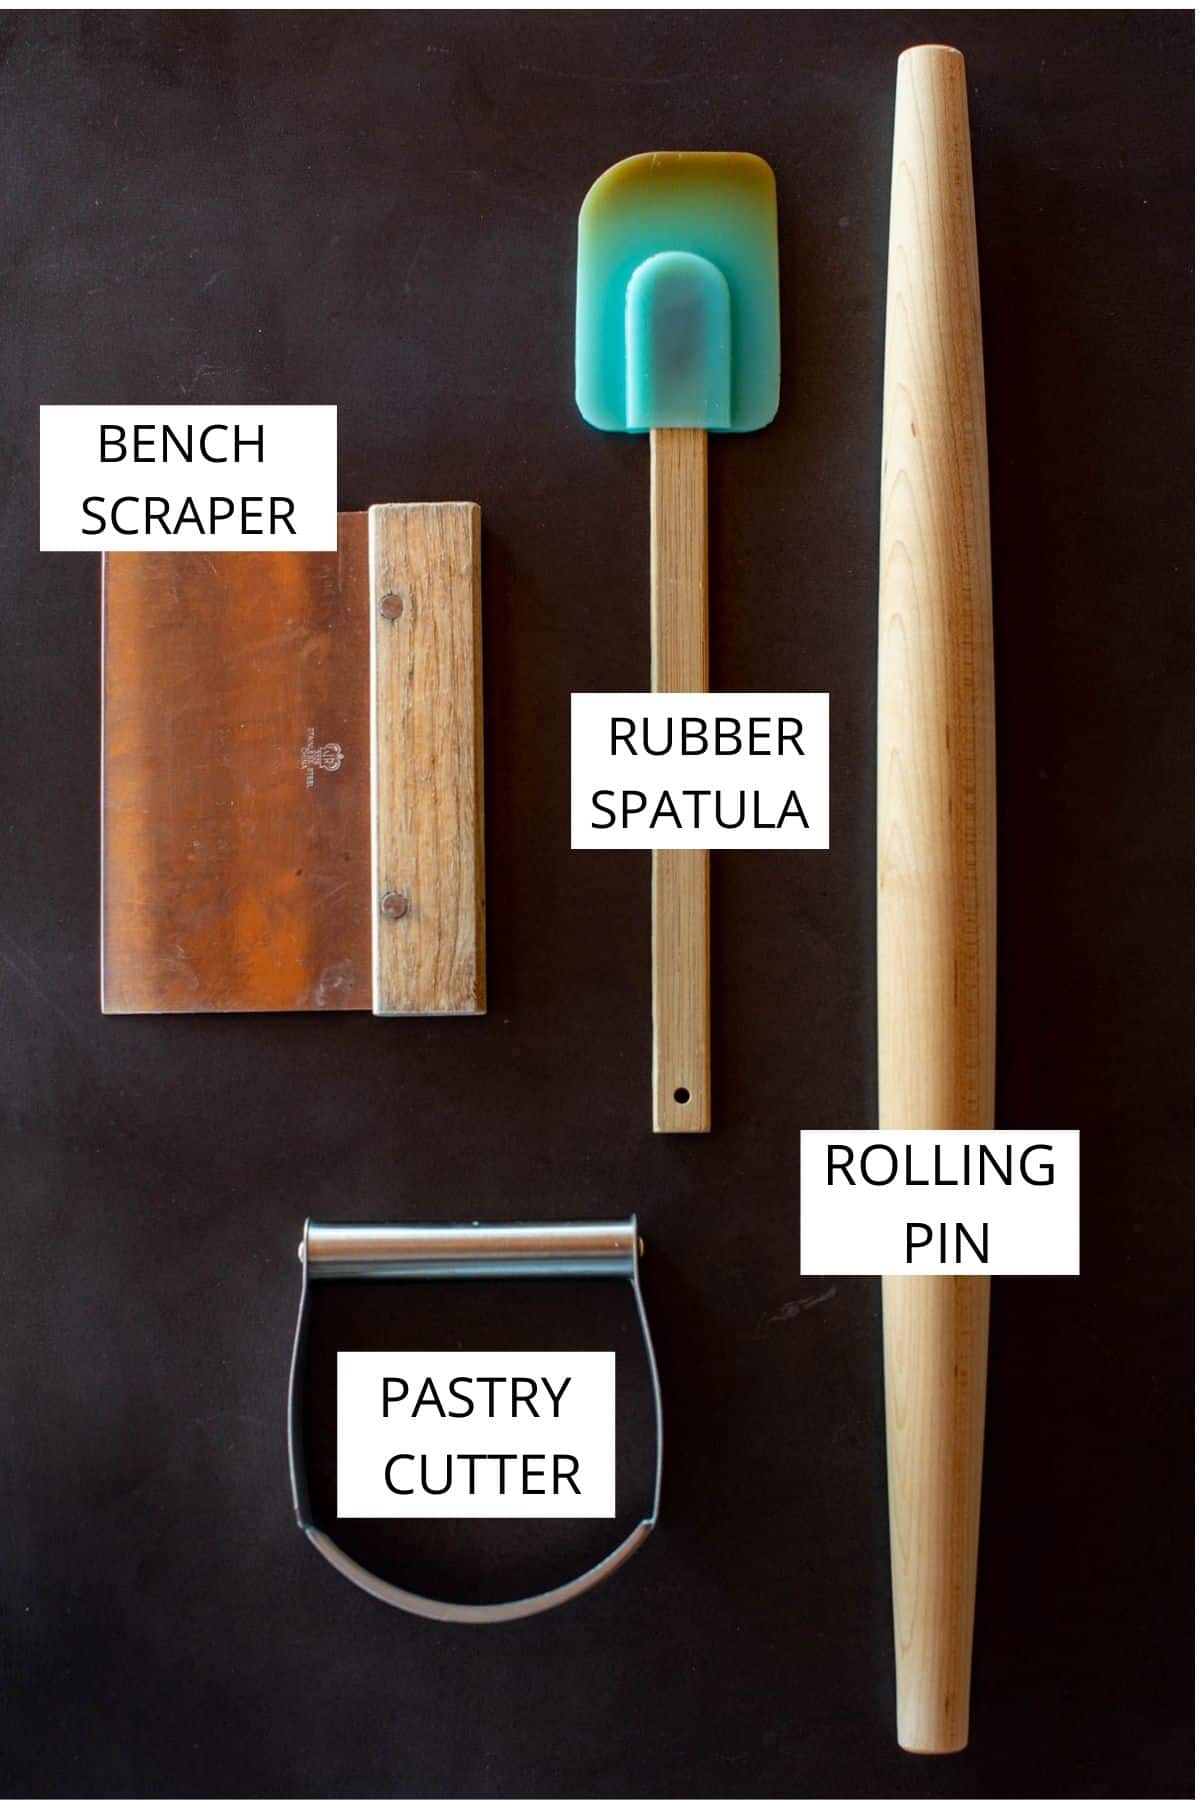
Pastry cutter - You'll need a pastry cutter to help you evenly incorporate all of the ingredients to make the pie dough. You can also use a fork or butter knife to cut the Crisco shortening into the flour.
Rubber spatula - A rubber spatula is great for scraping the sides of the bowl to make sure all of the ingredients are combined well.
Rolling pin - You'll need one of these to roll out your Crisco pie crust! I prefer my French rolling pin with no handles because it's lightweight and gives you more control when rolling out the dough on a cold surface. You can use any cylindrical object as a rolling pin (Grandma taught me to use a wine bottle in a pinch!), but a decent one will be a lot easier to work with.
Bench scraper - A bench scraper is an essential tool to help transfer the dough off of the counter and into the pie tin. I always have one within reach whenever I am baking one of my recipes.
Pie Dish - A 9-inch pie plate is the perfect size for a single-crust or double-crust pie. You can use ceramic, glass, or metal, but make sure it's deep enough to accommodate all of your filling.
Wax Paper - For rolling out the pie crust - it's so much easier!
How to make crisco pie dough
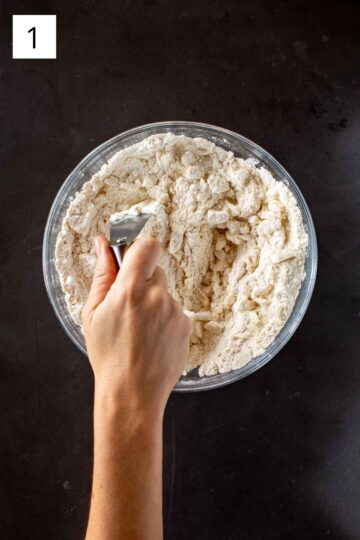
1. Combine the flour, salt, and sugar in a medium bowl. Add the cold shortening, then use a pastry cutter or fork to cut it into the flour until it becomes the size of large peas.
Tip: Make sure to leave out the sugar if you plan to use the crust to make a savory pie.
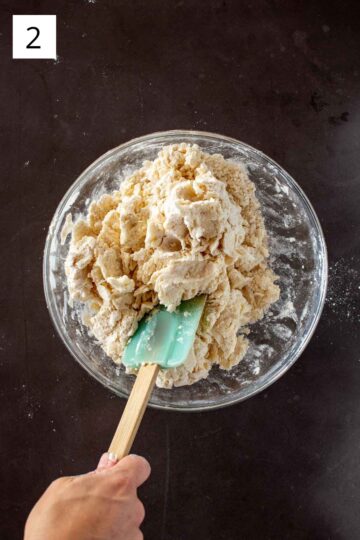
2. Add 6 tablespoons of water and mix gently with a rubber spatula until the dough just starts to form a shaggy mass. Add more water, one tablespoon at a time, as needed. Gently press the dough until it just barely comes together.
Note: The dough should not be sticky. Avoid over-mixing, or it will make it tough.
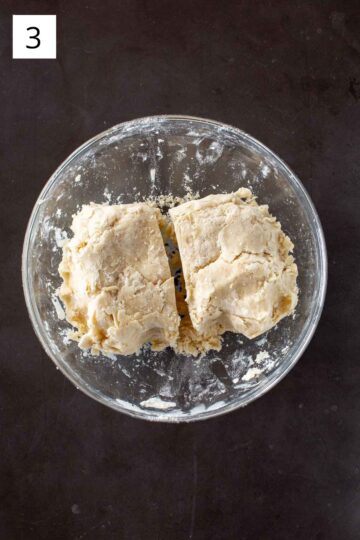
3. Once the dough is combined, split it down the middle into two even sections.
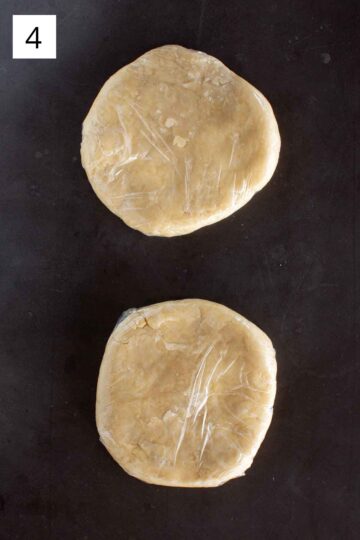
4. Then, gently shape them into discs and wrap them in plastic. Refrigerate for a minimum of 30 minutes or up to two days.
Note: For longer storage, make sure the dough discs are wrapped tightly and freeze for up to 6 months.
How to roll out crisco Pie crust
The method for rolling out this crust is a bit different than other pie crusts. The wax paper makes it super easy and efficient - don't skip it.
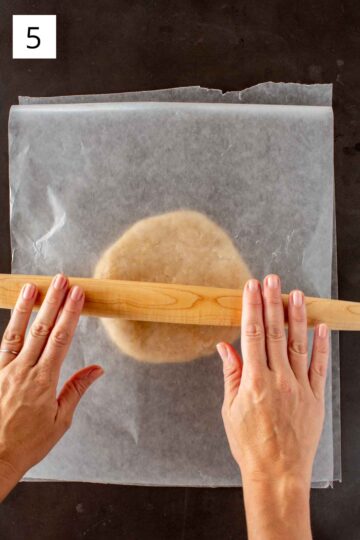
5. When you're ready to put your pie together, remove one disc at a time from the refrigerator, unwrap it, and place it on a piece of wax paper on top of a large work surface. Place another piece of wax paper over the top.
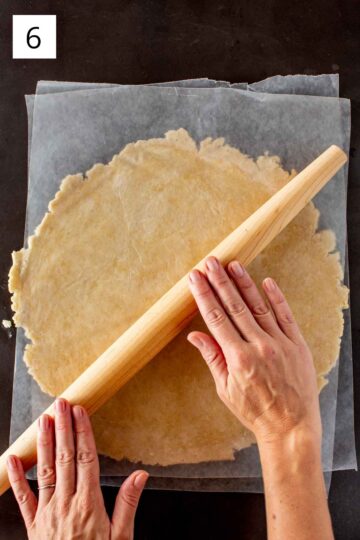
6. Begin to roll out the dough by starting at the bottom and rolling the pin away from your body. Roll the dough out to about 12 inches around or roughly 3 inches larger than the pie plate.
Tip: Rotate the dough 90 degrees after every 1-2 rolls to help keep it round.
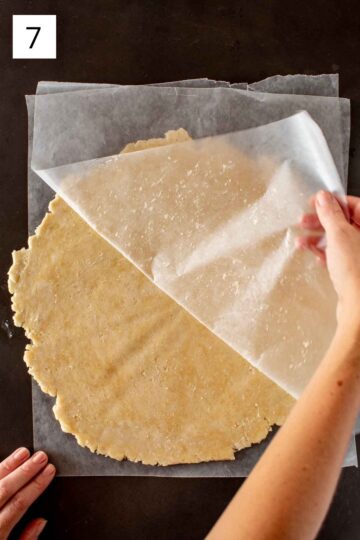
7. Gently peel back the top piece of the wax paper.
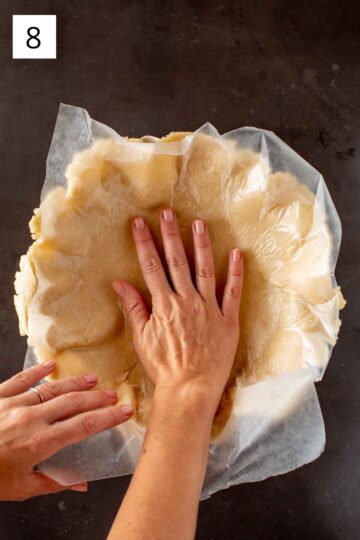
8. Then, place the palm of your hand beneath the bottom piece of wax paper and transfer it to the pie tin (or plate), wax paper side up.
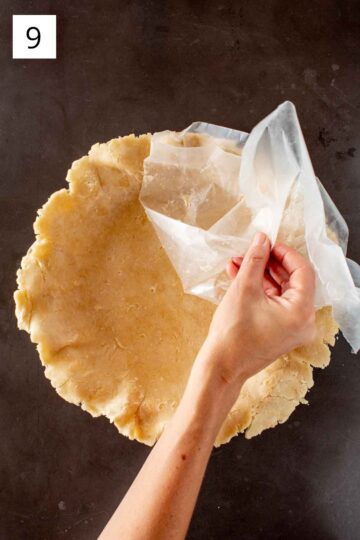
9. Carefully remove the remaining piece of wax paper and gently press the dough in to fit.
Note: For a single-crust pie, tuck the loose pieces under, then use your fingers or a fork to crimp the edges and proceed with your recipe. For a double-crust pie, remove the second piece of dough from the refrigerator and roll it out the same way as the first.
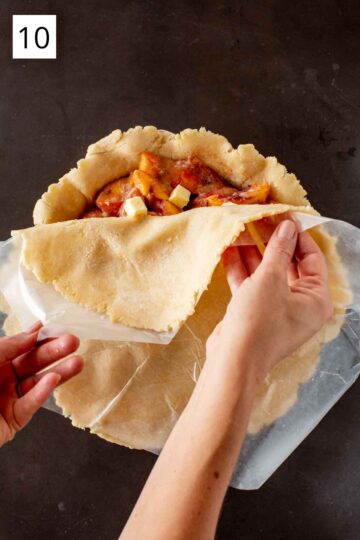
10. Add your favorite filling to the bottom crust and then transfer the rolled-out dough over the top, just like you did the bottom.
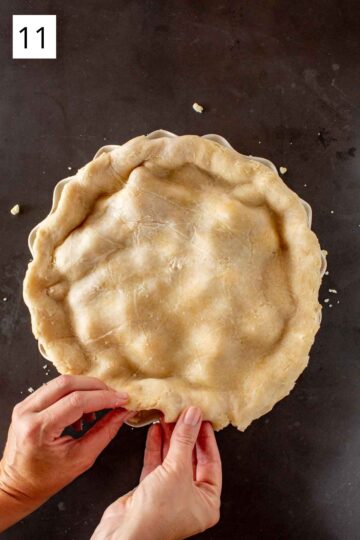
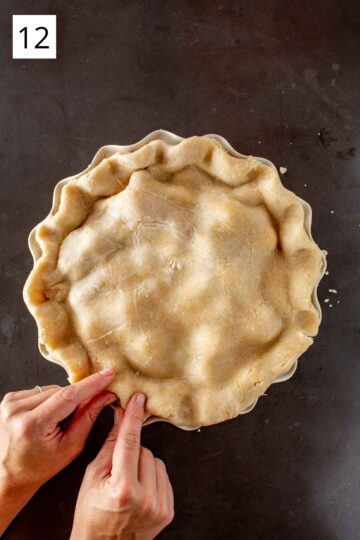
11. Use your fingers to pinch the top and bottom crusts together to seal in the filling.
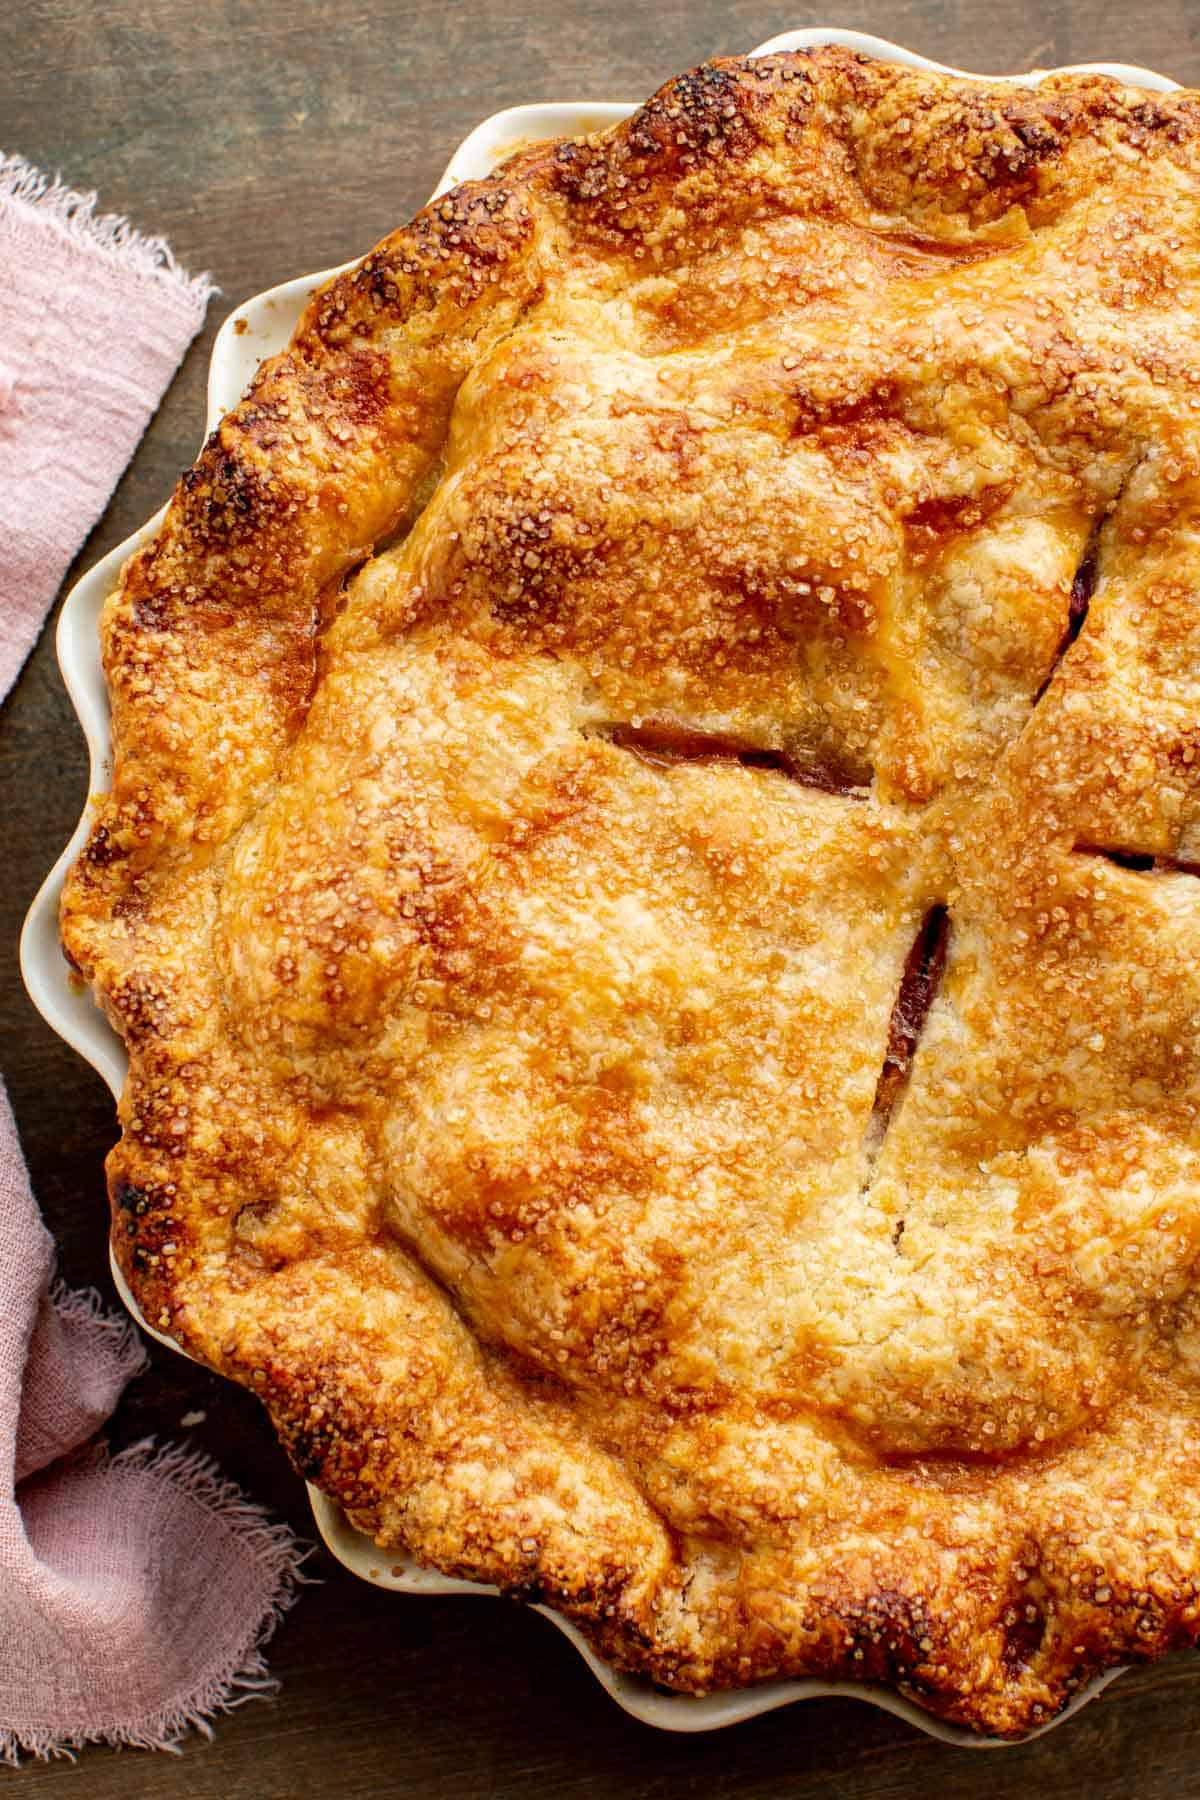
12. Tuck and roll the overhang under, then use your fingers or a fork to crimp the pie crust edges. Cut a few slits to vent the top, then brush all over with the egg wash.
Bake as directed below! Or, wrap tightly in plastic wrap and freeze for up to 3 months.
How to Bake
Adjust the instructions according to the recipe you're making.
How to Blind Bake For a Single Crust Pie
- Transfer the rolled out pie dough to a pie plate and crimp the edges with your fingers or a fork, then in the freezer for a minimum of 30 minutes before baking. This prevents shrinkage!
- Preheat the oven to 375° F.
- Line the frozen crust with a layer of parchment paper or foil, then fill with either dried beans or pie weights, making sure they are evenly distributed.
- Bake for 20 minutes, then remove the parchment and weights and let cool. It's now partially baked and ready to fill and continue baking.
- For a fully baked crust, prick the bottom all over with a fork, then bake for another 20 minutes or until golden brown all over.
For a Double Crust Pie
- Preheat the oven to 425° F and make move the oven rack to the bottom third of the oven with enough space to fit the pie.
- Brush the pie all over with egg wash, then place on a parchment lined baking sheet to catch any drips. Make sure there are a few vents in the top of the pie to allow steam to escape.
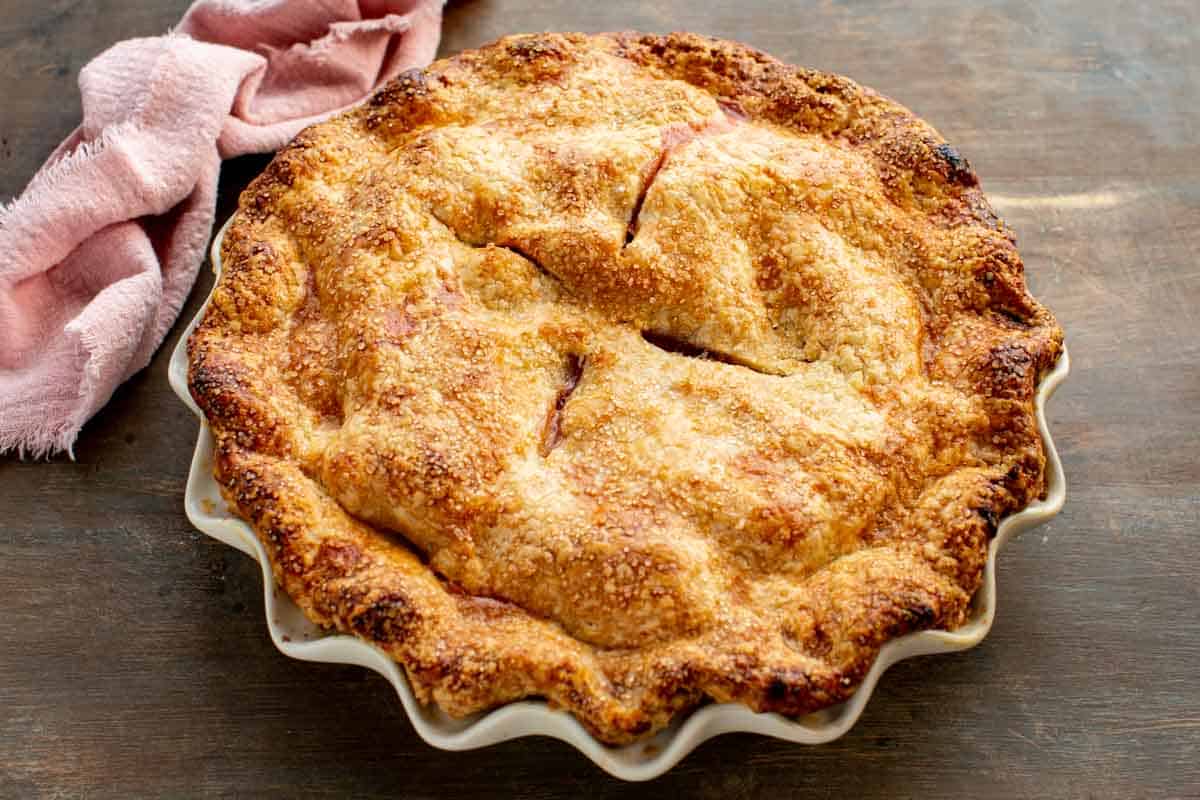
- Bake for 20 minutes, then lower to 350 and bake for an additional 45 minutes to an hour. it should be golden brown all over with the filling bubbling up out of the vents.
Tips for Success
- Make sure to keep all of your ingredients cold when mixing. If they start to come to room temperature, briefly place them in the freezer or refrigerator until cooled.
- A food processor works really well for making the dough super fast. Just be sure to use quick pulses and be really careful not to overwork it, which could result in a tough crust.
- To keep the dough cold, I like to run my hands under cold water and/or hold onto some ice cubes before mixing or shaping it so the warmth of my hands doesn't affect it.
- A shortening-based dough is easier to roll out between two pieces of wax paper (not parchment paper), unlike doughs made with butter, which is how my grandma does it!
- Make the top pie crust into a lattice top, or use cookie cutters to create some fun shapes before baking.
Serving Suggestions
You're now ready to fill your handmade Crisco pie crust! The beauty of a homemade pie crust is that it can be filled with virtually anything you fancy, sweet or savory.
Here are a few suggestions:
Sweet fillings:
- Classic Apple: Fill your pie crust with a mix of tart and sweet apples, sugar, a dash of cinnamon and nutmeg, and a pat of butter for a traditional and delicious dessert.
- Blueberry: Combine fresh blueberries, sugar, flour, and a few other ingredients for an all-American favorite.
- Old-Fashioned Custard: Mix together a combination of milk, eggs, sugar, and vanilla for a creamy custard filling. Bake until the center is just set, and enjoy!
Top your sweet pies with homemade ice cream, like this creamy butter pecan ice cream recipe. Or, try this refreshing lemon ice cream for a light and fruity dessert.
Savory fillings:
- Turkey Pot Pies: Create a savory filling with leftover Thanksgiving turkey, carrots, celery, and onions. Top with the homemade Crisco pie crust to make an all-in-one meal!
- Chicken Pot Pie:Fill your pie with a mix of cooked chicken, green peas, celery, carrots, and fresh herbs in a creamy sauce for a hearty dinner.
Remember, the choice of filling is endless, from sweet summer peaches to hearty beef stew. So go ahead, get creative, and make a pie that's perfect for you!
FAQ about this Crisco pie crust recipe
The short answer is yes. I usually opt for unbleached all-purpose flour, as it's the most accessible and easy to work with. You can also use pastry flour too. Just be sure to use a low-protein flour (not bread flour) to help achieve that tender, flaky crust!
No, you don’t need to sift the flour for this Crisco pie crust recipe. Simply scoop it into your measuring cup and level it off with a knife or spoon.
Yes, you can use a butter-flavored Crisco for the pie crust. It will add a bit more flavor to your crust and make it even more delicious!
If your Crisco pie crust is falling apart, it might be due to a few reasons.
One common issue may be that the dough was too dry when it was mixed. If there isn't enough moisture, the pie crust will crumble and won't hold together well.
Try spraying it down with a bit of water and then wrap it in plastic. Let it sit for an hour so that the pie dough absorbs the water.
Another problem could be that the dough was overworked. If you mix the dough too much, the gluten develops rapidly, which can lead to a tough and crumbly crust. Remember, when it comes to pie crusts, less is more.
Finally, one of the biggest common problems I have come across is that the dough isn't chilled enough before rolling it out. Always refrigerate your dough for at least 30 minutes before using it.
Egg wash helps to create a golden brown finish on your pie crust, and it also serves as a barrier to help keep the crust from getting soggy.
A single-crust pie, such as a pumpkin pie or a custard pie, only requires a bottom crust.
On the other hand, a double-crust pie is a perfect choice when making fruit pies like apple pie or cherry. This type of pie features both a bottom and a top crust, offering more flaky, buttery goodness with each bite.
Remember, if you're opting for a double-crust pie, don't forget to cut slits (small openings) in the top crust to allow the steam to be released during the baking process. This will prevent your pie from becoming soggy and ensure it cooks evenly.
To make a gluten-free version of this pie crust, you can substitute an equal amount of gluten-free flour blend (like Cup4Cup) for the regular all-purpose flour.
If needed, you can also add a bit of xanthan gum to help the dough come together. Just double-check and make sure your gluten-free flour blend doesn't already have it included!
The key to making a flaky Crisco pie crust is to make sure that all the ingredients are cold and to not overwork the dough. I know you might be tempted to u0022mix the dough until it's just right,u0022 but by doing that, the pie dough is drying out and won't hold together.
It will taste better if you leave it be, even if it doesn't look perfect. Embrace the rustic!
Did you LOVE this recipe? Please leave a star ⭐️ rating and comment and tag your creations @ColeyCooks on Instagram!
Want to Save This Recipe?
Enter your email & I'll send it to your inbox.
By submitting this form, you consent to receive emails from Coley Cooks.
Grandma's Crisco Pie Crust
Ingredients
- 3 cups all-purpose flour
- 1 tsp. salt
- 2 tablespoons sugar omit for a savory pie
- 1 cup cold vegetable shortening
- ½ cup plus 2 tablespoons ice water adjust amount as needed
Instructions
- Combine the flour, salt and sugar (omit sugar for savory pies) in a medium bowl.
- Add the cold shortening, then use a pastry cutter or fork to cut it into the flour until it becomes the size of large peas.
- Add the water and mix gently with a rubber spatula until the dough just starts to form a shaggy mass. Add more water one teaspoon at a time only if needed.
- Gently press the dough until it just barely comes together. The dough should not be sticky. Avoid over-mixing or will make it tough.
- Split the dough into two sections, then gently shape them into discs and wrap in plastic. Refrigerate for a minimum of 30 minutes or up to two days. For longer storage, wrap tightly and freeze for up to 6 months.
How to Roll Out the Dough
- When you're ready to assemble your pie, remove one disc at a time from the refrigerator, unwrap and place on a piece of wax paper on top of a large work surface.
- Place another piece of wax paper on top and begin to roll out the dough by starting at the bottom and rolling the pin away from your body.
- Rotate the dough 90 degrees after every 1-2 rolls to help help keep it round. Roll the dough out to about 12 inches around or roughly 3 inches larger than the pie plate.
- Remove the top piece of wax paper, then place the palm of your hand beneath the bottom piece of wax paper and transfer it to the pie plate wax paper side up.
- Carefully remove the remaining piece of wax paper and gently press the dough in to fit.
- For a single crust pie, tuck the loose pieces under, then use your fingers or a fork to crimp the edges and proceed with your recipe.
- For a double crust pie, remove the second piece of dough from the refrigerator and roll it out the same way as the first. Add your filling to the bottom crust, then transfer the rolled out dough on top just like you did the bottom.
- Use your fingers to pinch the top and bottom crusts together to seal in the filling. Tuck and roll the overhang under, then use your fingers or a fork to crimp the edges.
- Cut a few slits to vent the top, then brush all over with the egg wash. Bake as directed or wrap tightly in plastic wrap and freeze for up to 3 months.
How to Blind Bake For a Single Crust Pie
- Transfer the rolled out pie dough to a pie plate and crimp the edges with your fingers or a fork, then in the freezer for a minimum of 30 minutes before baking. This prevents shrinkage!
- Preheat the oven to 375° F.
- Line the frozen crust with a layer of parchment paper or foil, then fill with either dried beans or pie weights, making sure they are evenly distributed.
- Bake for 20 minutes, then remove the parchment and weights and let cool. It's now partially baked and ready to fill and continue baking.
- For a fully baked crust, prick the bottom all over with a fork, then bake for another 20 minutes or until golden brown all over.
How to Bake For a Double Crust Pie
- Preheat the oven to 425° F and make move the oven rack to the bottom third of the oven with enough space to fit the pie.
- Brush the pie all over with egg wash, then place on a parchment lined baking sheet to catch any drips. Make sure there are a few vents in the top of the pie to allow steam to escape.
- Bake for 20 minutes, then lower to 350 and bake for an additional 45 minutes to an hour. it should be golden brown all over with the filling bubbling up out of the vents.
Notes
- Can be made and frozen up to 3 months in advance!
- If you want to double or triple this recipe, make each batch separately for best results.
- Keep all ingredients cold at all times. If the dough starts getting warm at any moment, pop the bowl in the freezer or refrigerator (or outside) for a few minutes before continuing.
- I like to run my hands under cold water and/or hold on to some ice cubes prior to using my hands to mix or shape the dough. This helps keep it cold at all times.
- The amount of water needed to form the pie dough will always vary based on humidity. Always start with less and add more a little bit at a time until it forms a dough. You can always add more but you can't take it out. The dough should feel moistened without a bunch of excess flour, but not sticky and wet.
- Don't over mix the dough or it could get tough - once it just barely comes together wrap and refrigerate.





Love this pie crust. No mess. And it tastes great.
So glad you love the recipe! Thanks for leaving a review!
Love this recipe! Delicious! Thank you for sharing!
So glad you love the recipe! Thanks for leaving a review!
Yummy and fast and easy
So glad the recipe worked well for you!
Best recipe ever handed down through my family. For the shortening, I use the Butter Crisco one. And I don’t refrigerate my dough.
I like the butter crisco too! Thanks for leaving a review!
Question, I plan on using this recipe for making a tart…will it work well for that too?
It wouldn't be my first pick for a tart to be honest, but it should still work! I prefer a sweeter shortbread style crust for tarts like the one used here - https://coleycooks.com/cranberry-frangipane-tart/
Love grandma's crust. The Crisco just hits different. They should sponsor this post.
Crisco really does just hit different - well said.
Coley ~
Thanks for pie day~
Uncle Mark
Love that we keep the tradition going every year!
This crust makes the best apple pie ever
Thanks UIL!
This
I have never been able to pull of making pie crust from scratch in my life but this time I DID! I remember my grandma always making her pie crusts with crisco and wanted to try. Used it for banana cream pie and have another dough in the freezer. I appreciated the detailed pics and instructions - super helpful.
So glad the recipe worked well for you! Thanks for taking the time to leave a detailed review!
What tempature and how long to bake this please
the recipe has been updated with baking instructions
Can't find the oven temperature or minutes to bake.
the recipe has been updated with baking instructions!
Great instructions except there's no baking time or temp! If you're making it from scratch...there's no "bake as directed".
The recipe has been updated with baking instructions. Thanks for your feedback!