Crispy Chicken Milanese with Tomato Arugula Salad
This recipe for Chicken Milanese is truly the BEST you will ever have. Crispy breaded Italian chicken get topped with a lemony arugula tomato salad and shaved Parmesan cheese. It's a simple and delicious Italian dinner that will have you coming back for seconds (and thirds).
This post may contain affiliate links.
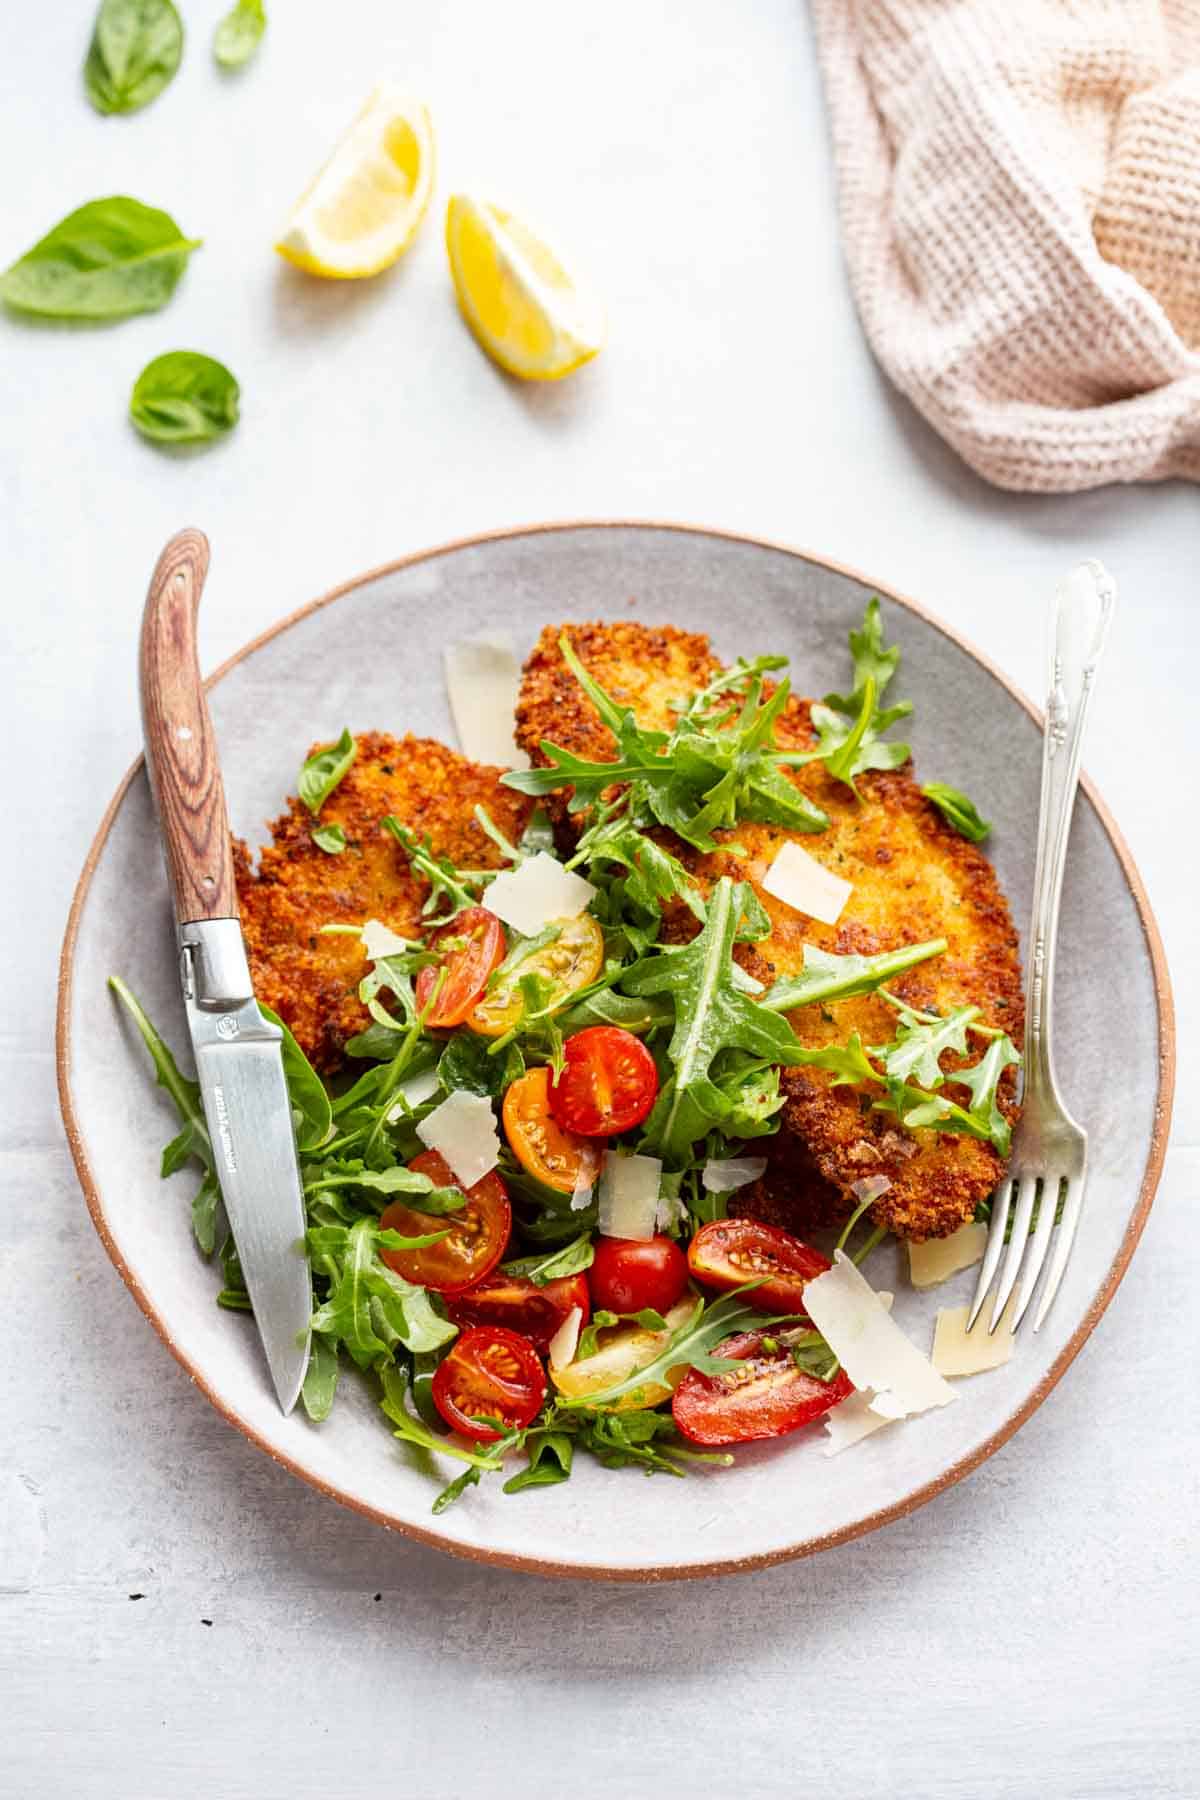
This Chicken Milanese is my favorite recipe ever. Ultra crispy, breaded and fried Italian chicken cutlets are complimented with a bright, lemony tomato arugula salad for a perfect mix of textures and flavors that's so good I could eat it every single day.
This classic Italian recipe is a simple dish that's similar to chicken schnitzel, but with way more flavor. It starts with my top-rated Italian chicken cutlets, but goes even further by pairing them with citrusy lemon, sweet tomatoes, peppery arugula and buttery parmesan cheese to balance out the richness of the crispy cutlets.
I make chicken Milanese all year long, but it's the best in late summer when tomatoes and basil are at their peak.
Why this recipe works
- The crispy cutlets act like giant protein-packed croutons for the fresh arugula salad.
- Made with homemade seasoned breadcrumbs for extra crispy chicken cutlets.
- Pounding out the chicken ensures even, thorough cooking with no oven required.
- Seasoning the meat prior to breading makes extra flavorful, juicy chicken breasts.
- Adding grated cheese to the egg mixture is a GAME CHANGER!
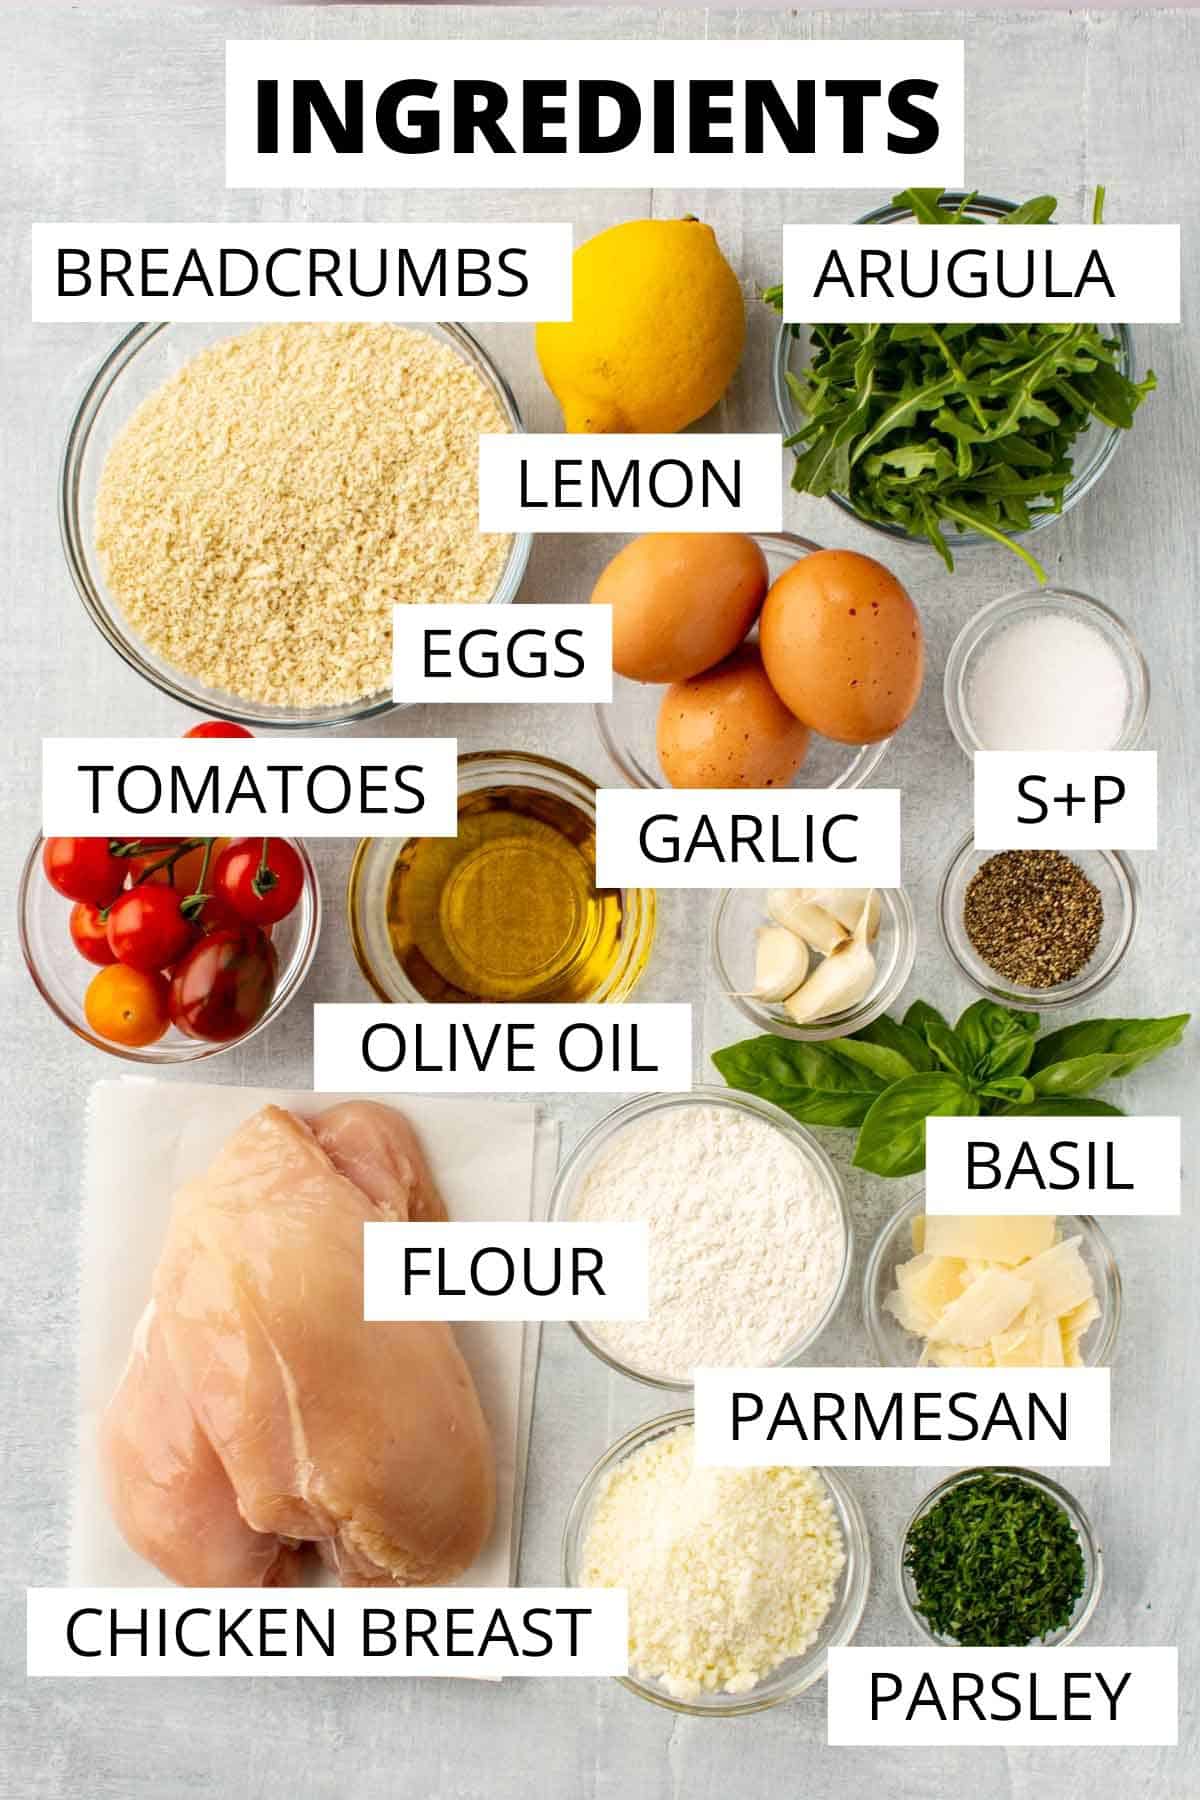
Ingredient Notes
- Boneless, Skinless Chicken Breasts - You can buy thinly sliced chicken breasts at most grocery stores, or save money and buy whole chicken breasts and use a sharp knife to slice them yourself. You can get 2 slices from small pieces of chicken or 3 from larger breasts.
- Breadcrumbs - You can use either homemade breadcrumbs or Panko breadcrumbs, which are lighter than traditional breadcrumbs and produce a really crispy crust. I prefer to season my own for the best flavor and texture, but if you're in a pinch, store-bought Italian seasoned breadcrumbs will work.
- Tomatoes - The better quality tomatoes you use, the better the dish will taste - try to make it when they're in season. You can use any type of tomato, and the more different varieties, the better. Sun gold tomatoes are the sweetest - use those if you can find them!
- Extra Virgin Olive Oil - I prefer frying my chicken in extra virgin olive oil because I think it has better flavor, but you can use a neutral oil like vegetable oil or avocado oil if you prefer. For the salad, only use the best extra virgin olive oil you can find.
- Parmesan Cheese - The only two cheeses I recommend here are Parmigiano Reggiano and Grana Padano, two high quality Italian cheeses. You'll need some grated and some shaved, so buy a big chunk and grate / shave it fresh.
Helpful Equipment
- Meat Mallet - Pounding out the chicken ensures it will fry up evenly without having to go into the oven to finish. A meat pounder works best, but you can use the bottom of a skillet or a flat bottomed coffee mug in a pinch.
- Wire Rack - You can drain the fried chicken cutlets on paper towels, but a wire rack will help them stay extra crispy.
Step by step instructions
For the Chicken
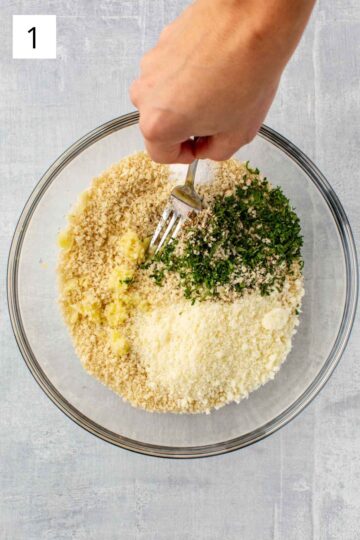
- Add the breadcrumbs to a medium, shallow dish along with the grated garlic, parsley, ½ cup grated parmesan, salt and pepper, then use a fork or your fingers to mix together. Make sure to really work the garlic into the breadcrumbs so it's evenly distributed.
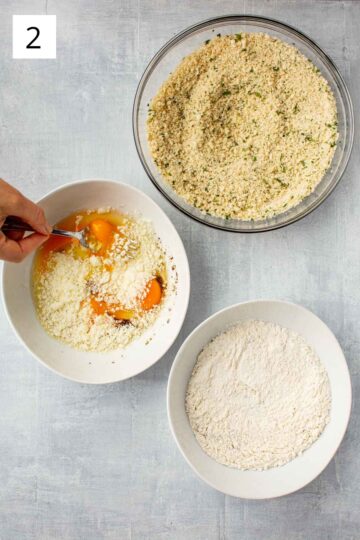
- Whisk 3 eggs with the remaining ½ cup parmesan, salt, black pepper and 1 tablespoon of water in a second shallow dish, until combined. Then add the flour into a third shallow dish, season with salt and pepper and mix to combine.
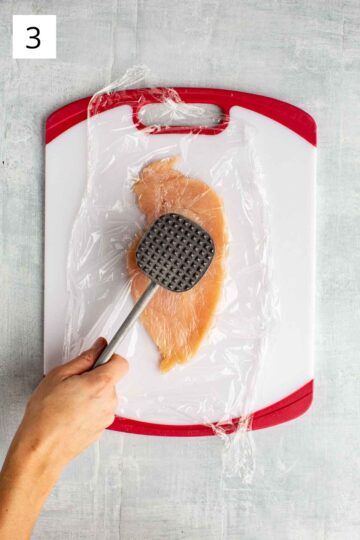
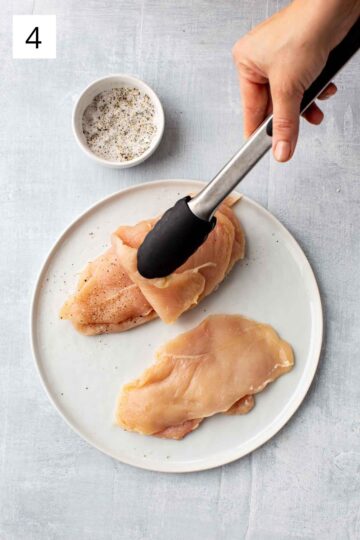
- Place a piece of thinly sliced chicken and on a cutting board and cover it with a sheet of plastic wrap or parchment paper. Use a meat mallet to pound it out to be about ½ inch thick. Repeat with the remaining chicken.
- Season each piece of chicken on both sides with salt and pepper. To season the chicken faster, liberally season one side, then stack another piece on top of it to allow some of the seasoning to transfer onto the other piece, then repeat.
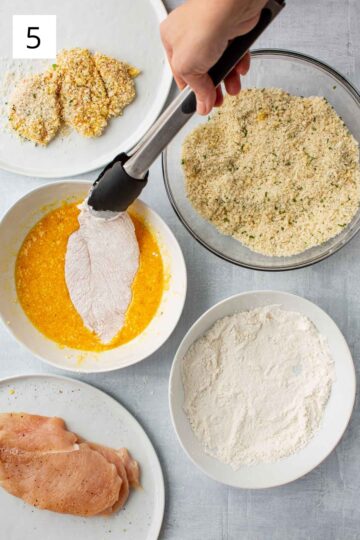
- Take a piece of chicken and coat it in the flour, then shake off the excess. Add the chicken to the beaten egg mixture, turn to coat, then let the excess drip off. Transfer the chicken to the bread crumb mixture, toss it around and press gently to help the breadcrumbs adhere, then place it on the reserved plate and repeat with the remaining chicken.
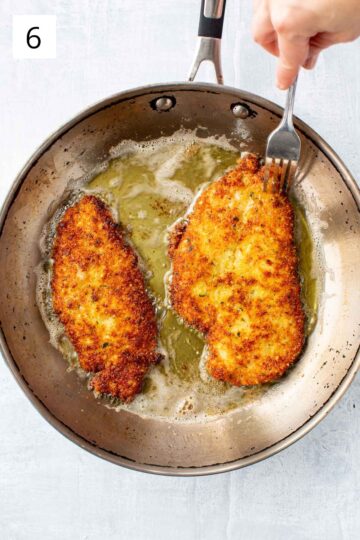
- Heat a generous amount of oil in a large skillet over medium-high heat. Carefully place 1 to 3 chicken breasts at a time in the hot oil, depending on how many your pan can hold without overcrowding. Cook until golden brown on both sides, then remove to a wire rack.
For the Salad and Serving
- Add the tomatoes, garlic clove, lemon juice, olive oil, salt and pepper to a bowl and mix to combine. Right before serving, remove the garlic clove if desired, then roughly tear the basil leaves and mix them in.
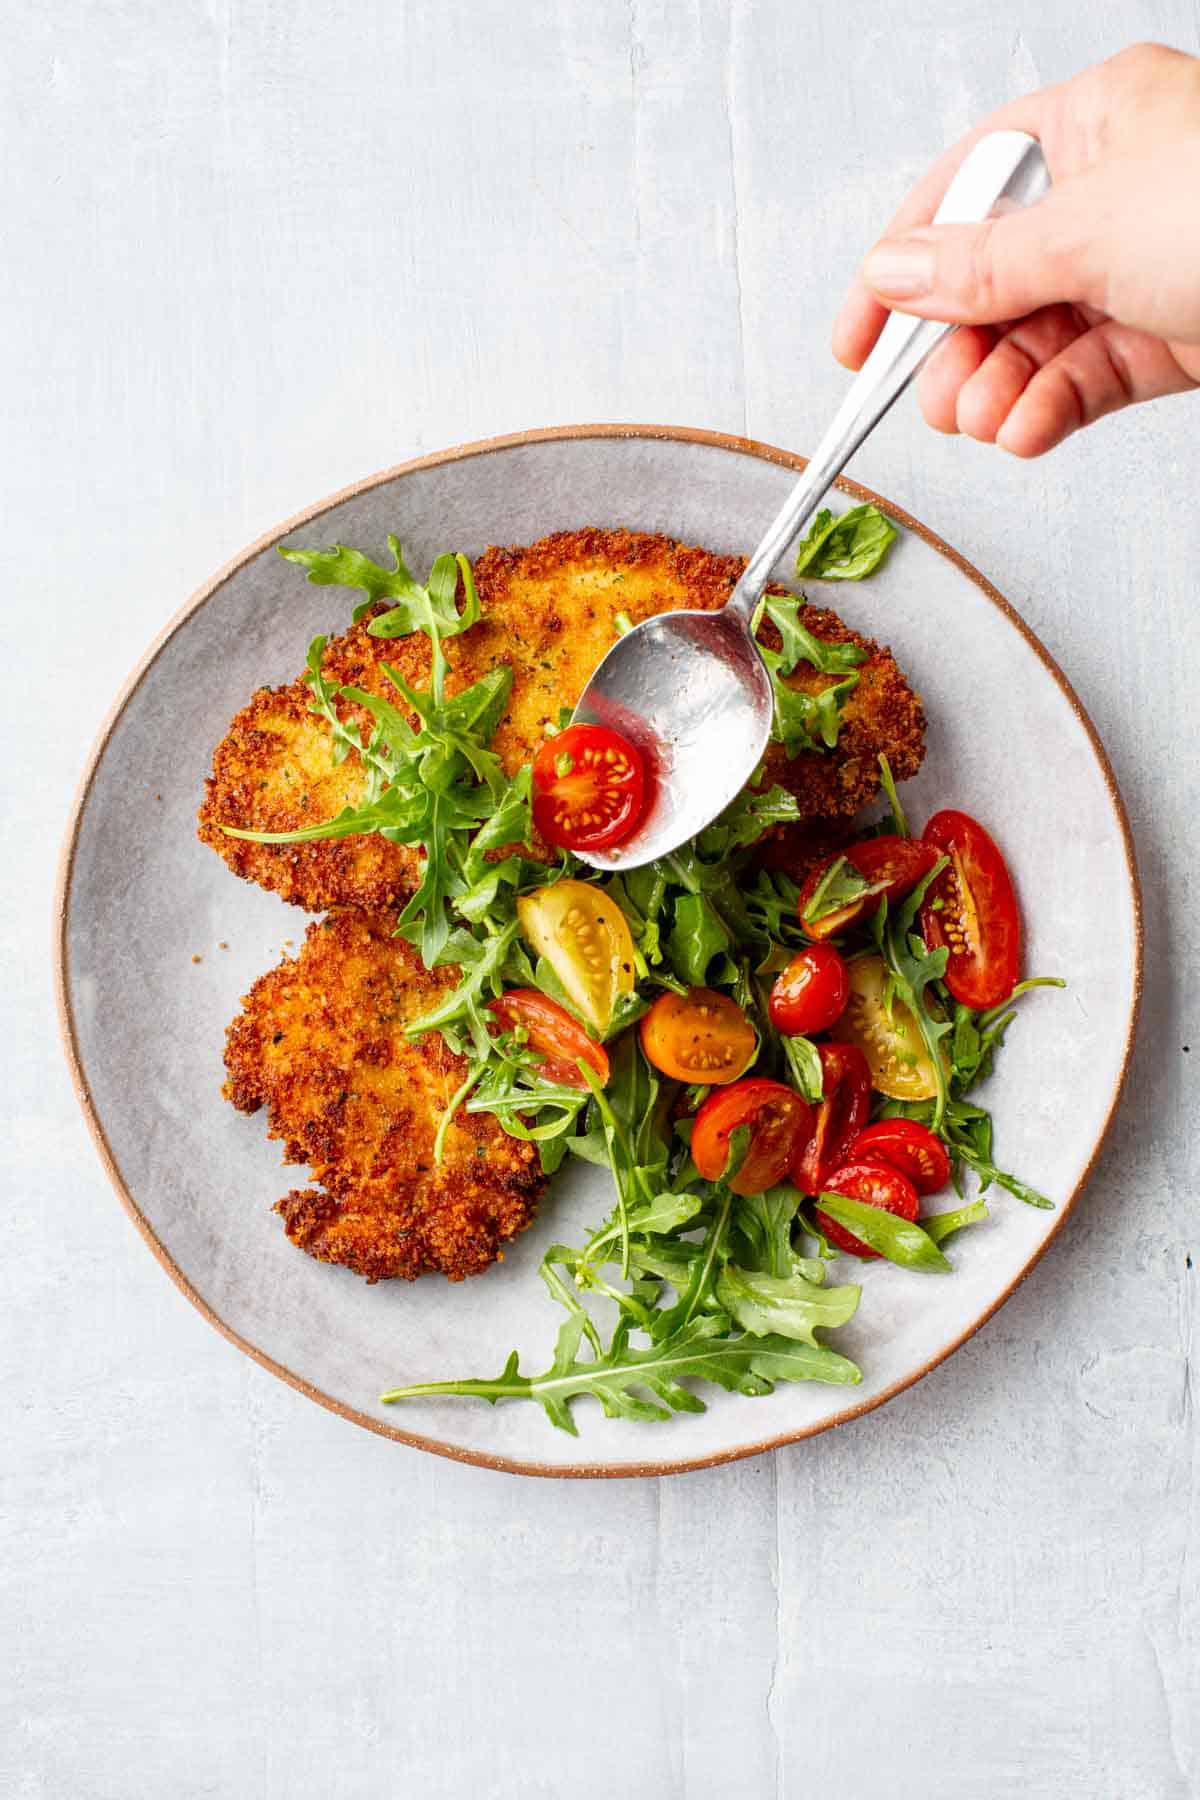
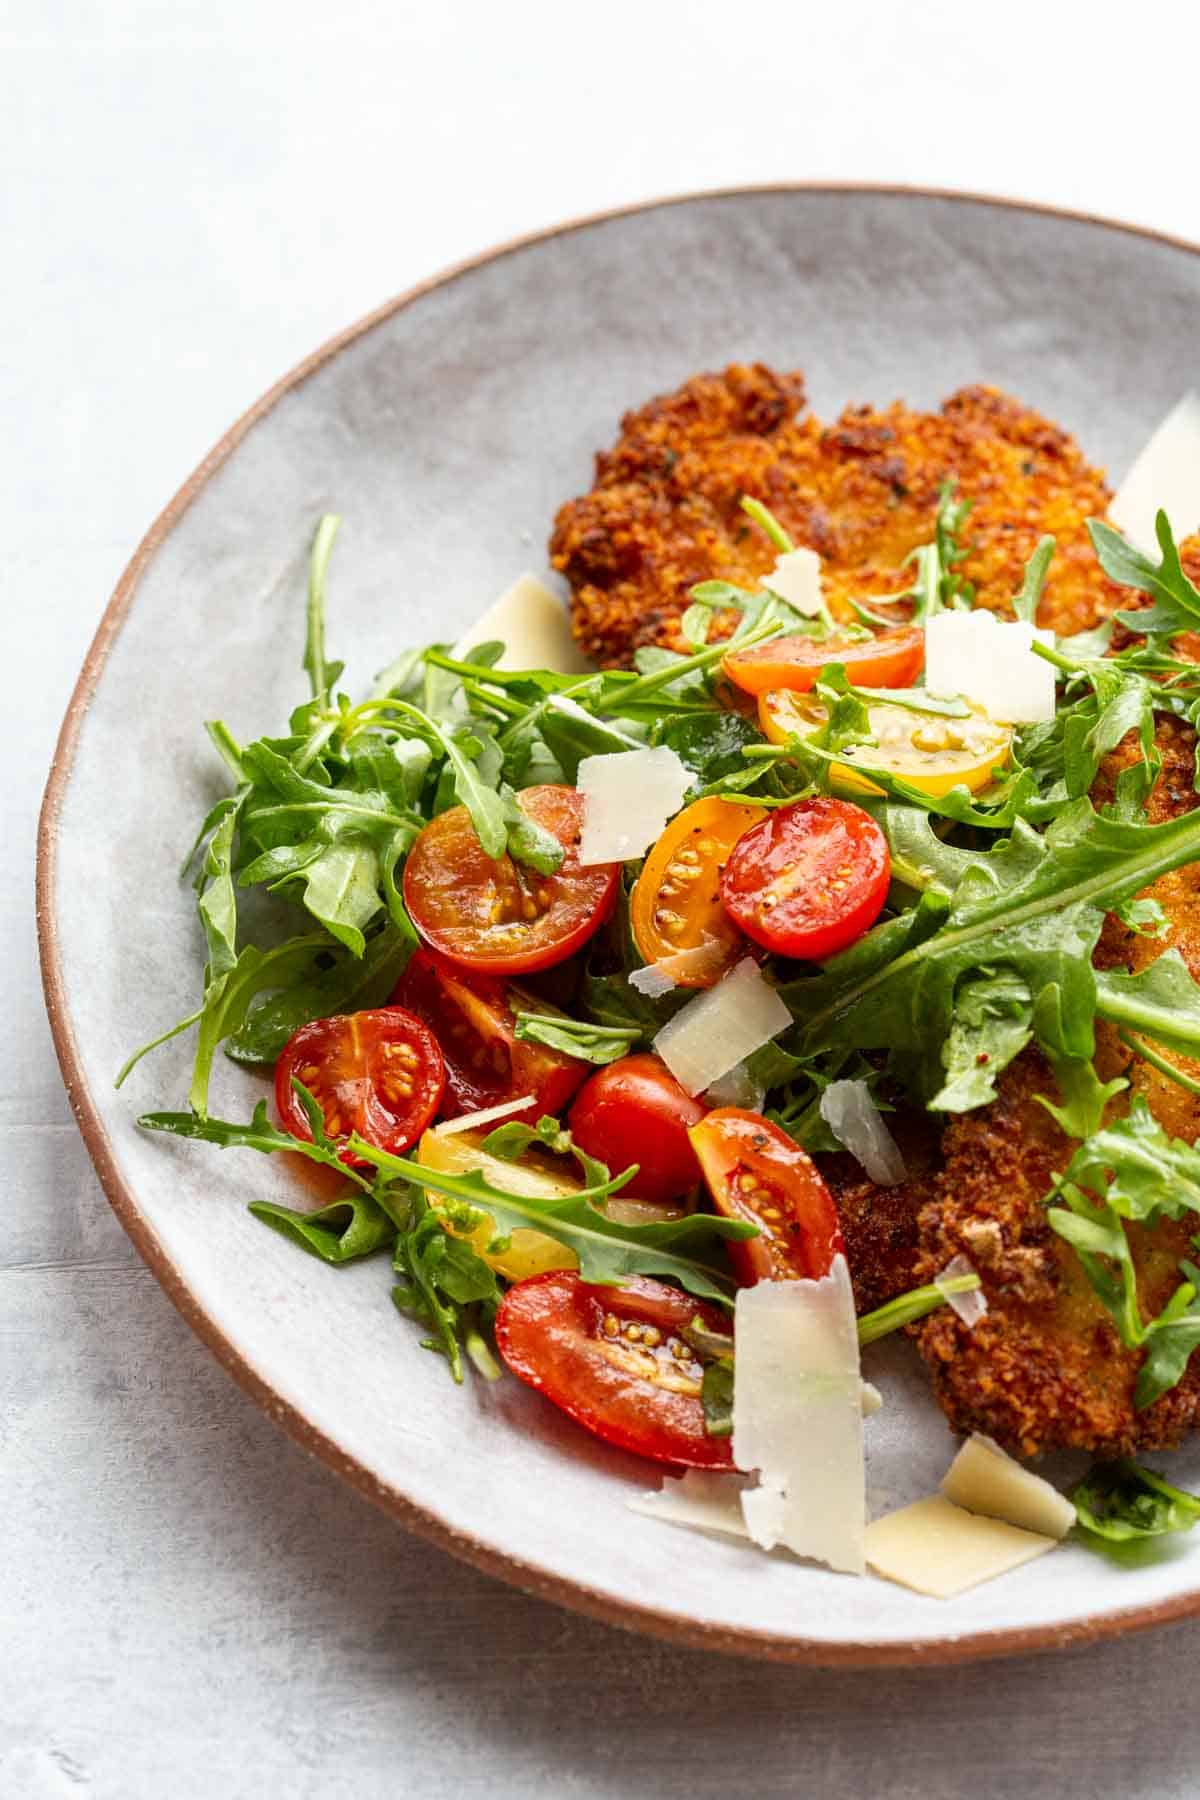
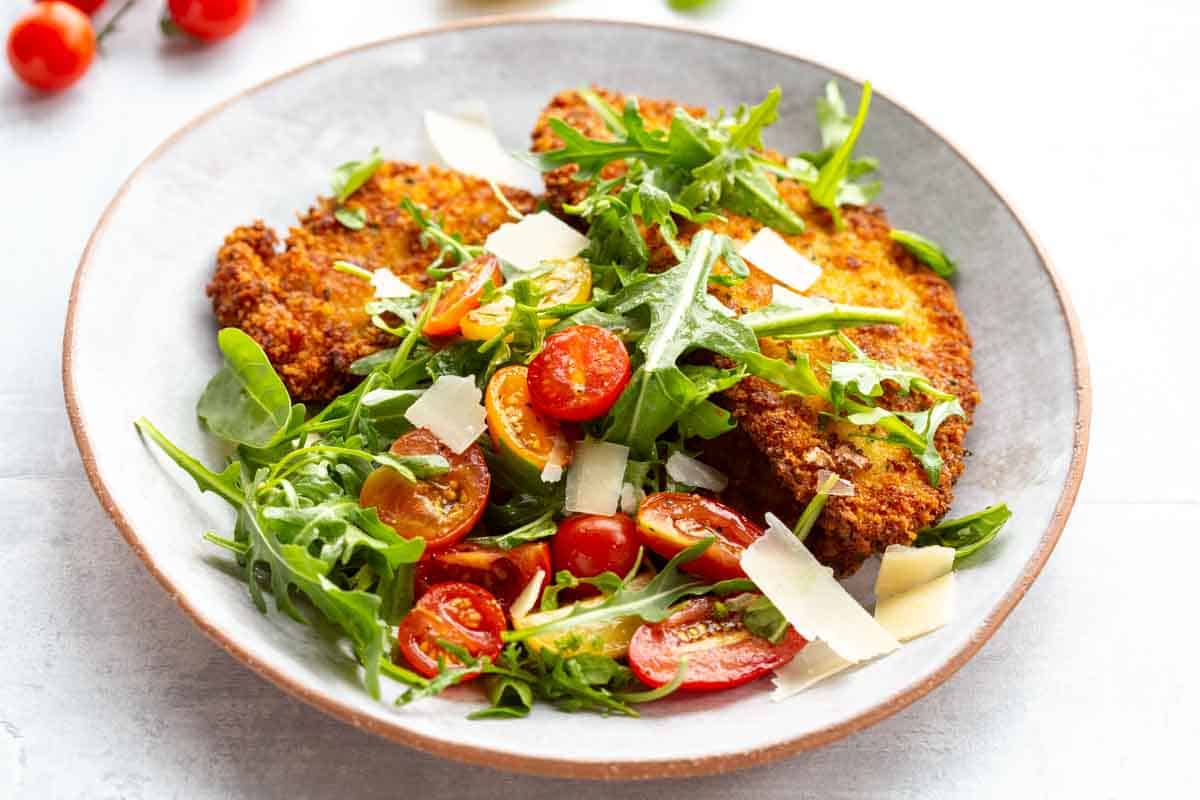
- Spoon a little bit of the tomato juices over the arugula and toss to combine. Place a chicken cutlet on a plate and add a mound of arugula over top. Spoon the tomatoes over top of each chicken breast, then sprinkle with shaved parmesan, drizzle with more olive oil and serve immediately with extra lemon wedges on the side.
Tips for success
- Use really good tomatoes, extra virgin olive oil and parmesan - it makes a difference!
- Let the tomatoes marinate an hour or two before serving to let the flavors meld, but don't add the basil right before.
- I love really thin cutlets, but if you're short on time you can skip the pounding.
- Arrange your breading station so that the raw chicken is on the left, then the flour next to it, then the egg, then the breadcrumbs, and then an empty plate to hold the breaded chicken.
- When breading the chicken, use tongs or a fork to keep your hands clean. If you prefer to use your hands try to keep one hand wet and one hand dry to avoid breading your fingers.
- Let the breaded chicken rest for about 30 minutes before you fry it to help the breading stick.
- For easier clean-up, place a wire rack over a baking sheet that's been lined with aluminum foil.
- Don't overcrowd the pan when frying. I try not to fry more than two at a time, but depending on your pan you may only be able to fit one.
- You can keep the fried chicken cutlets warm in a 250 degree oven for up to an hour before serving.
What to Serve with Chicken Milanese
This Chicken Milanese recipe is an Italian classic and a family favorite perfect for entertaining or a busy weeknight. It is a complete meal on its own, but you can skip the arugula salad and instead serve it with a simple green salad or add some mozzarella and tomato sauce to the breaded cutlets to make chicken parmesan! You can also serve some of these appetizers or sides to make the meal more substantial:
FAQ about Chicken Milanese
If your oil isn't hot enough when frying, the breadcrumbs will soak up the oil and get soggy and oily. Make sure the oil has plenty of time to heat up before placing the chicken cutlets in the pan. Drop a breadcrumb in the oil to test - if it bubbles up immediately, it's ready.
Yes. It's typical to fry foods in a neutral oil like vegetable or peanut oil because they have a high smoke point, but the flavor just can't compare to a chicken cutlet fried in olive oil. If you're not comfortable fryg in all olive oil, or want to save money, try a 50-50 mixture of olive oil and vegetable oil instead.
There are a few reasons why this could happen, but follow these tips and you can avoid it in the future. Pat the chicken dry before starting, then make sure you tap off all the excess flour so there is just a thin coating. Gently pat and press the breading into the chicken so it really adheres, then make sure you're letting it rest for at least 30 minutes before frying. When you fry, it helps to use a fork and spoon or spatula or move and flip the chicken rather than tongs, which can interfere with the breading and only flip it once.
Chicken Milanese is best when eaten fresh, but you can store the chicken in an airtight container for up to 3 days in the refrigerator. For best results, reheat leftover chicken in an air fryer or convection oven preheated to 450 degrees for 5-8 minutes. Or do what I do and eat them cold, straight out of the fridge. Store the tomatoes covered in the refrigerator for up to 3 days, but let them sit out at room temperature for about an hour before serving. Arugula will not hold up once dressed, so keep it on the side and toss with the dressing as needed.
Related Recipes
Did you LOVE this recipe? Please leave a star ⭐️ rating and comment to let other readers know! I absolutely love hearing from you and do my best to answer all questions and comments. I love seeing your creations so please tag me on Instagram @ColeyCooks!
Want to Save This Recipe?
Enter your email & I'll send it to your inbox.
By submitting this form, you consent to receive emails from Coley Cooks.
Chicken Milanese with Tomato Arugula Salad
Ingredients
For the Chicken
- 2 ½ cups homemade or panko breadcrumbs
- 2 cloves garlic finely minced
- 3 tablespoons finely minced fresh parsely
- ¼ teaspoon kosher salt plus more for seasoning
- ¼ teaspoon freshly ground pepper plus more for seasoning
- 1 cup finely grated parmesan cheese divided
- 3 large eggs
- 1 cup all purpose flour
- 2 lbs boneless skinless chicken breasts, thinly sliced
- olive oil or neutral oil for frying
For the Salad
- 2-3 cups assorted heirloom tomatoes cut into a large pieces, or cherry tomatoes cut in half
- 1 clove garlic smashed with the side of your knife
- 3 tablespoons freshly squeezed lemon juice
- kosher salt and freshly cracked black pepper to taste
- ½ cup extra virgin olive oil
- 8 ounces fresh arugula cleaned and dried
- ½ cup loosely packed fresh basil leaves
- 4 ounces Parmigiano Reggiano or Grana Padano shaved with a vegetable peeler
- lemon wedges for serving
Instructions
For the Chicken:
- Add the breadcrumbs to a medium, shallow bowl along with the grated garlic, parsley, ½ cup grated parmesan, salt and pepper, then use a fork or your fingers to mix together. Make sure to really work the garlic into the breadcrumbs so it's evenly distributed.
- Whisk 3 eggs with the remaining ½ cup parmesan, salt, pepper and 1 tablespoon of water in another medium, shallow bowl, until combined. Then add the flour into another shallow bowl, season with salt and pepper and mix to combine.
- Place a piece of thinly sliced chicken and on a cutting board and cover it with a sheet of plastic wrap. Use a meat mallet to pound it out to be about ½ inch thick. Repeat with the remaining chicken.
- Season each piece of chicken on both sides with salt and pepper. To season the chicken faster, liberally season one side, then stack another piece on top of it to allow some of the seasoning to transfer onto the other piece, then repeat.
- Arrange your breading station so that the raw chicken is on the left, then the flour next to it, then the egg, then the breadcrumbs, and then another plate or pan to hold the breaded chicken.
- Take a piece of chicken and coat it in the flour, then shake off the excess.
- Add the chicken to the egg mixture, turn to coat, then let the excess drip off.
- Transfer the chicken to the breadcrumbs, toss it around and press gently to help the breadcrumbs adhere, then place it on the reserved plate and repeat with the remaining chicken.
- Heat a generous amount of oil in a large sauté pan over medium-high heat. Carefully place 1 to 3 chicken breasts in the pan at a time, depending on how many your pan can hold without overcrowding.
- Cook until golden brown on both sides, then remove to a wire rack.
For the Salad and Serving:
- Add the tomatoes, garlic clove, lemon juice, olive oil, salt and pepper to a bowl and mix to combine. Right before serving, remove the garlic clove if desired, then roughly tear the basil leaves and mix them in.
- Spoon a little bit of the tomato juices over the arugula and toss to combine. Place a chicken cutlet on a plate and add a mound of arugula over top. Spoon the tomatoes over then sprinkle with shaved parmesan, drizzle with more olive oil and serve immediately with extra lemon on the side.
Notes
- Use really good tomatoes, olive oil and parmesan - it makes a difference!
- Let the tomatoes marinate an hour or two before serving to let the flavors meld, but don't add the basil right before.
- Arrange your breading station so that the raw chicken is on the left, then the flour next to it, then the egg, then the breadcrumbs, and then an empty plate to hold the breaded chicken.
- When breading the chicken, use tongs or a fork to keep your hands clean. If you prefer to use your hands try to keep one hand wet and one hand dry to avoid breading your fingers.
- Let the breaded chicken rest for about 30 minutes before you fry it to help the breading stick.
- For easier clean-up, place a wire rack over a sheet pan that's been lined with aluminum foil.
- Don't overcrowd the pan when frying. I try not to fry more than two at a time, but depending on your pan you may only be able to fit one.
- You can keep the fried chicken cutlets warm in a 250 degree oven for up to an hour before serving.


Amazing!
SO glad you enjoyed the recipe! 🙂
This recipe is amazing! Def will make again. I didnt bread my chicken but the flavors were so good
So glad you enjoyed the recipe! Thanks for leaving a review!
This was amazing I want to eat it everyday!! I used gluten free breadcrumbs with pecorino remano. Half garlic infused olive oil/half avocado oil (for chicken and salad). And added extra lemon juice to the dressing. Sooo yummy !
I'm so glad you loved the recipe! Thanks for leaving a review! I'll have to try it with the garlic flavored oil next time!
I make chicken Milanese and arugula salad all the time but THIS recipe is by far the best I have ever made! Mine is always so-so........so I keep looking for better recipes. Thank you for sharing!
I'm so happy you love the recipe! Thanks for leaving a review!
Wow! This was amazing! We've never made chicken Milanese before, but certainly will be making this again very soon. Someone else mentioned best ever, even in restaurant, and we agree. Turned out beautiful too. We used homemade breadcrumbs. We didn't let the tomatoes marinate very long and used mixed baby greens, and no basil, less oil - still perfect! Love lemon! We can't wait to make it again, and for company! I've subscribed to your emails and can't wait to try your pizza - we have BGE, and never make pizza! Thank you! So happy to have found your site!
I'm so glad you loved the recipe! It's one of my all time favs. Thanks for leaving such a lovely review!!
Big hit with the family! Will be making again.
So happy it was a hit! Thanks for taking the time to leave a review 🙂
I made this for my mom’s birthday dinner for a group of 13 people. I broke the prep work up over 2 days, and it was very manageable. All of the work was worth it- every guest LOVED the dish. The chicken and flavors came out perfectly. Will definitely make again.
I'm so glad you all loved the recipe! Thanks for leaving a review!
Wow!!! My boyfriend always disliked chicken Milanese and he absolutely LOVES this recipe! Thank you!
What an amazing compliment! I'm so happy - thanks for leaving a review! 🙂
This is the one! Probably the best! I split my chicken breasts and lightly salt them first. I don’t understand the need for pounding them ghin; they are already thin enough. Otherwise, I followed the recipe, and it was excellent. Juicy and flavorful.
I'm so glad you loved the recipe! Thanks for leaving a review!
Thank you so much for the detailed recipe! It was delicious… the breading remained on the chicken and it enabled me to put tomatoes and basil from my garden to great use! I will be sure to check out some more of your recipes. Thanks again!
So glad you enjoyed the recipe! Thanks for leaving a review 🙂
This chicken was amazing! Whole family loved it keep asking to make it again. Thx great recipe
So glad your family enjoyed my Chicken Milanese recipe!
Wow. I normally don't leave comments but this was a 10/10 recipe. The cheese in the breadcrumbs and egg really takes it over the top. I cannot wait to eat the leftovers. best milanese ive ever had even at restaurants
SO glad you loved the recipe! 🙂
Excellent! It was my turn to cook for our 12-member supper club. It was a hit! The half hour wait before frying is key, and keeping warm in the low oven allowed me to enjoy most of the cocktail hour. Our one vegetarian got eggplant using the same recipe, which worked beautifully. First course was marinated crab. Accompaniments were baked penne (marinara, marscapone, heavy cream) and steamed broccoli. I made a caper sauce for the cutlets and served the arugula salad as a separate course afterward, with cheese. Dessert was a clafoutis. But the star was the Milanese. Thank you.
Your dinner sounds incredible! I'm so glad my recipe worked well for you. Thanks for leaving a rating and review!
I made these. It was absolutely delicious. The only thing I did differently was to cut the lemon juice in half and added a bit of cider vinegar as it was a little bit too lemony for my taste. Thanks for the recipe!
SO glad you enjoyed the recipe!
OMG! This crispy chicken milanese look absolutely delicious, I definitely have to give them a try.
Hope you enjoy them!
This chicken milanese is one of our favorites! My kids request it for dinner all the time!
You have some lucky kids! So glad you all love it!
Love Chicken Milanese!! This recipe was so easy to make and so flavorful. A new favorite!
Love that it's a new favorite, it's one of mine too! 🙂
Love this Chicken Milanese recipe, looks delicious and flavorful. Will make it soon for dinner. Thanks for sharing 🙂
SO happy you love it!