Best Turkey Gravy Recipe
This easy homemade turkey gravy recipe will walk you through the few simple steps needed to make a silky smooth, savory gravy from turkey drippings. It's rich, velvety and will make the perfect accompaniment to your Thanksgiving feast.
A really good homemade gravy is essential on every Thanksgiving table. It goes on everything - the turkey, stuffing, mashed potatoes and veggies.
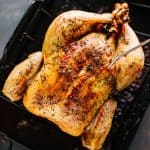
The best turkey gravy recipe will always start with pan drippings. Those browned bits stuck to the bottom of the pan are key to making the most delicious gravy because they have so much concentrated flavor.
I don't use the giblets in my classic turkey gravy recipe, but I do always add them, along with the turkey neck, to the turkey roasting pan to add flavor to the drippings, which also enhances the flavor of the gravy.
For more Thanksgiving recipes, try my homemade creamed corn, easy muffin popovers, or Italian ricotta pie.
Why You'll Love This Homemade Turkey Gravy Recipe
- Turkey drippings add deep, rich flavor.
- Simple ingredients - nothing fancy.
- Relies on rendered turkey fat instead of butter for even more delicious flavor.
- Cooking the roux gets rid of the raw flour flavor and adds depth.
- Optionally strained for a velvety smooth texture.
Ingredient Notes
Turkey Drippings - Turkey drippings are the flavorful juices that collect at the bottom of the roasting pan while cooking a turkey. They are intensely rich and concentrated with flavor. They add an incredible depth of flavor that you can't get any other way.
Rendered Turkey Fat - This is from the reserved turkey drippings and is used in place of butter to make a roux. You can substitute butter or a neutral oil for all or a portion of the fat.
All-Purpose Flour - For thickening the gravy. You can substitute a gluten free cup for cup alternative.
Turkey or Chicken Stock - If you don't have enough drippings, you can supplement with turkey stock or bone broth, or you can use chicken stock. You can also use water to supplement the drippings, but it will be a bit less concentrated.
Salt and Black Pepper - Don't season your gravy until after tasting it. The pan drippings can have a lot of saltiness and seasonings, so it's important to taste the gravy first before adding more.
*Find the full ingredient list in the recipe card below!
Helpful Equipment
How to Make Gravy From Turkey Drippings
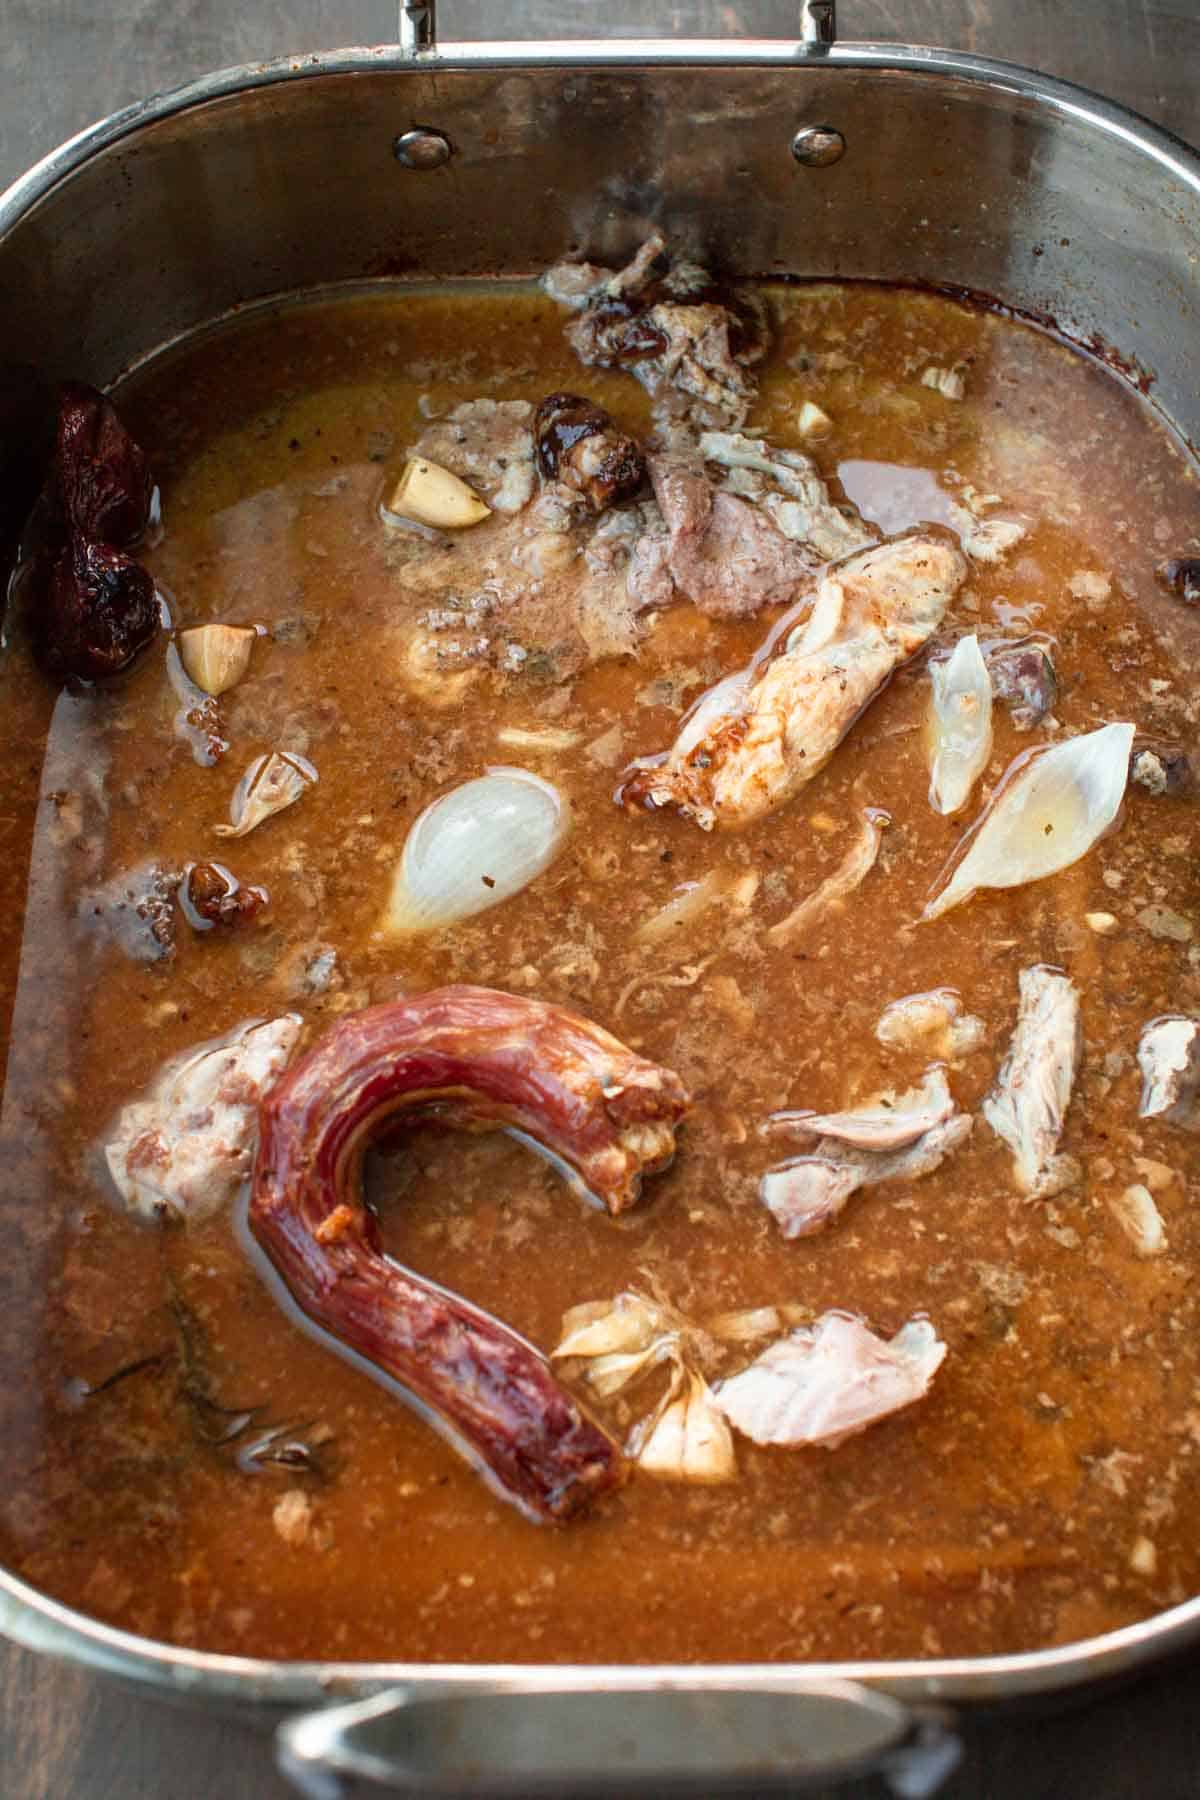
- After removing the turkey from the roasting pan, use a wooden spoon or spatula to scrape up the browned bits stuck to the bottom of the pan. If the pan is dry, add 2-3 cups of liquid (water or turkey broth) to help loosen.
- Strain the drippings and transfer them to a fat separator. Alternatively you can place them in a jar or container and let the fat rise to the top.
Pro Tip: Place the drippings in the refrigerator or freezer for a few minutes to speed up the fat separation.
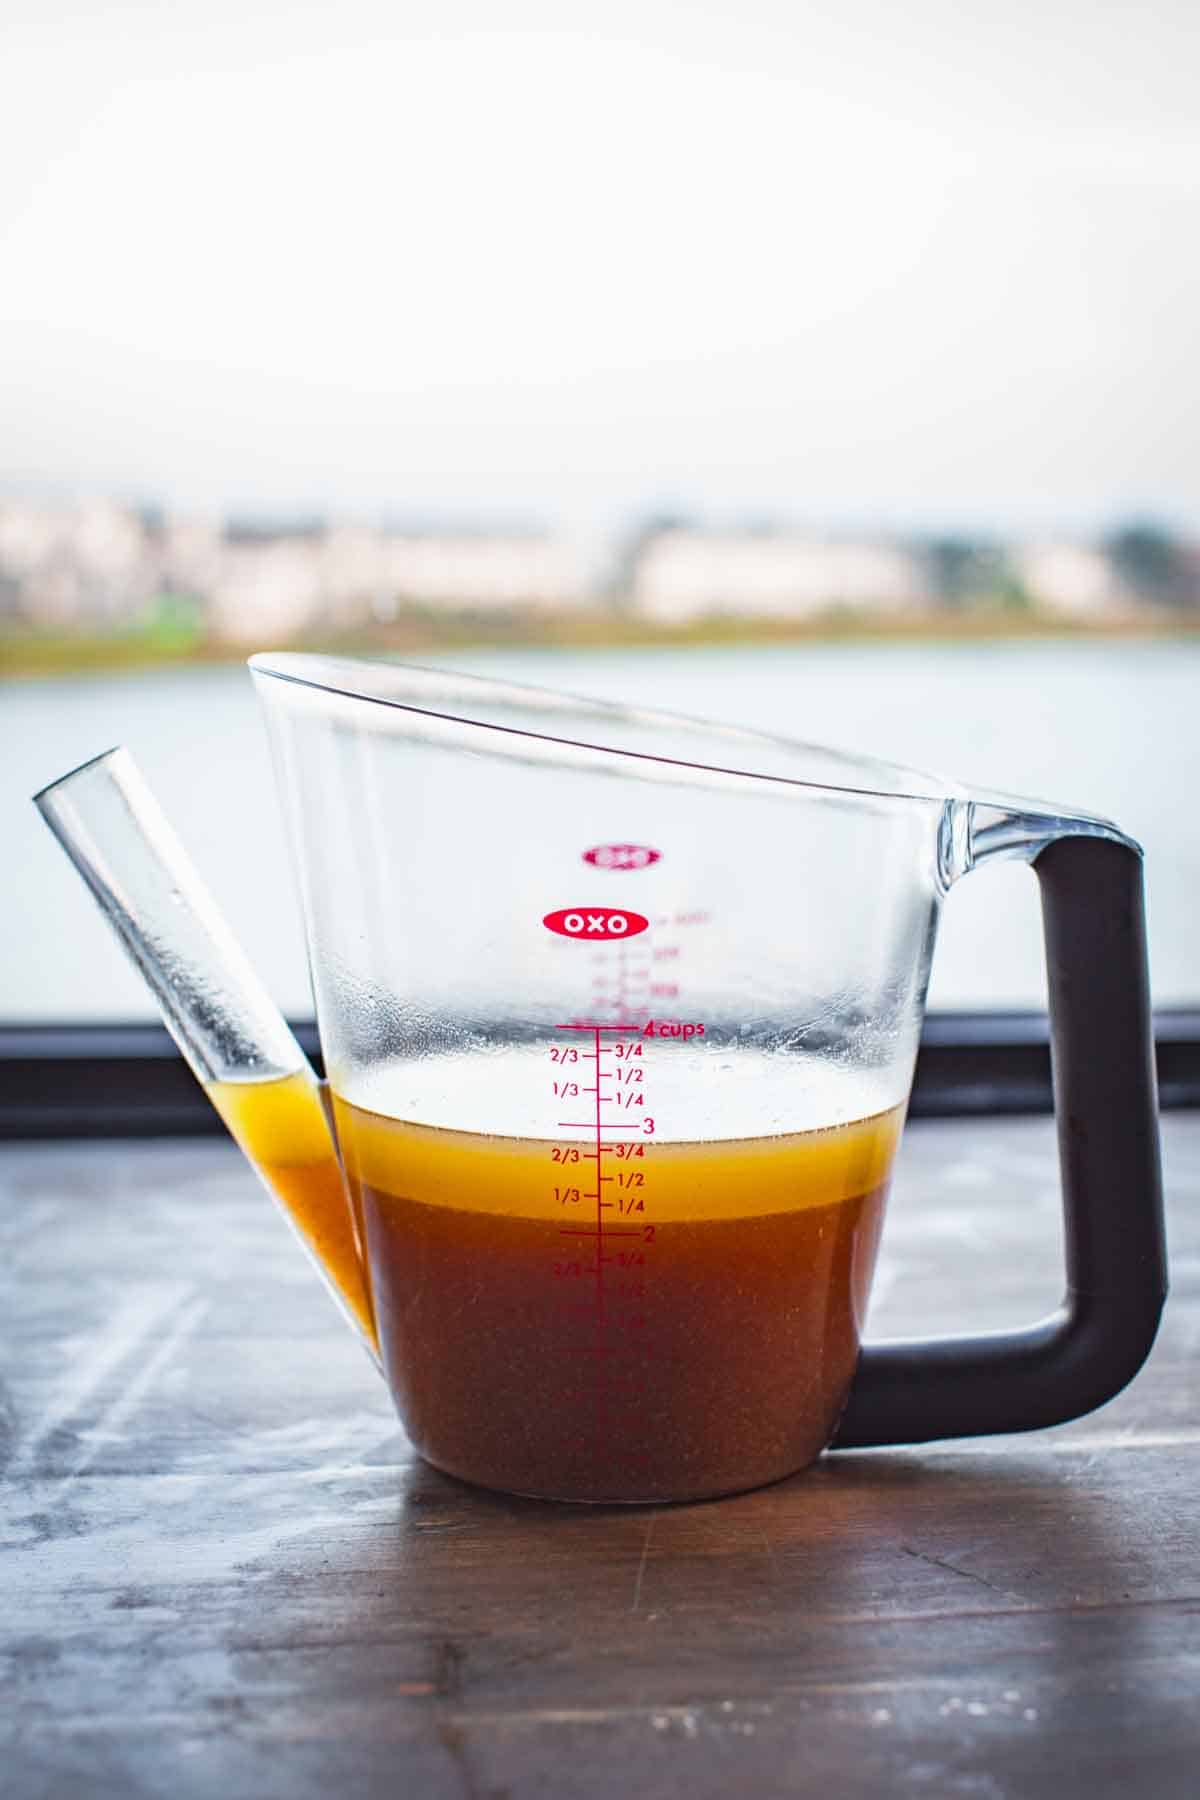
- Pour or ladle ½ cup of rendered turkey fat from the top of the drippings into a medium saucepan. Skim the remaining drippings of the excess fat and discard. Measure out 4 cups of drippings. Supplement with turkey stock or water if there isn't enough.
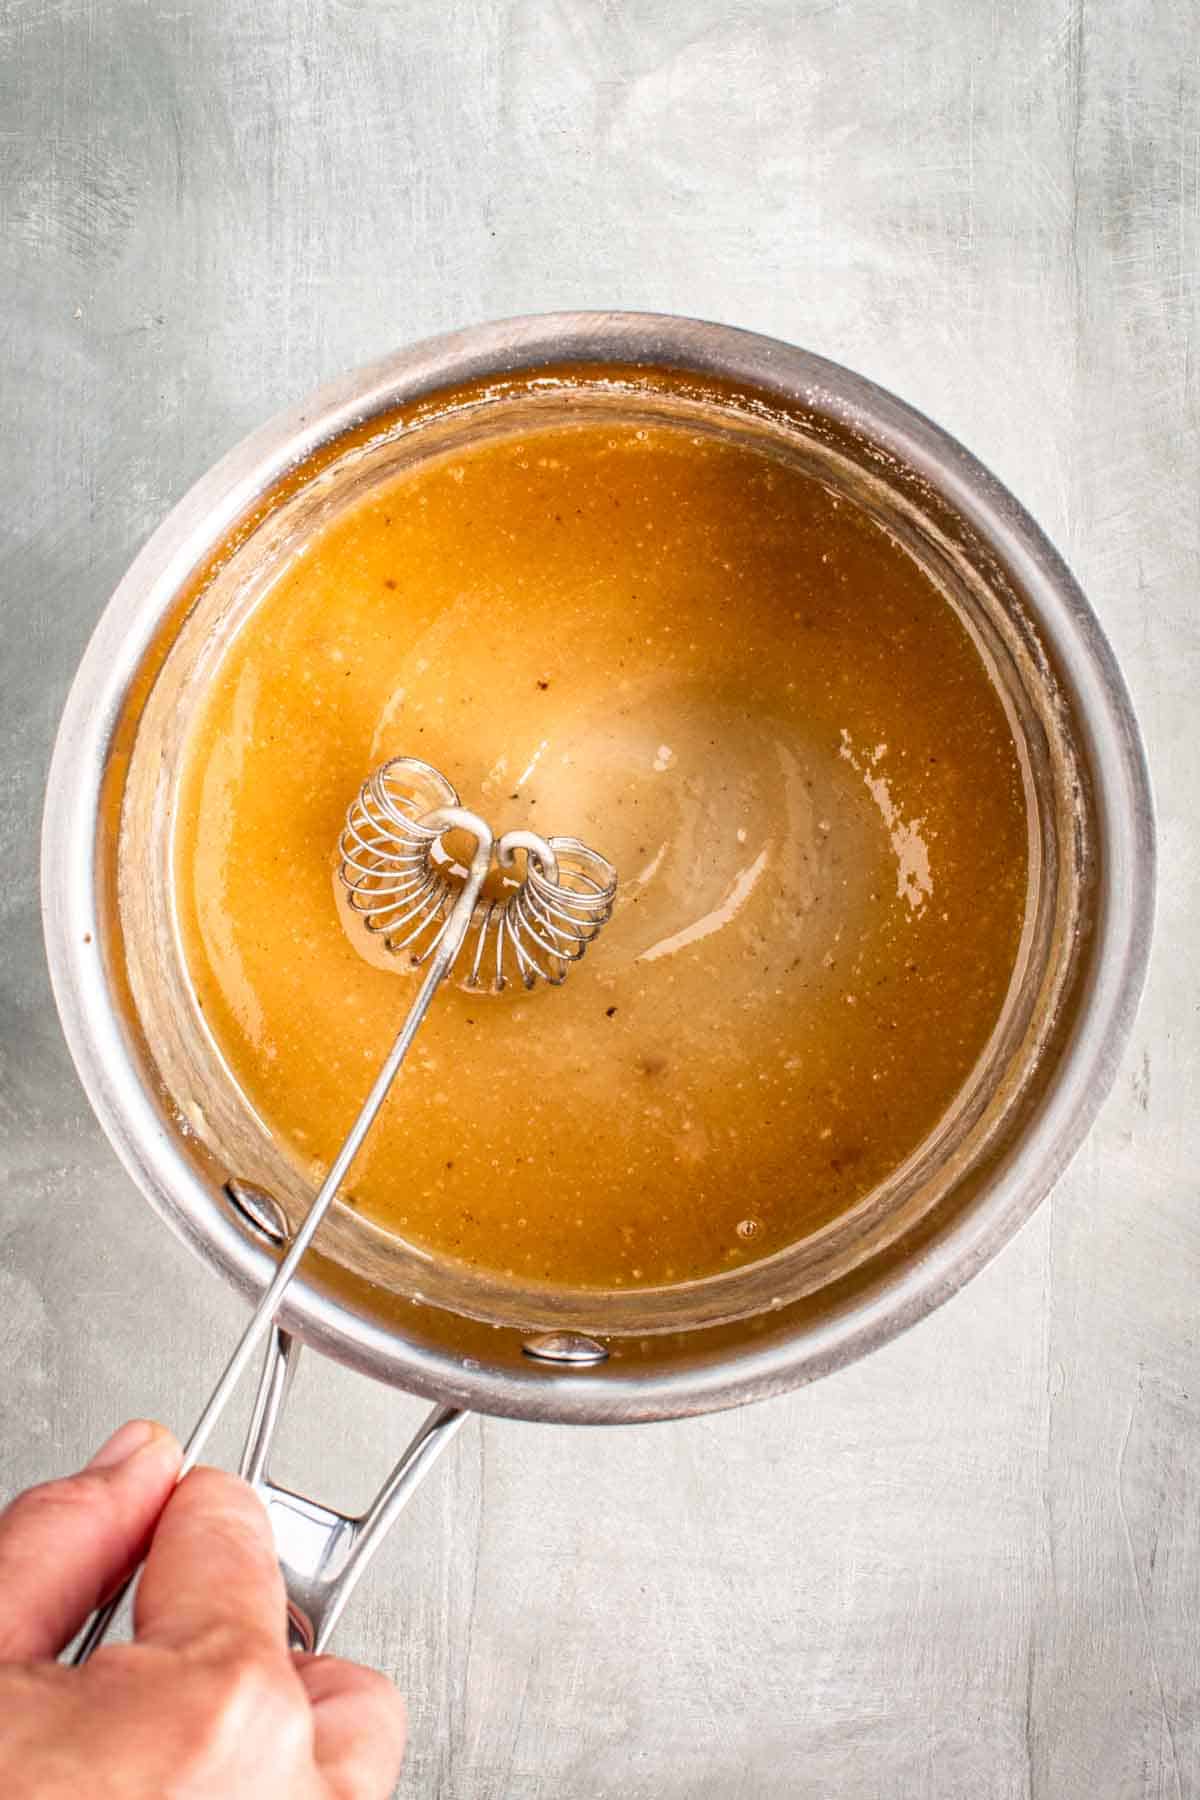
- Place the saucepan with the turkey fat over medium heat and whisk in the flour. Continue whisking for about 2 minutes until it turns slightly golden in color.
- Pour in the drippings while whisking and bring up to a boil. Lower the heat to a simmer and continue whisking until thick, about 3 minutes. Cook while whisking occasionally for another 10 minutes.
Pro Tip: For a thicker gravy, let it simmer longer to reduce, or whisk up a quick flour slurry by shaking ¼ cup flour with ½ cup water in a jar. Add it to the gravy a tablespoon or two at a time, simmering at least 5 minutes between additions until it reaches your desired thickness.
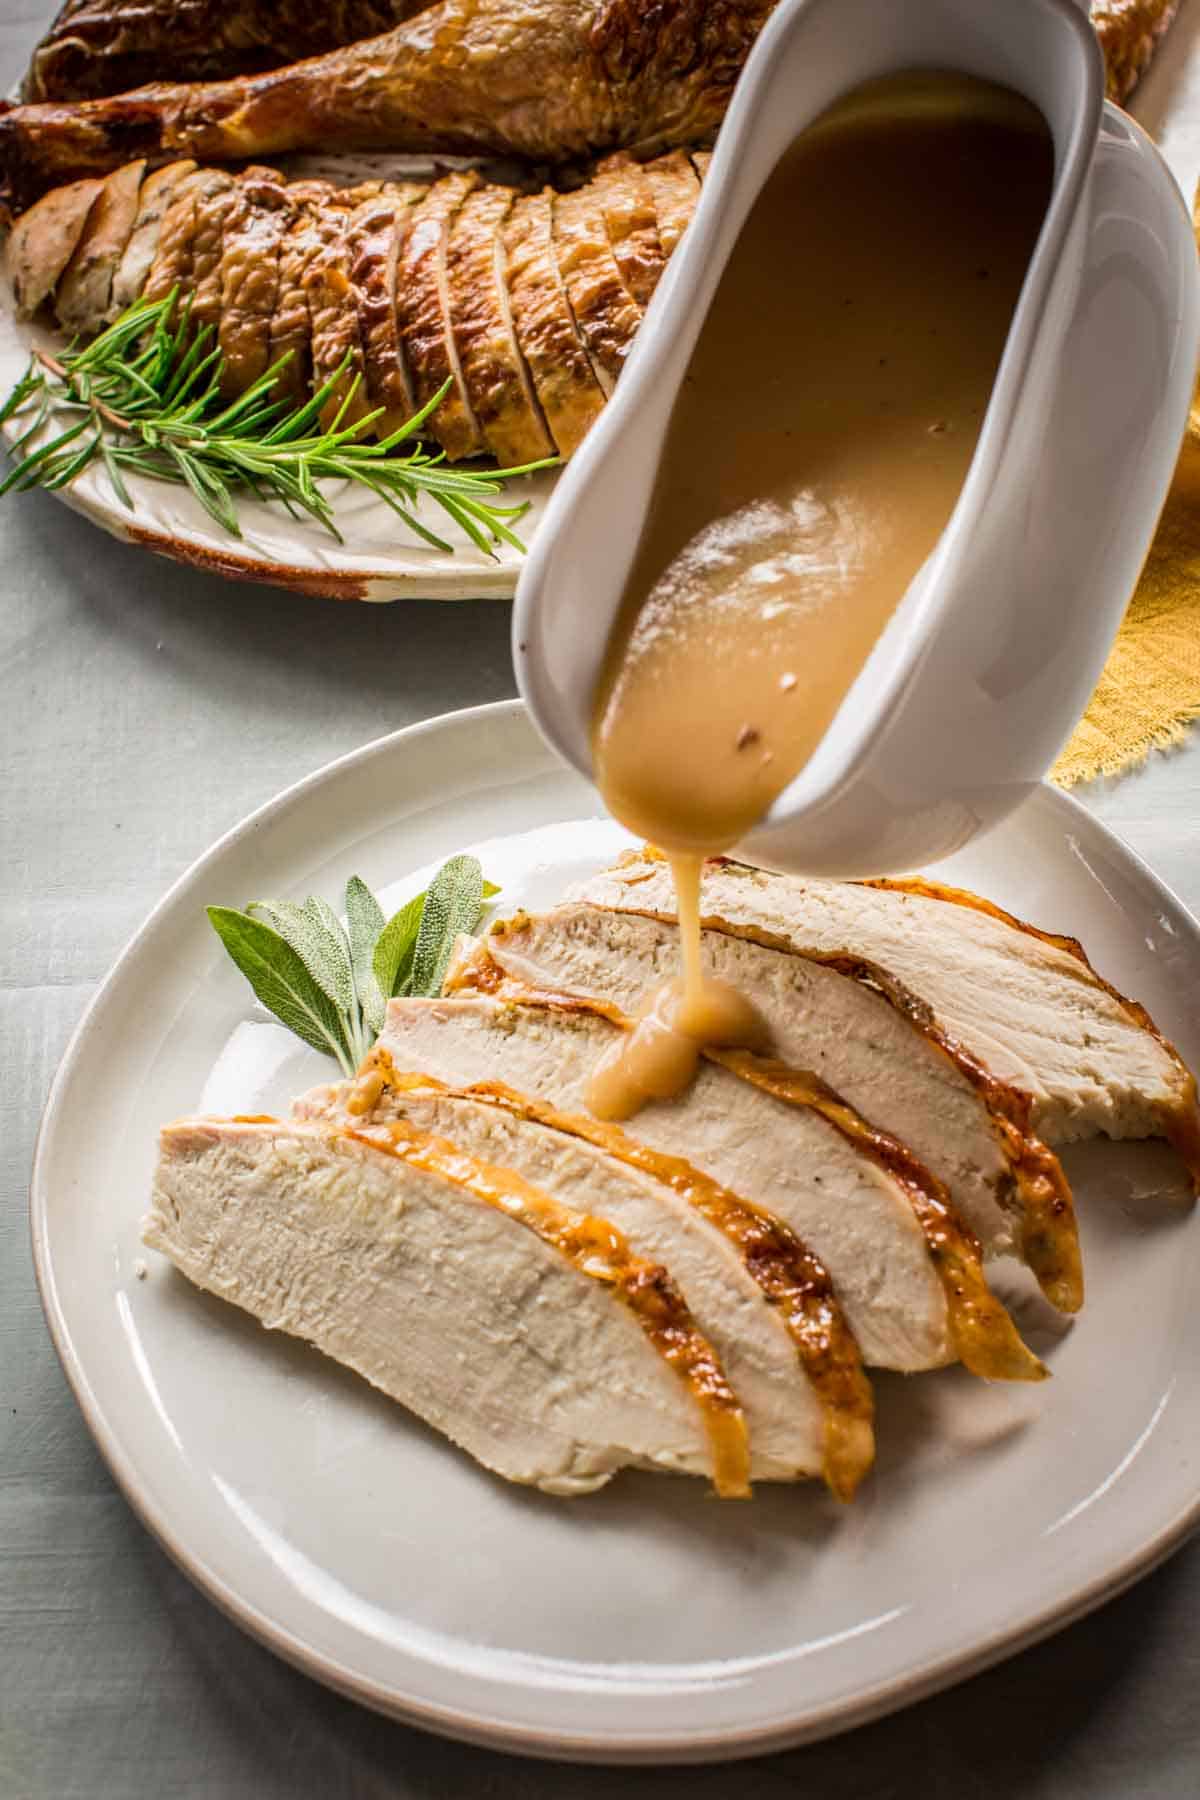
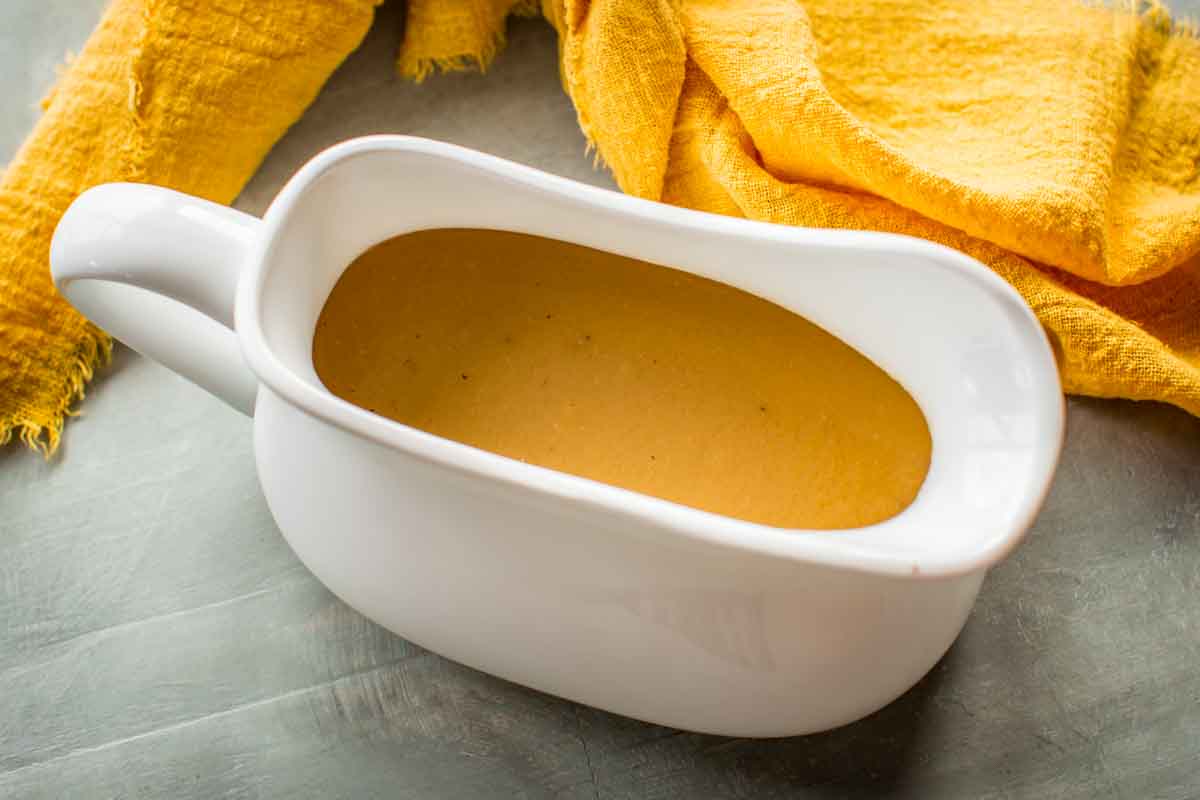
- Taste and adjust the seasoning as needed, then transfer to a gravy boat and serve piping hot.
Pro Tip: To ensure your gravy is totally lump-free, strain it through a fine mesh sieve one more time before serving.
How to Make Turkey Gravy Ahead of Time
Yes! Store gravy in an airtight container in the refrigerator for up to 5 days and reheat it on the stovetop. Loosen it up by whisking in a little bit of water or broth, and simmer for a few minutes until it reaches the right consistency.
This post may contain affiliate links.
Tips for Best Gravy for Thanksgiving
- Add the turkey neck and giblets to the roasting pan with your turkey to add extra flavor to the drippings!
- Make sure to continuously whisk the gravy while it's simmering to avoid lumps or a skin forming.
- A good gravy should just coat the back of a spoon. If gets too thick, add more stock or water to thin it out.
- Enhance the flavor with ½ teaspoon of poultry seasoning, a drop of Worcestershire sauce or fresh herbs like fresh thyme, sage or rosemary.
- You can easily double or triple this recipe to serve more people.
Serving Suggestions for Homemade Turkey Gravy
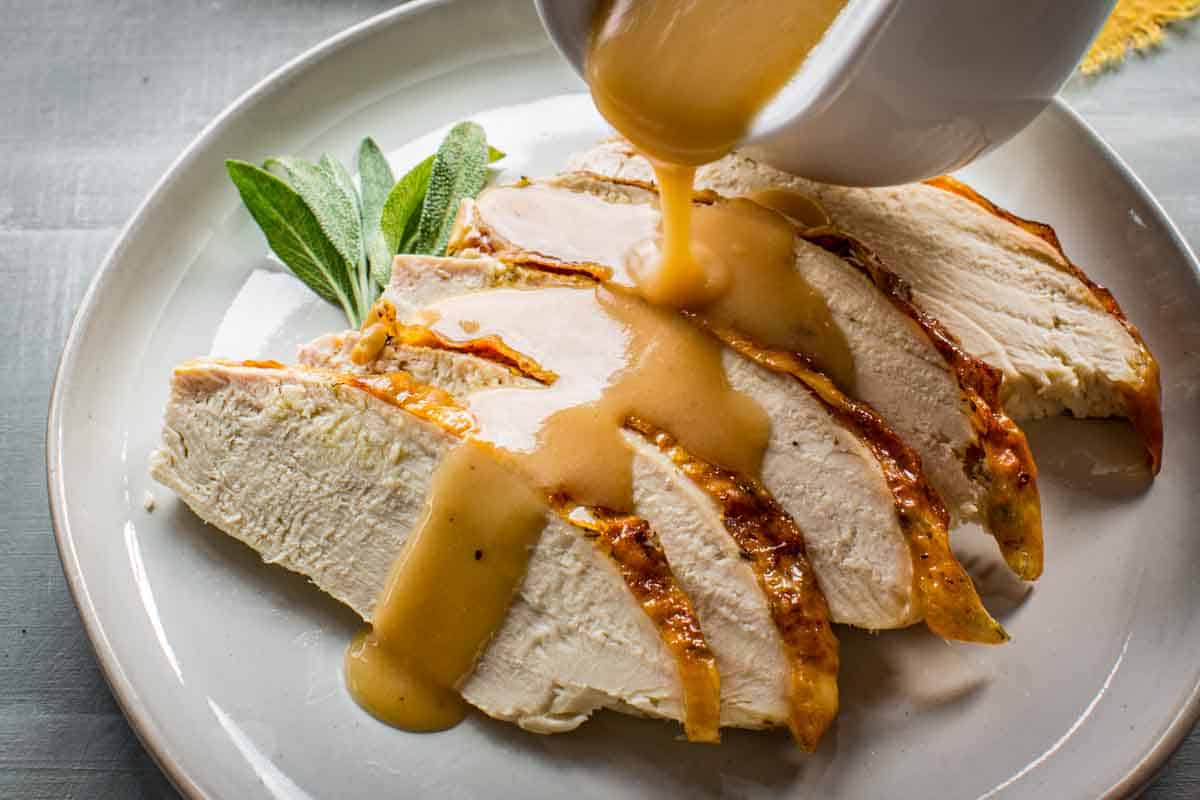
After you carve the turkey, serve it immediately with plenty of hot gravy. It's important that the gravy is served piping hot so it can help keep everything else on your plate hot.
No matter what's on your Thanksgiving menu, this old-fashioned turkey gravy pair along perfectly!
Pour it all over everything on your plate, from the juicy roasted turkey breast to the green bean casserole and everything in between.
Some of my favorite sides to serve on Thanksgiving are cauliflower gratin, flaky cheddar biscuits and this easy Brussels sprout salad.
No Thanksgiving dinner is complete without dessert. Try my grandma's famous apple pie or make something unique like this ruby red cranberry pie.
Have leftover turkey gravy? Use it to smother an open face turkey sandwich or use it to top poutine or disco fries!
How to Store Homemade Turkey Gravy Recipe
Let the gravy cool, then store it in an airtight container in the refrigerator for up to 4 days. Reheat gently in a saucepan over low heat and whisk in a splash of stock or water to loosen it.
For longer storage, freeze it for up to 3 months. Thaw in the refrigerator, then warm it slowly on the stove and whisk to smooth it back out. If it remains lumpy, strain through a fine mesh sieve or give it a quick buzz in the blender.
Best Turkey Gravy Recipe FAQs
The key to avoiding lumps is by ensuring the roux is smooth, then adding the liquid in gradually while vigorously whisking. You can also strain the gravy through a fine mesh sieve right before serving to ensure it's totally lump-free.
The amount of gravy needed will vary with your guests, but a general guideline is to shoot for about ½ cup of gravy per person.
The best method to fix a salty gravy is to dilute it with water or unsalted broth. You could also use milk or cream in a pinch. Add a little bit, taste, and adjust more as needed. You may need to thicken the gravy more after diluting.
Yes! While the Turkey drippings will give the best flavor, you can use butter in place of the turkey fat and turkey or chicken broth as the liquid. You can also enhance the flavor with additional herbs, spices or a little bit of bouillon.
Yes! Simply substitute a cup-for-cup gluten free flour blend.
Yes, you can still make a great turkey gravy without drippings.
The key is to use a good quality stock, not broth, and make sure it's well seasoned. Homemade stock is best, but store bought works too.
You can build even more flavor by first sautéing a finely minced shallot, adding a splash of white wine or sherry, a pinch of poultry seasoning or stir in a little bit of bouillon.
You can also add aromatics like fresh thyme, rosemary, sage, garlic cloves and/or peppercorns and strain them out before serving.
It's also helpful to whisk in a little pat of butter to make up for the richness that the drippings add.


Did you LOVE this recipe? Please leave a star ⭐️ rating and comment and tag your creations @ColeyCooks on Instagram!
Want to Save This Recipe?
Enter your email & I'll send it to your inbox.
By submitting this form, you consent to receive emails from Coley Cooks.

Perfect Homemade Turkey Gravy for Thanksgiving
Ingredients
- ½ cup turkey fat separated from drippings or unsalted butter
- ½ cup all-purpose flour
- 4 cups strained turkey drippings or turkey stock
- Salt and pepper to taste
Instructions
- Use a wooden spoon or spatula to scrape up the brown bits from the bottom of the pan used to roast the turkey. If the pan seems dry, add 2-3 cups of water or turkey broth, to help loosen.
- Next, strain the collected drippings and pour them into a fat separator. Alternatively, you can place them in a jar or container and allow the fat to naturally rise to the surface.
- Pour or ladle approximately ½ cup of the turkey fat that has risen to the top of the drippings into a medium saucepan. Skim off any surplus fat from the remaining drippings and discard.
- Measure out 4 cups of the strained drippings and, if necessary, supplement them with turkey stock or water.
- Place the saucepan with the turkey fat on the stovetop over medium heat and gradually whisk in the flour. Continue whisking for roughly 2 minutes until it takes on a slightly golden hue.
- Gradually pour in the prepared drippings while whisking and bring the mixture to a boil. Reduce the heat to a simmer and continue whisking until the mixture thickens, about 3 minutes. Let it simmer, occasionally giving it a whisk, for another 10 minutes.
- Taste the gravy and adjust the seasoning to your liking. Finally, transfer it to a gravy boat and serve immediately.
Notes
- Place the drippings in the refrigerator or freezer for a few minutes to speed up the fat separation.
- Make sure to continuously whisk the gravy while it's simmering to avoid lumps or a skin forming.
- For a thicker gravy, you can either reduce it down further by letting it simmer longer, or you can thicken it with a flour slurry. Add ¼ cup of flour and ½ cup water to a mason jar, cover and shake vigorously to combine until smooth. Add it to the gravy in 1-2 tablespoon increments, allowing it to simmer and thicken at least 5 minute between each addition until you achieve the perfect thickness.
- A good gravy should just coat the back of a spoon. If gets too thick, add more stock or water to thin it out.
- To ensure your gravy is totally lump-free, strain it through a fine mesh sieve one more time before serving.
- Enhance the flavor with ½ teaspoon of poultry seasoning, a drop of Worcestershire sauce or fresh herbs like fresh thyme, sage or rosemary.
- You can easily double or triple this recipe to serve more people.
