Classic Veal Milanese
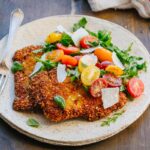
This classic veal Milanese is my take on the original, inspired by my most popular recipe. A crisp, golden crust encases tender veal cutlets that get topped with a vibrant salad for the ultimate contrast of textures and flavors. I'm sharing all my best tips to help you achieve restaurant-quality veal cutlets with that signature golden crust every single time.
This post may contain affiliate links.
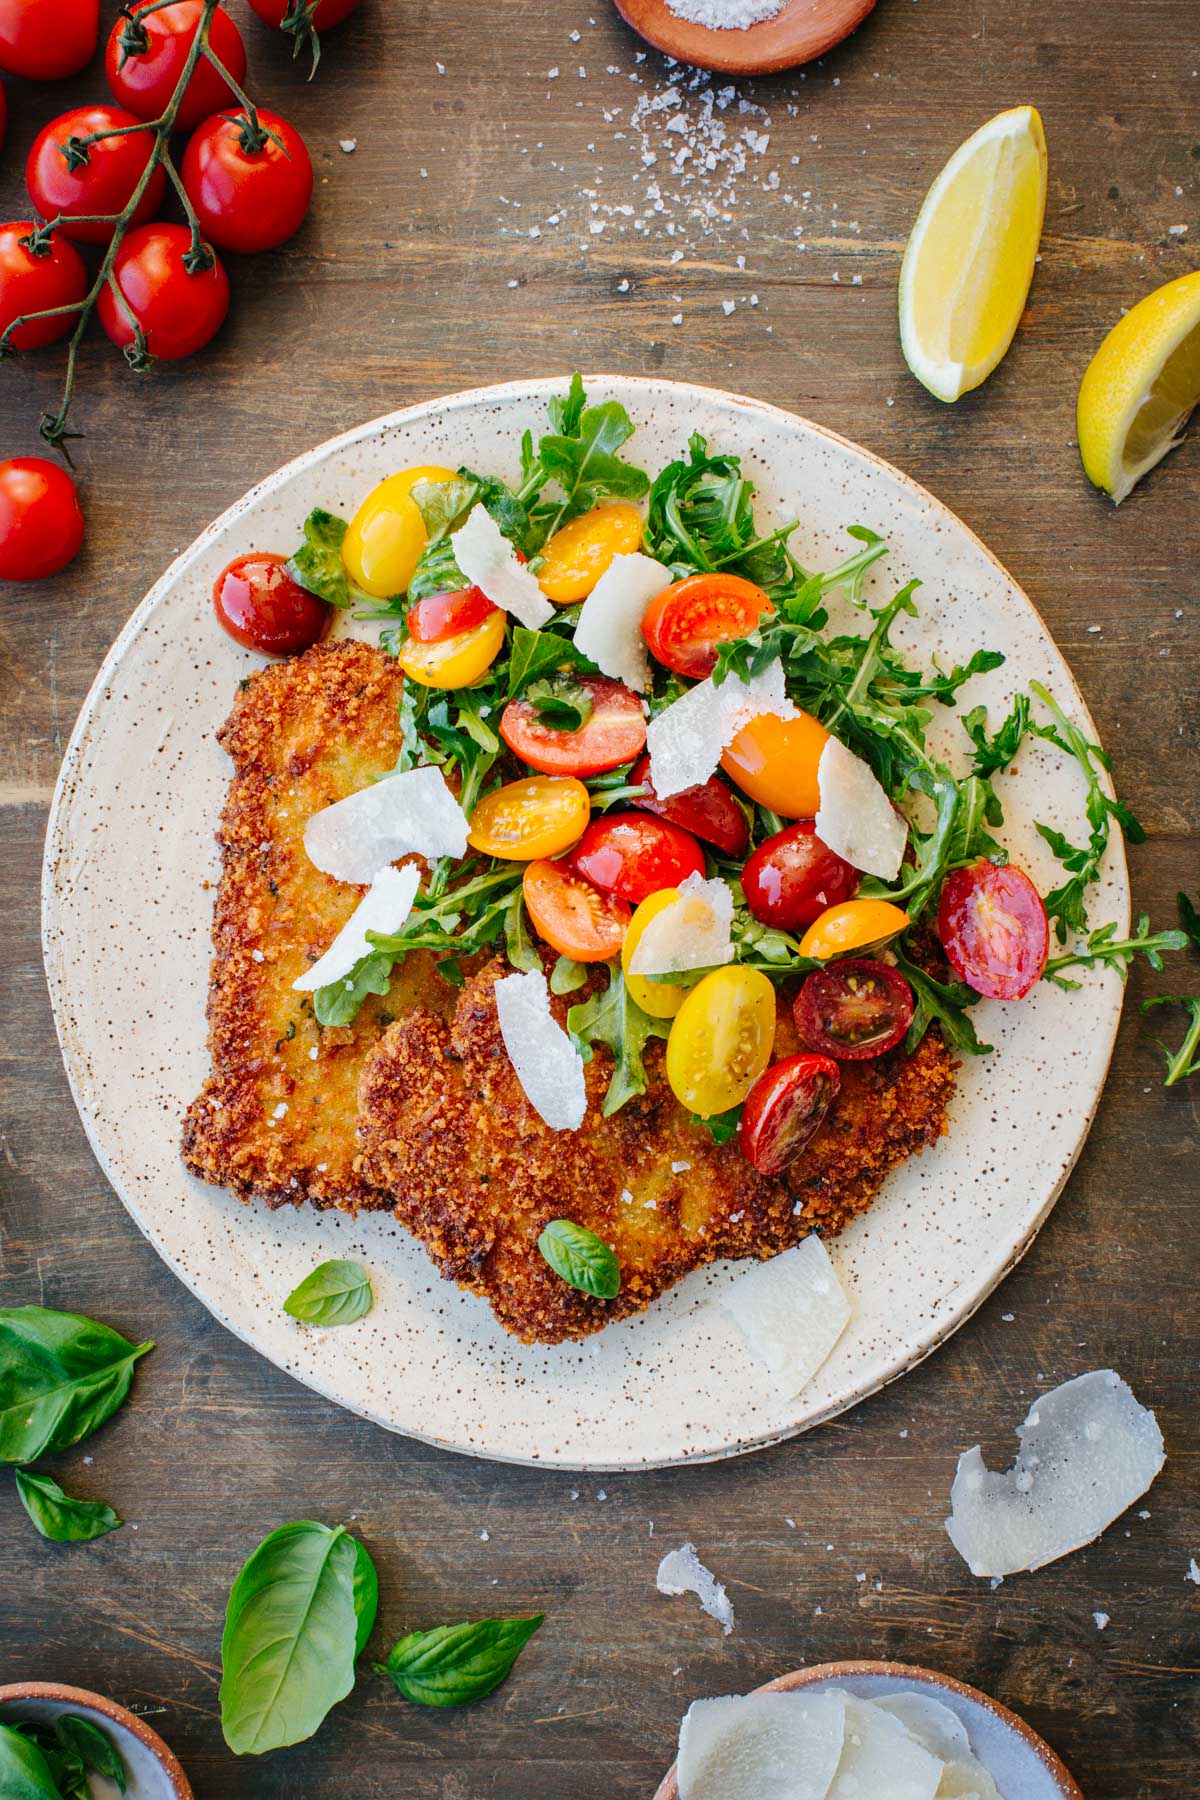
My chicken Milanese and Italian breaded chicken cutlets are two of the most popular recipes on my site, so it's about time I shared the original version they're based on.
Veal Milanese is the true Northern Italian classic, and it deserves its place at the table.
What is Veal Milanese?
The traditional version from Milan, known as cotoletta alla milanese, is made with a bone-in veal rib chop that's breaded and fried in butter. It's a stunning dish, but in most home kitchens, boneless cutlets are far more practical.
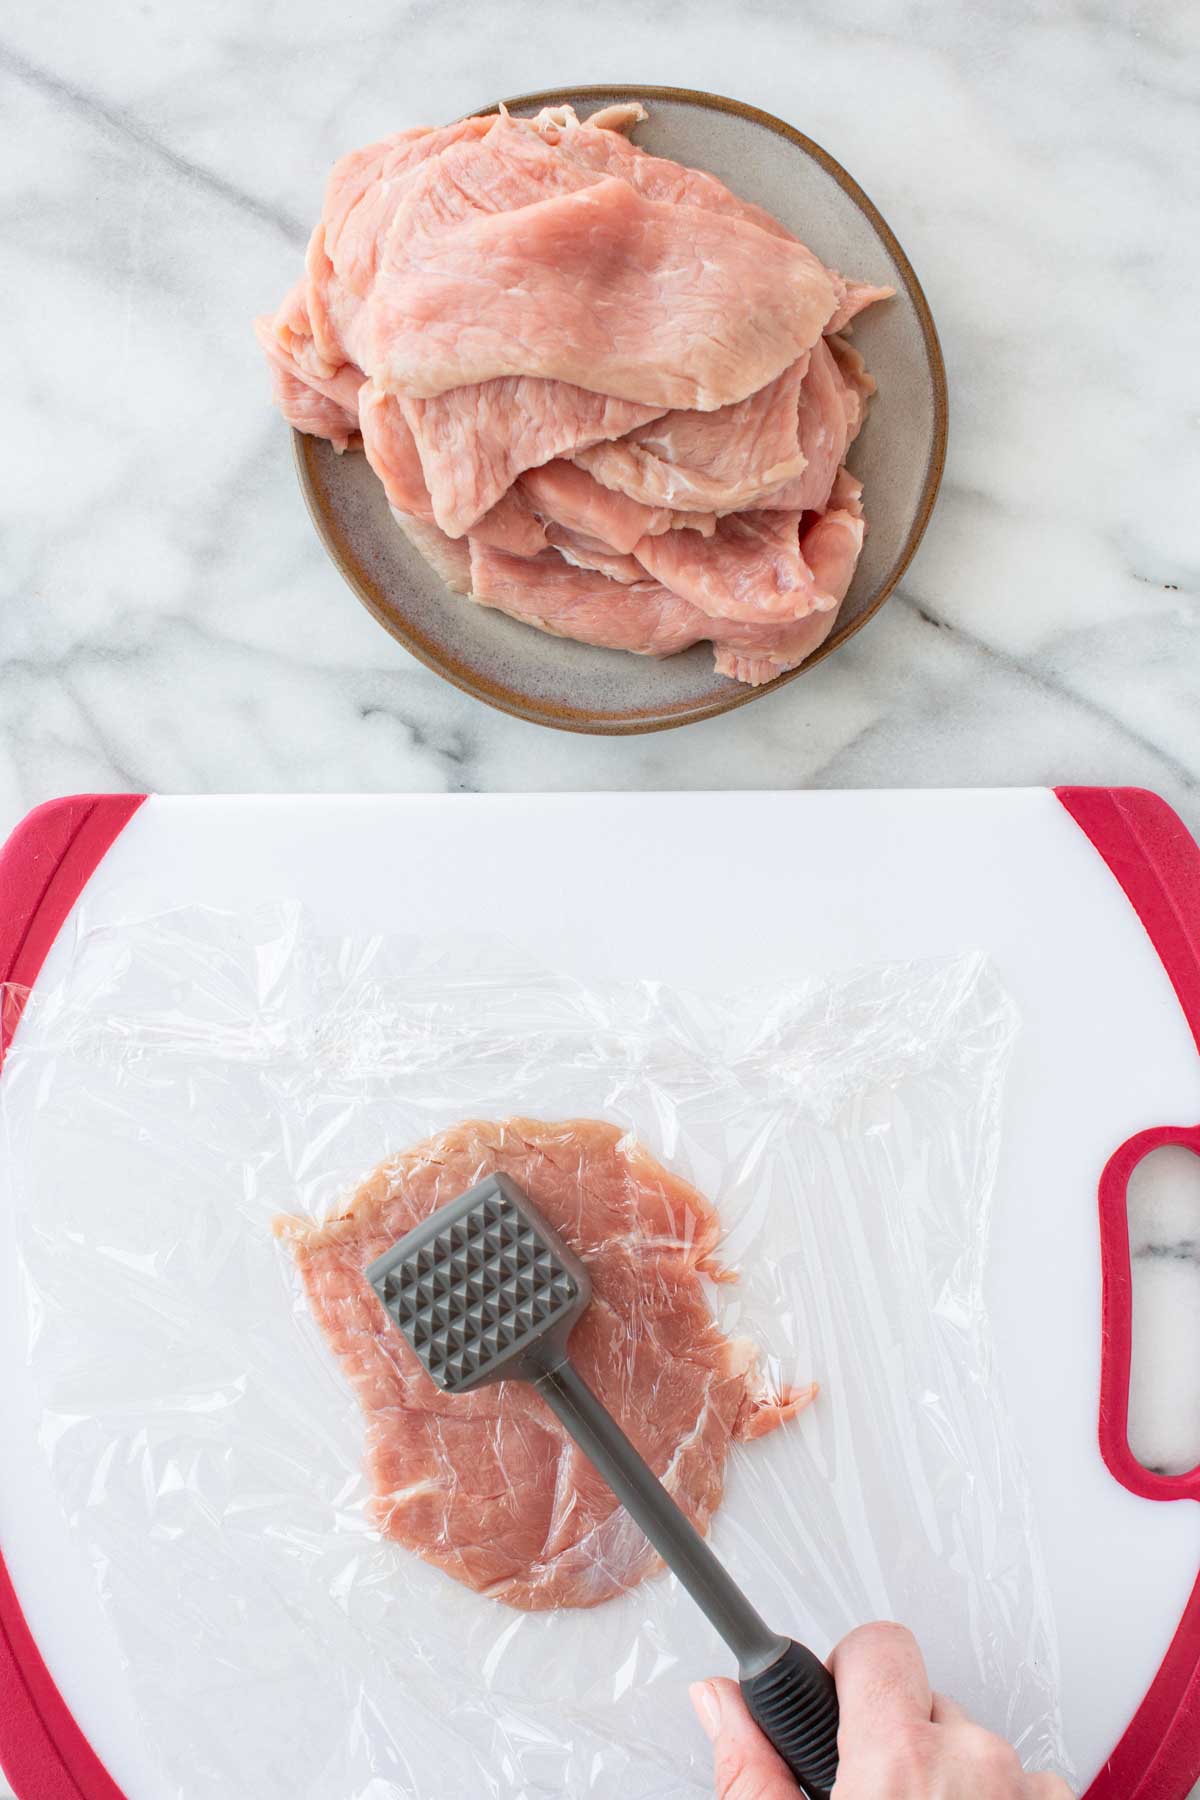
I like to use veal from the top round or loin, sliced thin, then pounded out even further. Getting that thin, even thickness is one of the most important steps to making any type of cutlet, but particularly veal which can get tough.
The thinness ensures the veal stays tender and cooks through quickly, while giving you the perfect ratio of crispy coating to meat.
At its core, the Milanese preparation is all about taking a cut of meat, slicing it thin and pounding it out so it cooks quickly and evenly in the pan.
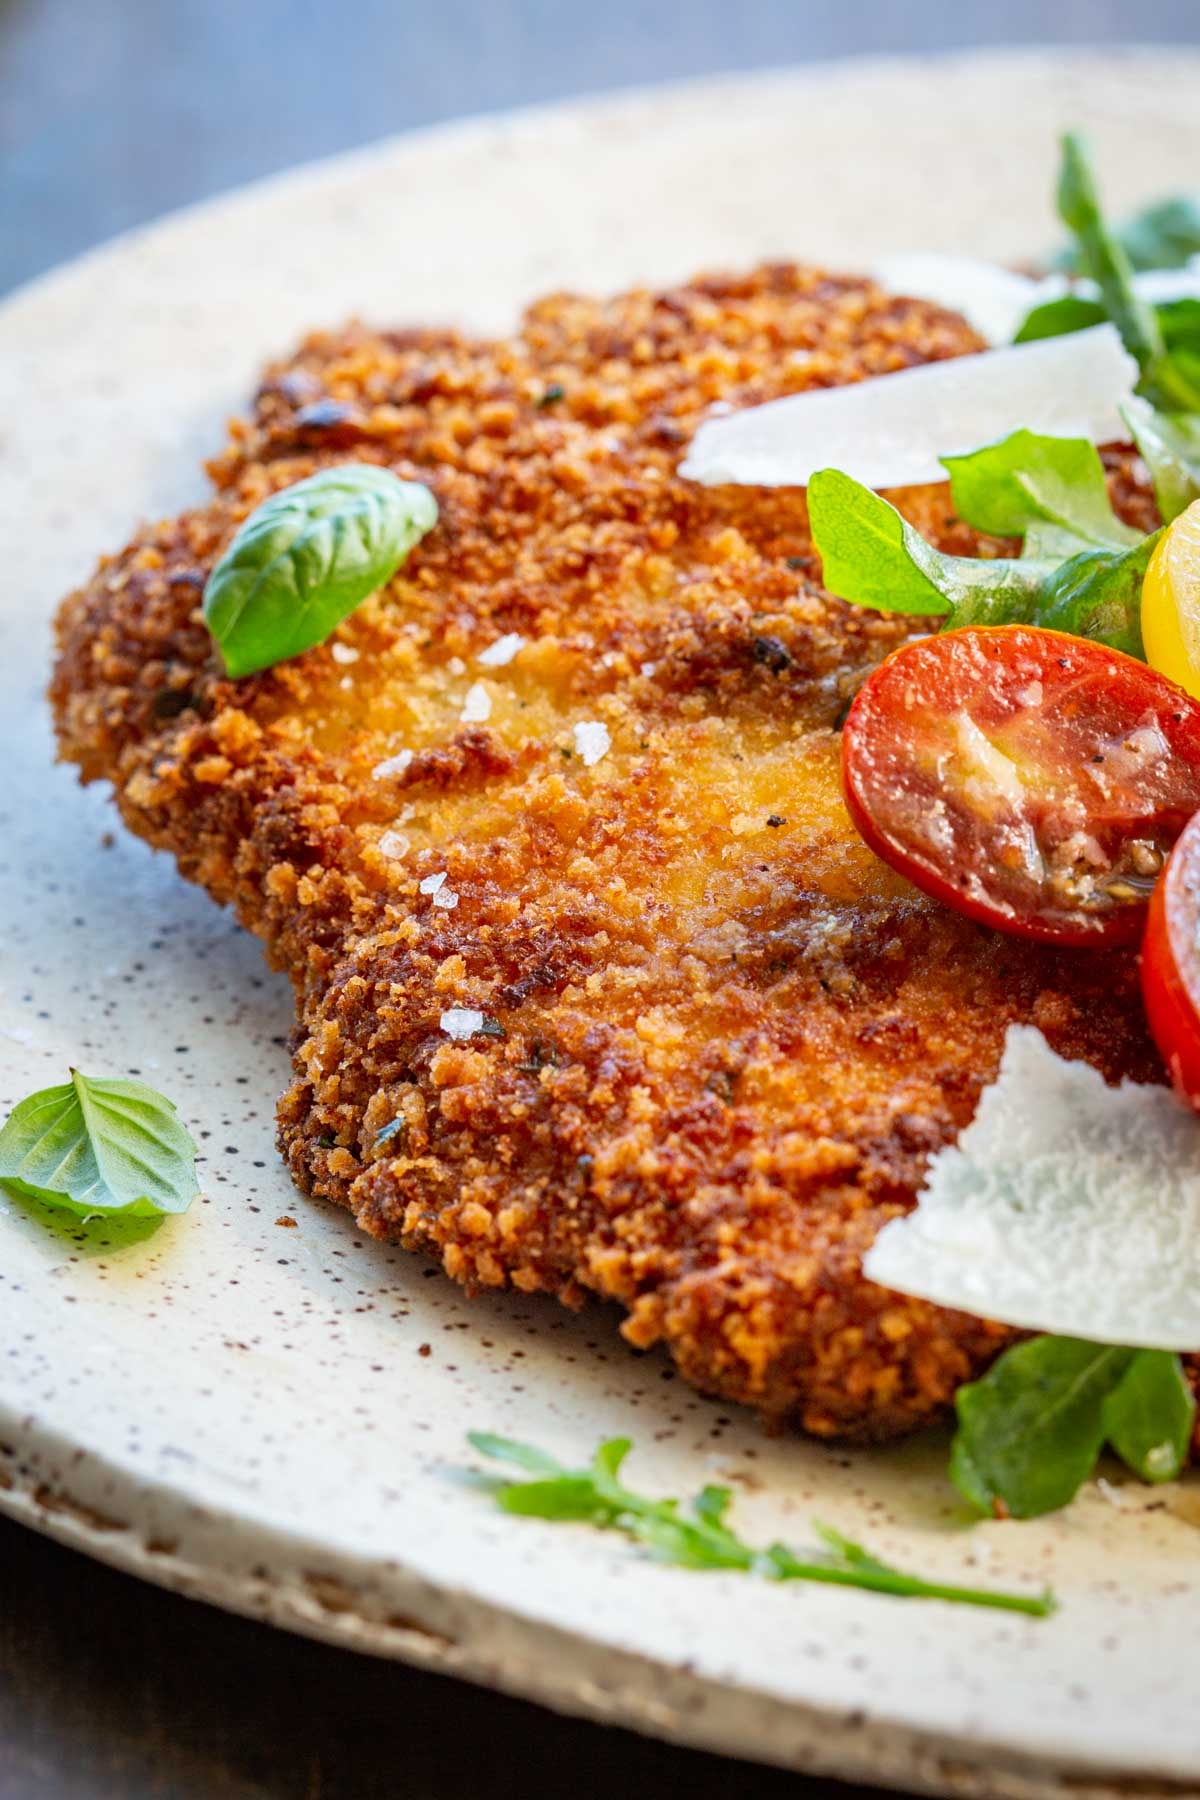
When it's done right, it has a delicate texture and a light, crisp coating that's hard to beat!
My Veal Milanese Recipe
My technique for making Milanese is pretty much the same whether I'm working with chicken, pork, or veal.
Before breading the cutlets, it's important to always season the meat itself. It's a simple step, but it makes a big difference. You're building flavor from the inside out, not just relying on the coating.
From there, it's the standard breading process, but with a few upgrades that really set my recipe apart.
I prefer to use homemade breadcrumbs whenever possible, otherwise panko is the next best option. I always season them myself so I can control the flavor. I add fresh grated garlic, parsley, and plenty of finely grated pecorino Romano cheese.
One of my favorite tricks is adding grated cheese to the egg mixture. It helps the coating cling better and creates a crisp, flavorful crust that's just a little bit richer. It really makes a difference!
For frying, fat choice and temperature are everything. Traditionally, Milanese is cooked in clarified butter, which gives incredible flavor and allows for a clean, even fry since the milk solids have been removed.
I typically use extra virgin olive oil since I love the flavor and rarely ever have clarified butter on hand. You can throw a few pats of butter into the skillet as the veal fries if you want to impart some of that rich buttery flavor, or use clarified butter if you want to go all out.
The key is keeping the temperature just right. If the oil is too cool, the breading will absorb it and turn greasy. Too hot, and the crust burns before the veal has a chance to cook through. When the heat is perfectly dialed in, the cutlets fry up golden, crisp, and light.
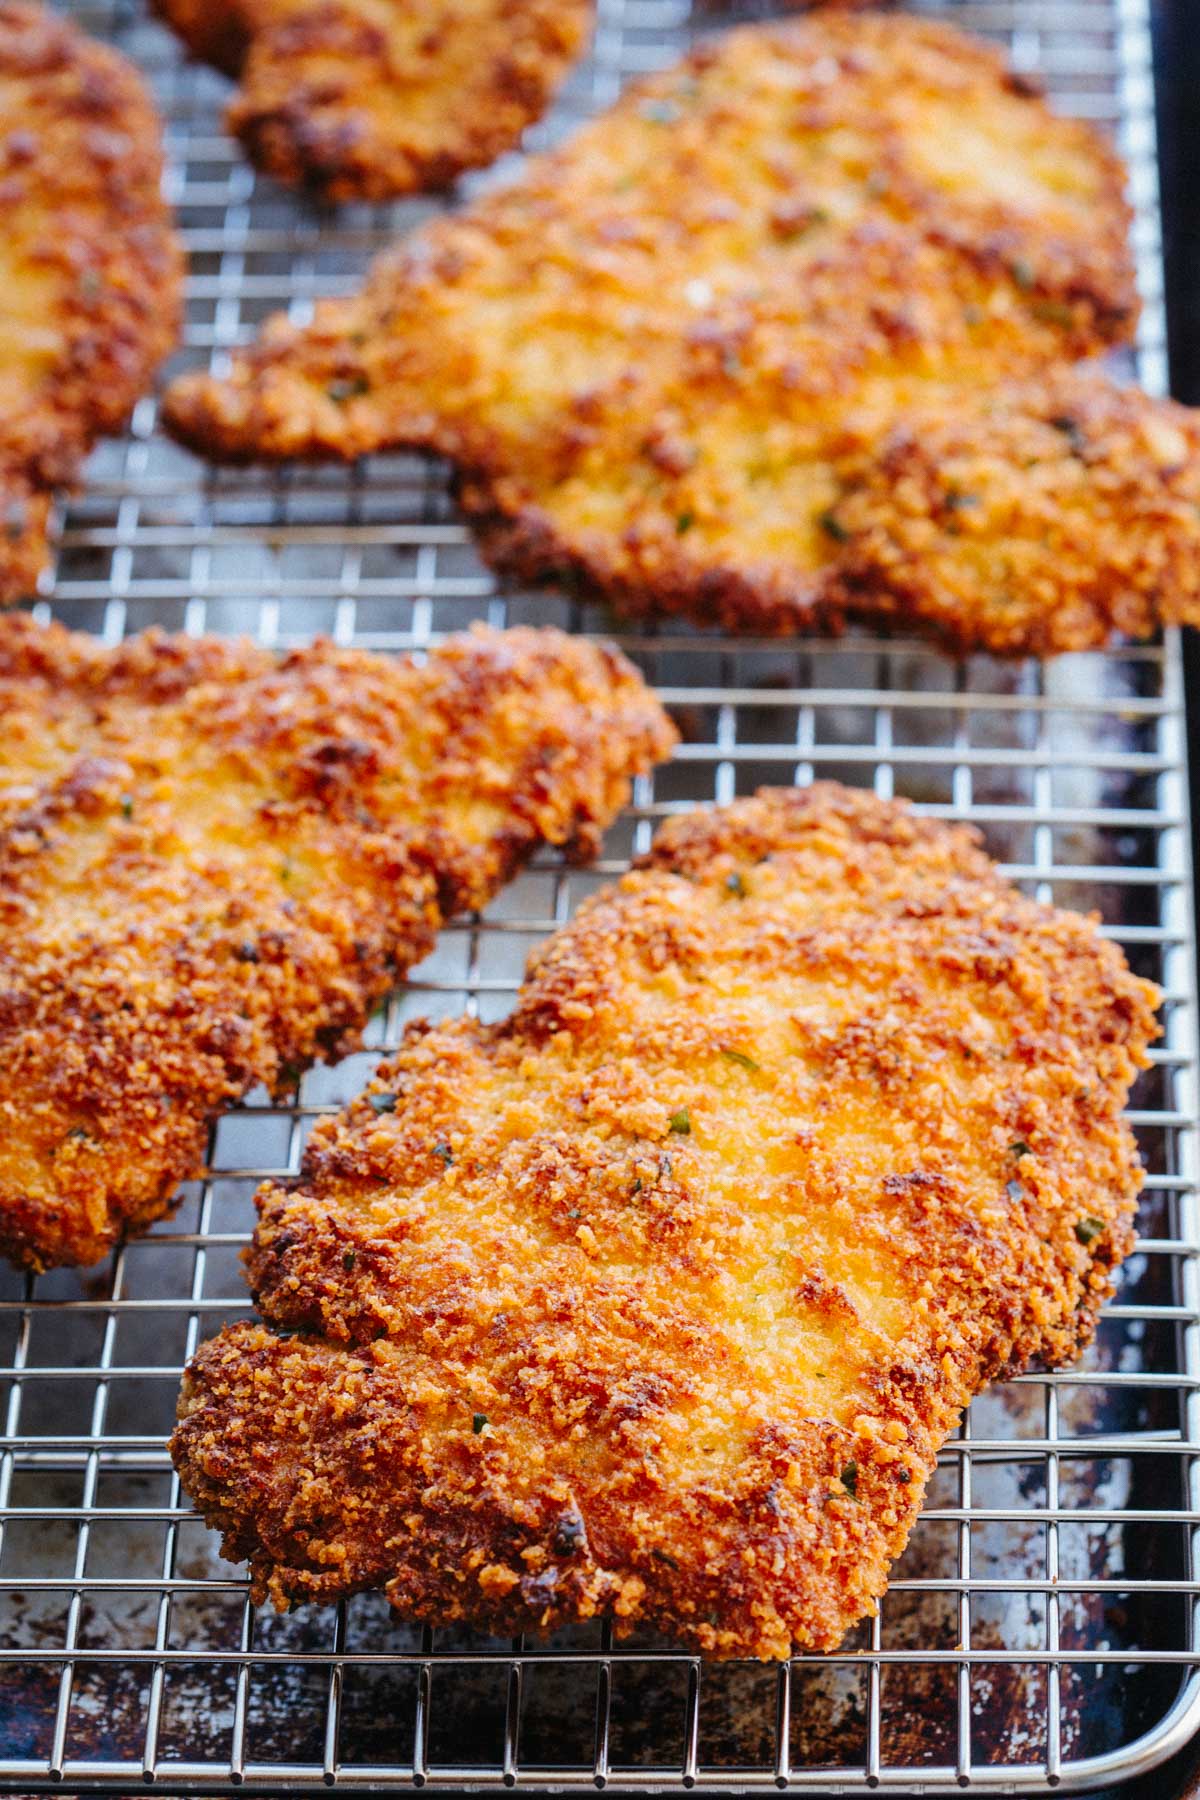
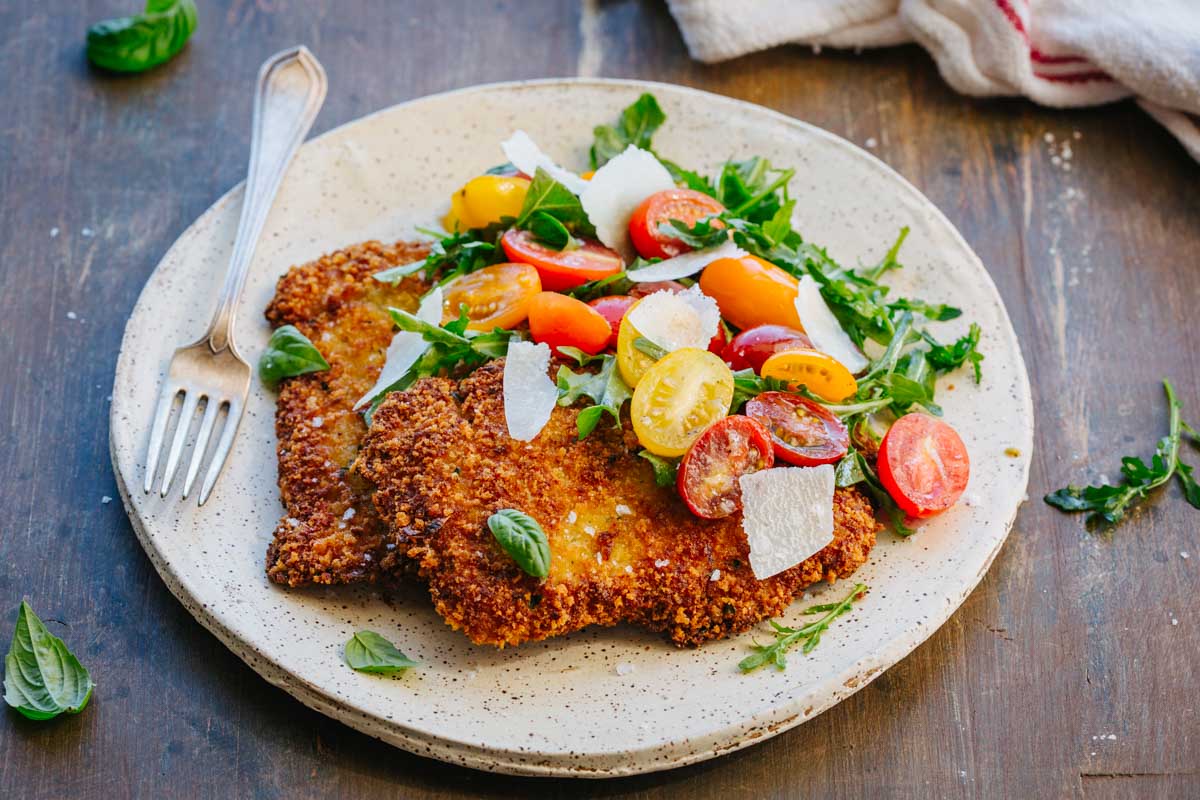
Because veal Milanese is rich, it really benefits from something fresh and bright to balance it out. Traditionally, it's just served with a few lemon wedges, but you'll also often see it served with a simple arugula and tomato salad on top, especially in Italian American versions.
Personally, this is my favorite way to eat it. The cutlet acts almost like a big, crispy crouton, soaking up all those fresh, lemony juices.
A squeeze of lemon right at the end is essential to wake everything up and cut through the richness, but you can also use a light drizzle of aged balsamic instead for a bit of sweetness.
For me, this dish is all about contrast. The crisp, golden crust and tender, buttery veal paired with something fresh, peppery and acidic on top is pure perfection.
When those elements come together, it feels balanced and satisfying, which is exactly why veal Milanese is such a classic!
Want more classic Italian recipes? Try Roman chicken saltimbocca, tender slow cooked beef braciole or a simple lemon caper fish piccata.
Why This Recipe Works
- Made with boneless veal cutlets instead of bone-in chops to be more practical and easy to make at home.
- The veal is pounded ultra thin so it cooks quickly, evenly, and stays tender.
- All of the breading components and the veal are individually seasoned so flavor is built from within.
- Adding grated cheese to the egg mixture helps the coating cling better and adds an extra layer of crunch.
- Frying at the right temperature without overcrowding the pan results in a perfectly crispy crust.
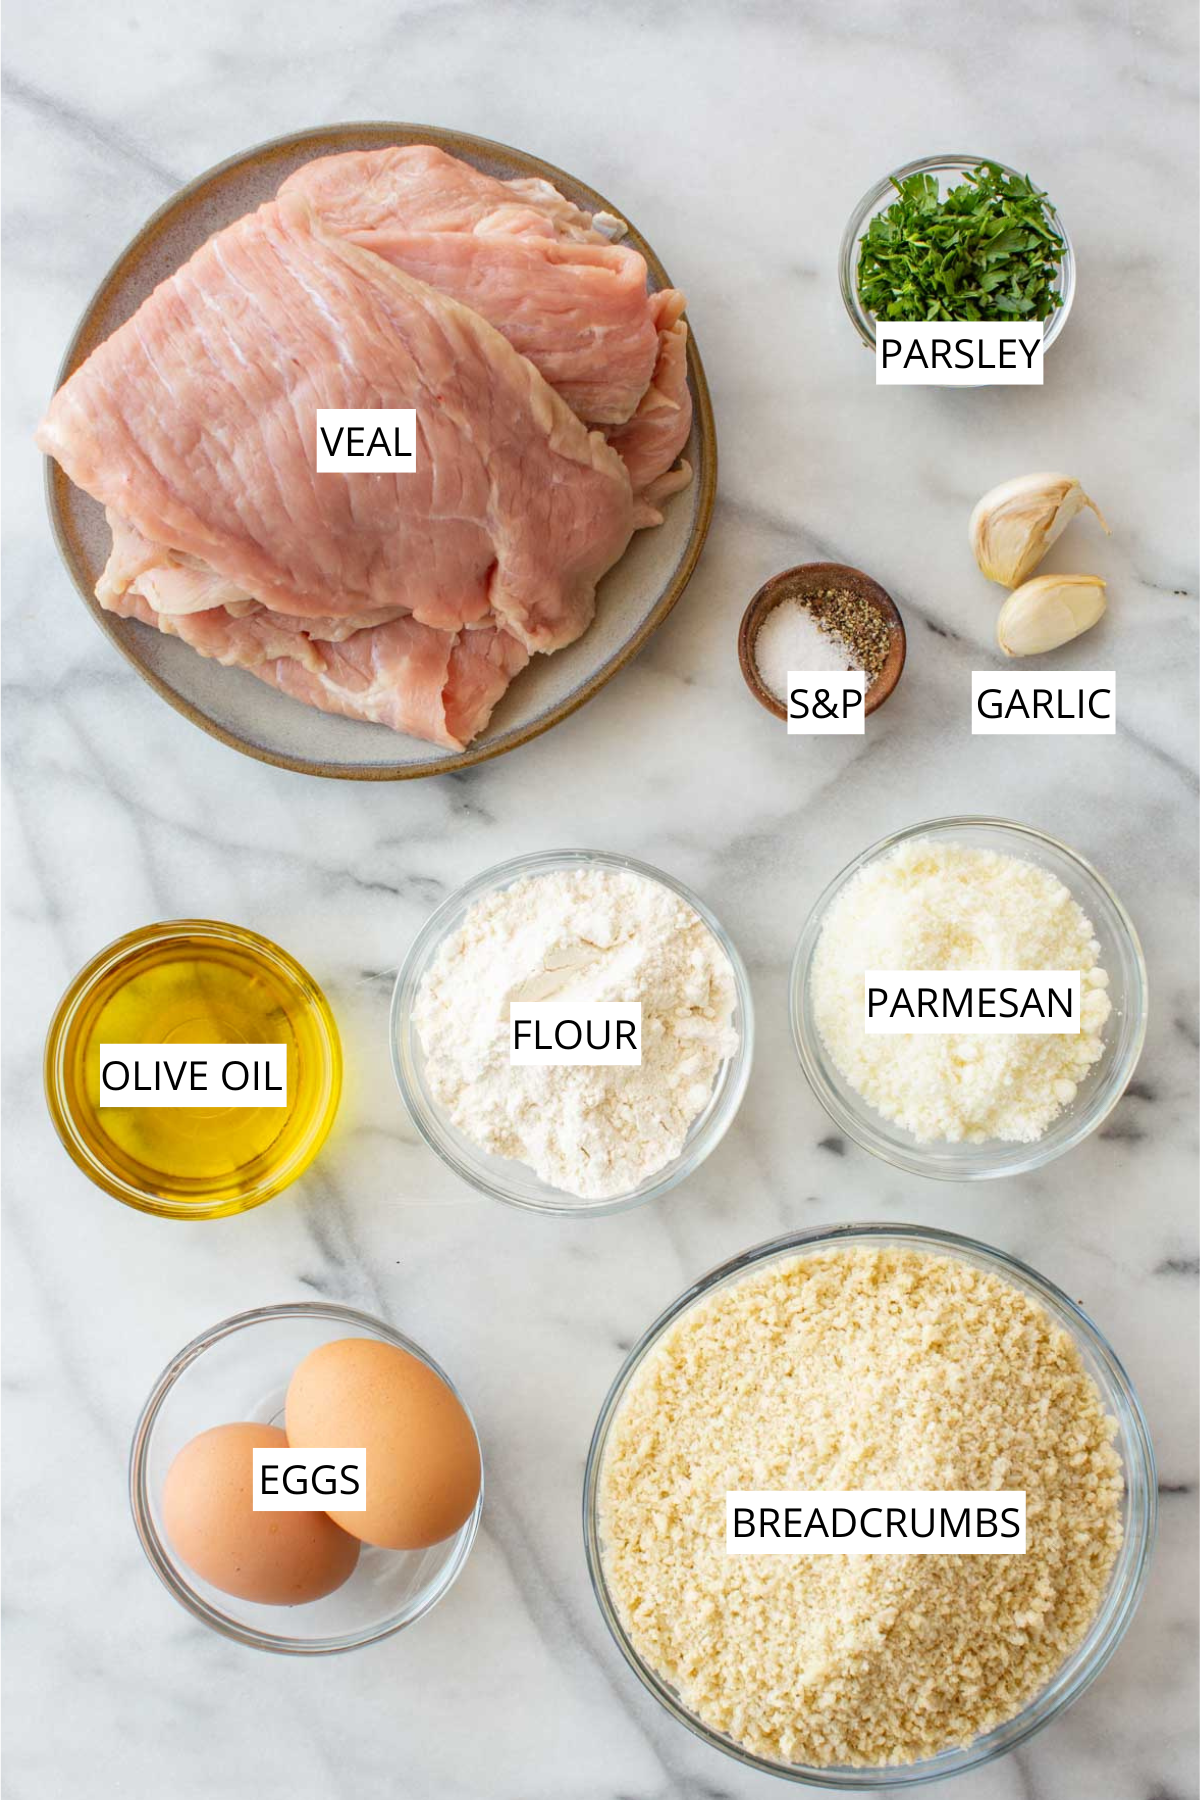
Milanese Veal Ingredients
Veal - Use thinly sliced veal cutlets from the top round or loin. These will be pounded out even further for the perfect even thickness. If you want to go all out, you can use bone-in chops instead. Just be sure to butterfly them and pound them out as thinly as possible.
Breadcrumbs - I use homemade breadcrumbs made from stale bread whenever possible, but panko is also a great option.
Grated Cheese - Use Parmigiano Reggiano, Grana Padano, Pecorino Romano, or use a mix, and grate it fresh. Using good quality Italian cheese really matters here. Pecorino Romano will be saltier, so be mindful of that if using.
Eggs - Fresh large eggs are used for the breading process, seasoned with grated cheese, salt and pepper.
Olive oil - I fry my Milanese in extra virgin olive oil because I love the flavor. Use clarified butter instead if you want to mimic the traditional recipe, or add a few pats of butter to your oil to impart some of that flavor.
*Find the full ingredient list in the recipe card below!
How to Make Classic Veal Milanese
- Add the breadcrumbs, garlic, parsley, and ½ cup of cheese to a medium shallow bowl. Season with salt and pepper, then use your fingers to mix it together, working the garlic into the breadcrumbs until evenly distributed.
- In another medium shallow bowl, whisk together the eggs with ½ cup cheese, a pinch of salt and pepper, and 1 tablespoon of water until combined.
- Pour the flour into another shallow bowl or plate, season with salt and pepper, and mix to combine.
- Take one veal cutlet and place it on a cutting board. Place a piece of plastic wrap over the top, then use a meat mallet to pound it out to be about ½ inch thick. Repeat with the remaining veal.
- Season each piece of veal on both sides with salt and pepper.
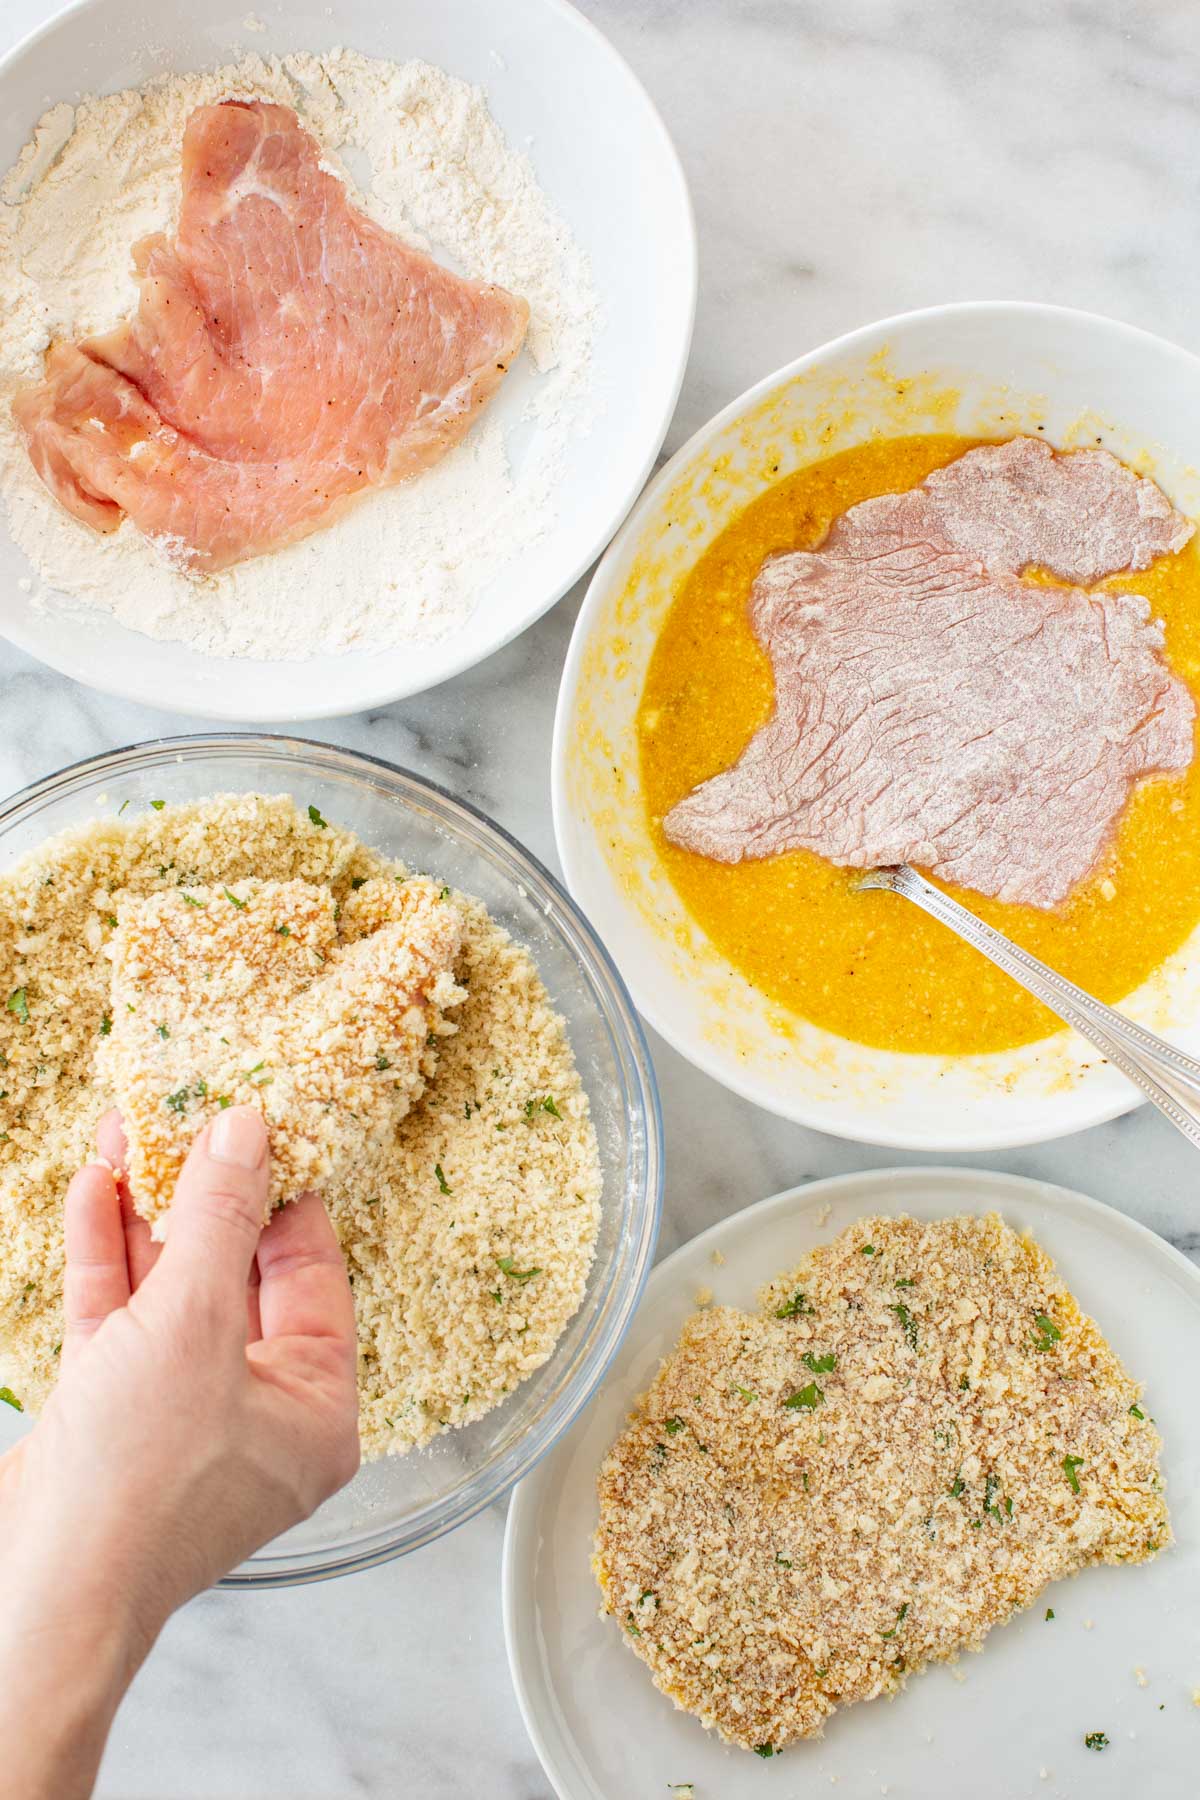
Pro Tip: When breading, designate one hand for dry (flour and breadcrumbs) and one hand for wet (raw veal and eggs) to keep your fingers from getting breaded. You can also use a fork to help you move the meat between bowls to keep your hands clean.
- Set up the breading station so that the veal is on the far left, then next to it the flour, then the egg, then the breadcrumbs, and then a landing plate or pan to hold the breaded veal.
- Take a piece of veal and dip it into the flour to coat on all sides, then tap off the excess.
- Next, dip it in the egg mixture and let the excess drip off.
- Transfer the veal into the breadcrumbs. Press it down and move it around so that it's thoroughly coated. Place the veal on the reserved plate, and repeat with the remaining pieces.
Pro Tip: Allow the breaded veal to rest for about 30 minutes before frying to help the breading adhere. You can also do this the night before, store in the fridge layered with parchment and wrapped tightly. Take them out of the fridge about 20-30 minutes before frying so they reach room temp again and cook evenly.
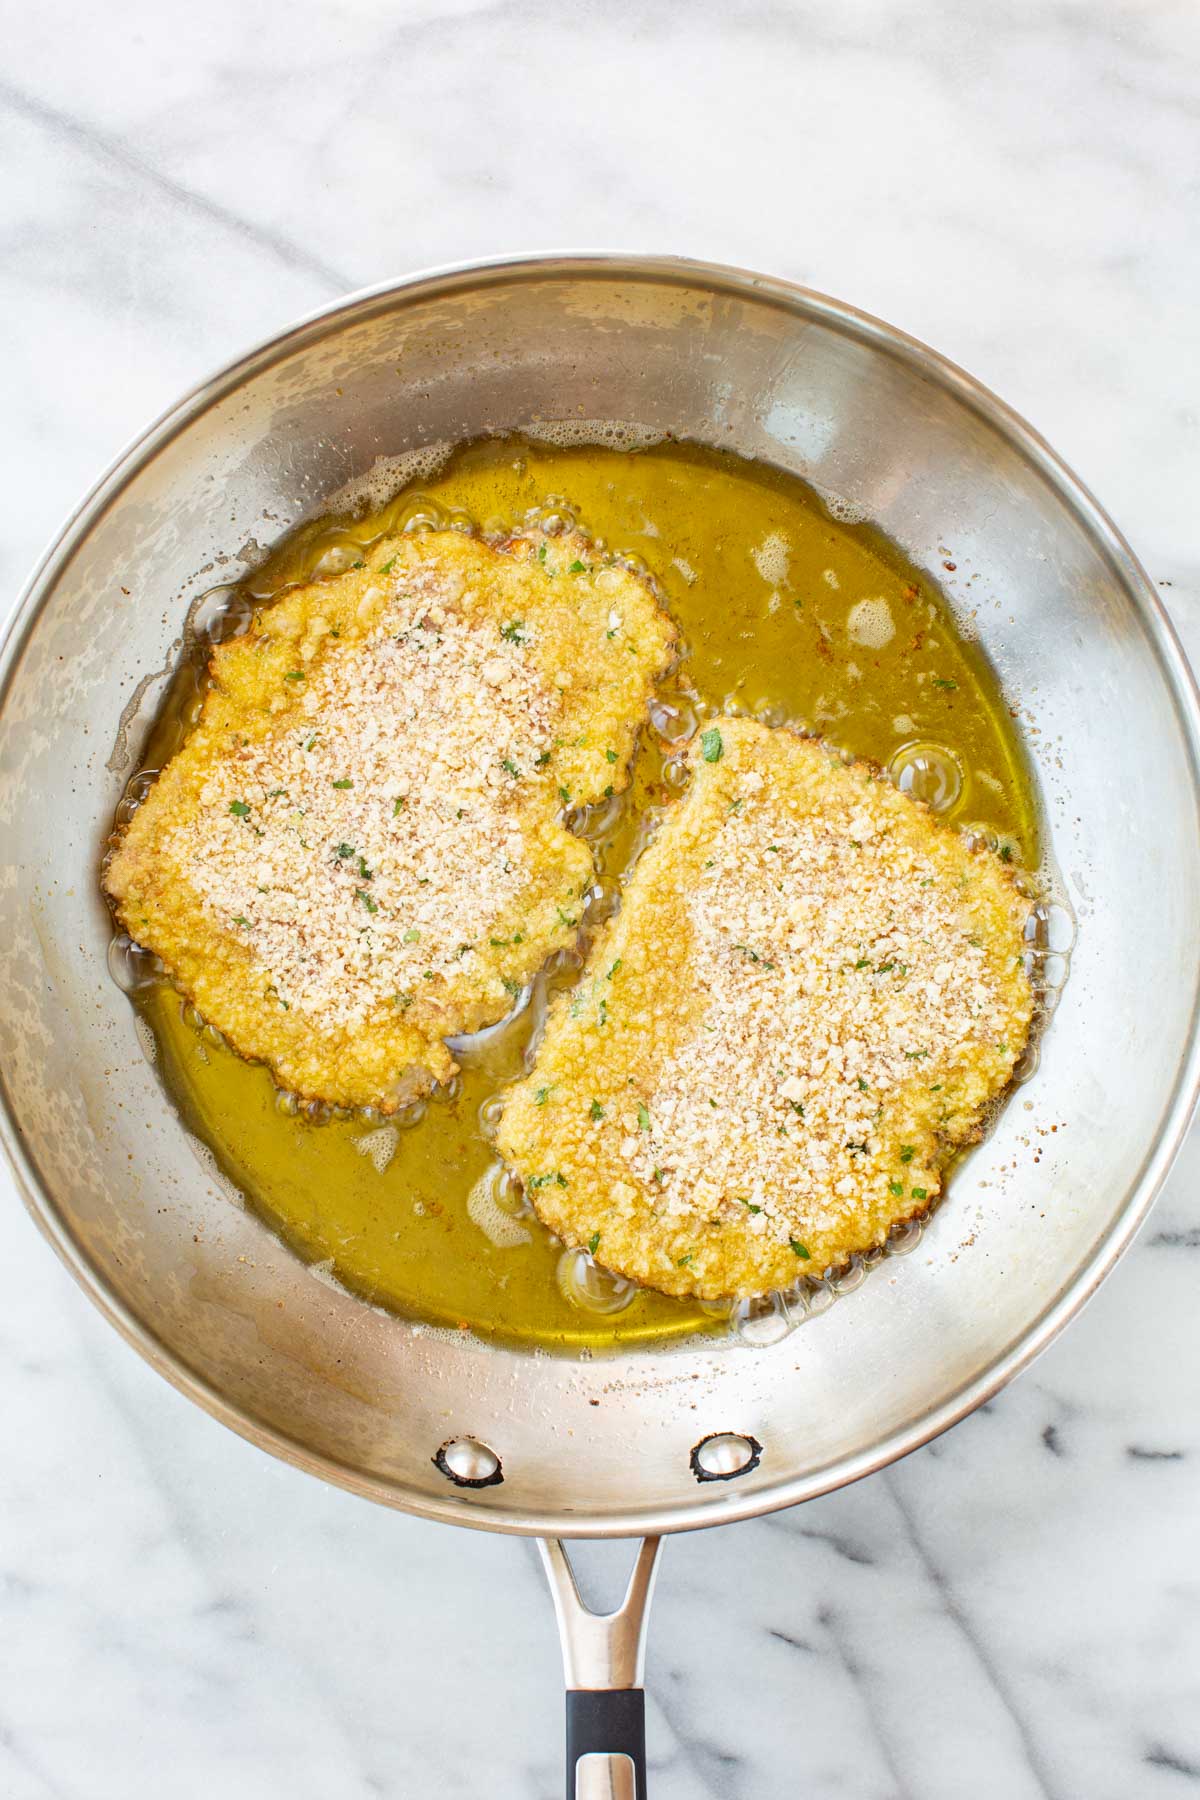
- Heat a generous amount of olive oil in a large, heavy bottomed sauté pan over medium-high heat. Place 1-3 veal cutlets in at a time, depending on how many your pan can hold. Don't overcrowd the pan.
Pro Tip: As you add the breaded cutlets to the pan, give them a gentle shake to make sure they don't stick to the bottom. Do not manipulate or flip the cutlets with tongs or other utensils until a visible crust has formed, otherwise you can tear the breading off.
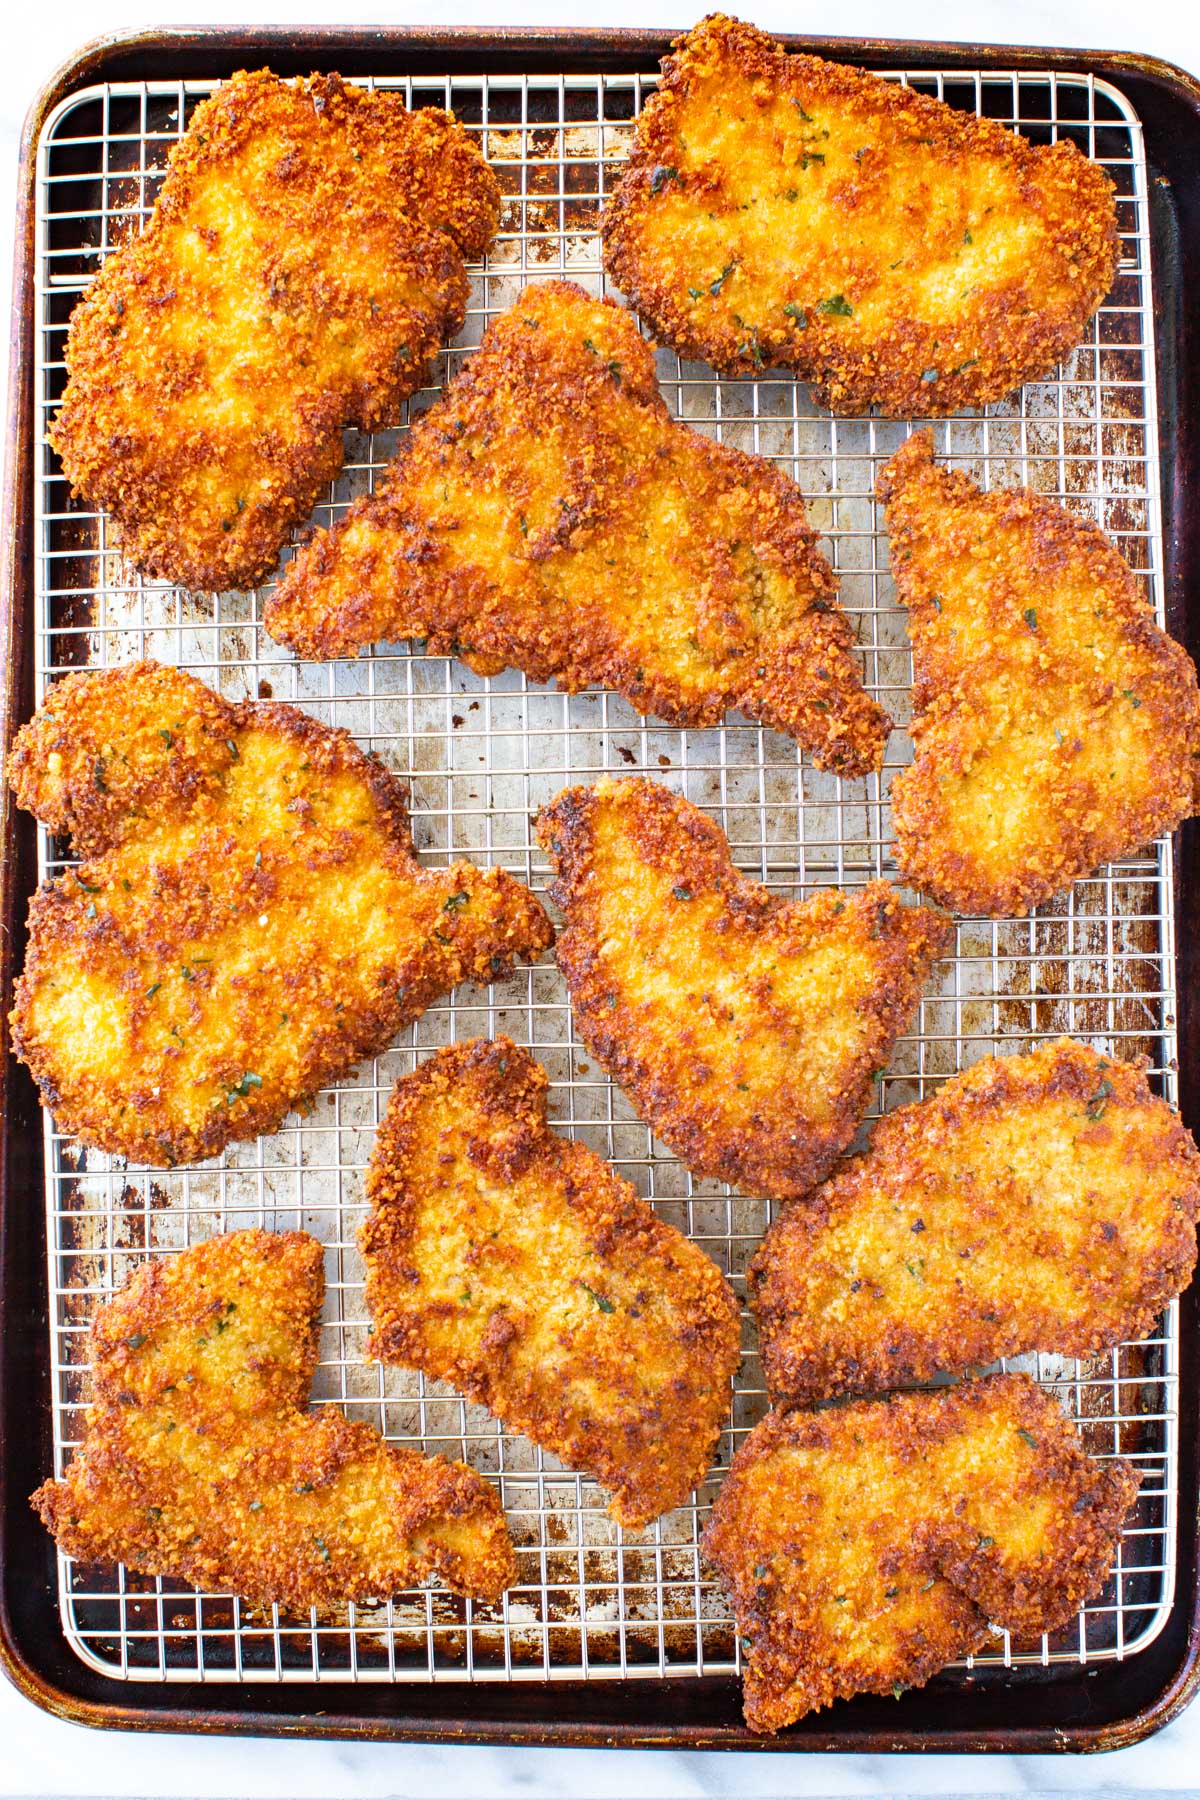
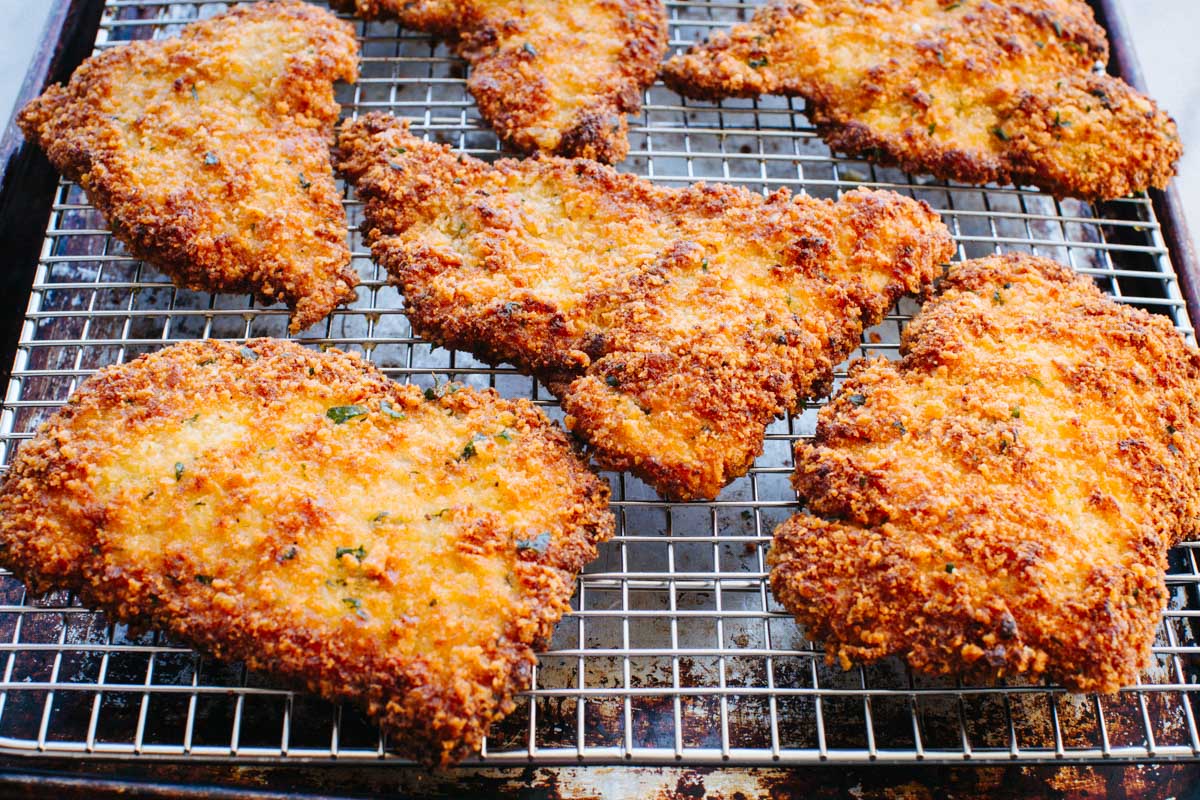
- Cook until golden brown on each side, then remove to a rack or paper towels to drain. Repeat with the remaining veal.
- Serve immediately, or place in a 250°F oven for up to 1 hour before serving to keep warm.
- Serve as is with a squeeze of lemon, with a tomato arugula salad, or smothered with marinara and mozzarella to make veal parmigiana.
Tips For Cooking Veal Cutlet Milanese
- Add a few knobs of butter to the pan while you're frying the veal for a richer flavor.
- If you have leftover breadcrumbs, freeze them in a zip-top bag and use them the next time you make Milanese.
- Don't overcrowd the pan when frying. Try not to fry more than two cutlets at a time, but depending on your pan or the size of the cutlets you may only be able to fit one.
- Use a fork to bread the veal and flip it in the pan. It works way better than tongs!
- Drain fried veal cutlets on a rack rather than paper towels to keep them crispier.
Milanese Veal Cutlet Variations
- Make this with boneless chicken breasts, thighs or pork chops instead.
- For a vegetarian option, you can use eggplant slices with the peel off.
- Use potato or corn starch instead of flour and ground nuts or seeds instead of breadcrumbs to make it gluten free, like this almond crusted chicken.
- Substitute parsley with other fresh herbs like basil or thyme.
What to Serve With Veal Milanese
Serve this perfectly crispy milanese with some fresh sides to balance the richness.
Try an easy arugula salad with pine nuts dressed with a simple balsamic vinaigrette, a traditional Caprese salad with creamy mozzarella and homemade basil oil, or add some slow roasted cherry tomato confit for sweetness and umami.
You can also use these cutlets to make into parmigiana for a different take on chicken parm.
How to Store and Reheat Veal Cutlets
Veal Milanese is best served immediately, but leftovers can be kept in an airtight container in the refrigerator for up to 3 days.
To reheat, pop the veal in an air fryer or convection oven at 450°F for 5-8 minutes to recrisp.
You can also bread the cutlets in advance and store in an airtight container in the fridge for up to 3 days before frying. Or flash-freeze them uncooked in a tray for 1-2 hours until firm. Then transfer them to a freezer-safe container, placing a small sheet of parchment to keep them from sticking.
They will store for up to 3 months. To cook them, there is no need to thaw, just fry straight from the freezer.
FAQs
The oil likely didn't reach the right temperature before you added cutlets to the pan. Next time, drop a breadcrumb in the oil to test, if it bubbles up immediately, it's ready.
Breading typically falls off due to a few common missteps. If the cutlets weren't patted dry, had too much flour, or the breadcrumbs weren't pressed in, the coating won't adhere properly. Skipping the resting time or frying in low-temperature oil can also cause it. If you flip or manipulate the cutlets with tongs before they form a crust, this can also tear the breading. Pay close attention to these details next time and you will have a nice and crispy crust!
You can always spray the cutlets generously with oil and cook them in a convection oven or an air fryer at 450°F for about 15 minutes until golden brown, flipping once halfway. However, the results will not be the same.



Did you LOVE this recipe? Please leave a star ⭐️ rating and comment and tag your creations @ColeyCooks on Instagram!
Want to Save This Recipe?
Enter your email & I'll send it to your inbox.
By submitting this form, you consent to receive emails from Coley Cooks.
Milanese Veal Cutlet
Ingredients
- 2 cups breadcrumbs homemade or panko
- 2 cloves garlic finely minced or grated
- 1 tablespoon Italian flat leaf parsley fresh, finely minced
- kosher salt and freshly ground black pepper to taste
- 3 eggs large size, use 4 if your cutlets are very thin or small
- ¾ cup Pecorino Romano or Parmigiano Reggiano cheese, or a mix of both, finely grated, divided
- ⅔ cup all purpose flour
- 1 ½ lbs veal cutlets thinly sliced
- extra virgin olive oil for frying
- lemon wedges for serving
Instructions
- Add the breadcrumbs, garlic, parsley, and ½ cup of cheese to a medium shallow bowl. Season with salt and pepper, then use your fingers to mix it together, working the garlic into the breadcrumbs until evenly distributed.2 cups breadcrumbs, 2 cloves garlic, 1 tablespoon Italian flat leaf parsley, ¾ cup Pecorino Romano , kosher salt and freshly ground black pepper
- In another medium shallow bowl, whisk together the eggs with ½ cup cheese, a pinch of salt and pepper, and 1 tablespoon of water until combined.3 eggs
- Pour the flour into another shallow bowl or plate, season with salt and pepper, and mix to combine.⅔ cup all purpose flour
- Take one veal cutlet and place it on a cutting board. Place a piece of plastic wrap over the top, then use a meat mallet to pound it out to be about ½ inch thick. Repeat with the remaining veal.1 ½ lbs veal cutlets
- Season each piece of veal on both sides with salt and pepper.
- Set up the breading station so that the veal is on the far left, then next to it the flour, then the egg, then the breadcrumbs, and then a landing plate or pan to hold the breaded veal.
- Take a piece of veal and dip it into the flour to coat on all sides, then tap off the excess.
- Next, dip it in the egg mixture and let the excess drip off.
- Transfer the veal into the breadcrumbs. Press it down and move it around so that it's thoroughly coated. Place the veal on the reserved plate, and repeat with the remaining pieces.
- Heat a generous amount of olive oil in a large, heavy bottomed sauté pan over medium-high heat. Place 1-3 veal cutlets in at a time, depending on how many your pan can hold. Don't overcrowd the pan.extra virgin olive oil
- Cook until golden brown on each side, then remove to a rack or paper towels to drain. Repeat with the remaining veal.
- Serve immediately, or place in a 250°F oven for up to 1 hour before serving to keep warm.
- Serve as is with a squeeze of lemon, with a tomato arugula salad, or smothered with marinara and mozzarella to make veal parmigiana.lemon wedges
Notes
- When breading, designate one hand for dry (flour and breadcrumbs) and one hand for wet (raw veal and eggs) to keep your fingers from getting breaded. You can also use a fork to help you move the meat between bowls to keep your hands clean.
- Allow the breaded veal to rest for about 30 minutes before frying to help the breading adhere. You can also do this the night before, store in the fridge layered with parchment and wrapped tightly. Take them out of the fridge about 20-30 minutes before frying so they reach room temperature again and cook evenly.
- As you add the breaded cutlets to the pan, give them a gentle shake to make sure they don't stick to the bottom. Do not manipulate or flip the cutlets with tongs or other utensils until a visible crust has formed, otherwise you can tear the breading off.
- Add a few knobs of butter to the pan while you're frying the veal for a richer flavor.
- If you have leftover breadcrumbs, freeze them in a zip-top bag and use them the next time you make Milanese.
- Don't overcrowd the pan when frying. Try not to fry more than two cutlets at a time, but depending on your pan or the size of the cutlets you may only be able to fit one.
- Use a fork to bread the veal and flip it in the pan. It works way better than tongs!
- Drain fried veal cutlets on a rack rather than paper towels to keep them crispier.