Homemade Ricotta Recipe
This foolproof method for homemade ricotta cheese is so easy to make. This recipe uses buttermilk as the acid to produce a super creamy ricotta with the best flavor and texture.
This post may contain affiliate links.
As an Italian American and professional chef, ricotta cheese has been a lifelong staple in my kitchen. Making cheese at home may seem impossibly difficult and time-consuming, and it can be, but homemade ricotta is actually about as easy as boiling water.
With just a few simple ingredients and minimal hands-on time, I'm going to teach you all the tricks to making the most authentic and creamy ricotta right in your own kitchen.
Let me share my time-tested techniques to help you elevate all sorts of dishes, both savory and sweet, and bring a taste of la dolce vita right to your own table!
For more ricotta recipes, try my pizza rustica, ricotta pesto pasta or ricotta gelato with pistachio and fig.
Why this Recipe Works
- Easy, beginner friendly recipe - anyone can make this!
- Uses buttermilk rather than vinegar or lemon juice for the cleanest flavor and creamiest texture.
- Only takes 20 minutes and 3 simple ingredients to make.
Ingredient Notes
- Buttermilk - Homemade cheese is produced when an acid is used to coagulate milk proteins and the curds (solids) get separated from the whey (liquids). This can be done with vinegar or lemon juice, but I've found that buttermilk produces the creamiest texture with the most neutral flavor. Since it's not as strong of an acid and already has a dairy base, it curdles the milk gently and produces a cheese that's really smooth, incredibly creamy and light. (Use leftover buttermilk to make the best waffles you'll ever have!)
- Whole Milk - Whole milk makes the creamiest, best tasting cheese. While you can still make it with 2% or even skim milk, it will not taste nearly as good. For best results, stick to whole milk.
- Heavy Cream - This makes the ricotta extra rich and delicious, but if you want a lighter version you can replace the cream with milk, light cream or half and half instead.
*Find the full ingredient list in the recipe card below!
How to make Ricotta Cheese
- Pour the milk, cream and buttermilk into a large pot and place it over medium to medium-high heat.
- Give it a stir, then let it slowly come up to a simmer (have patience) without disturbing it.
Pro Tip: Be sure to refrain from stirring the mixture as it comes up to a simmer. This will ensure the curds stay nice and large and don't break up too much, which is what you want.
- As soon as the milk just barely begins to bubble, turn off the heat. You don't want it to actually boil, but just barely start to gently simmer (190 degrees F if using a thermometer).
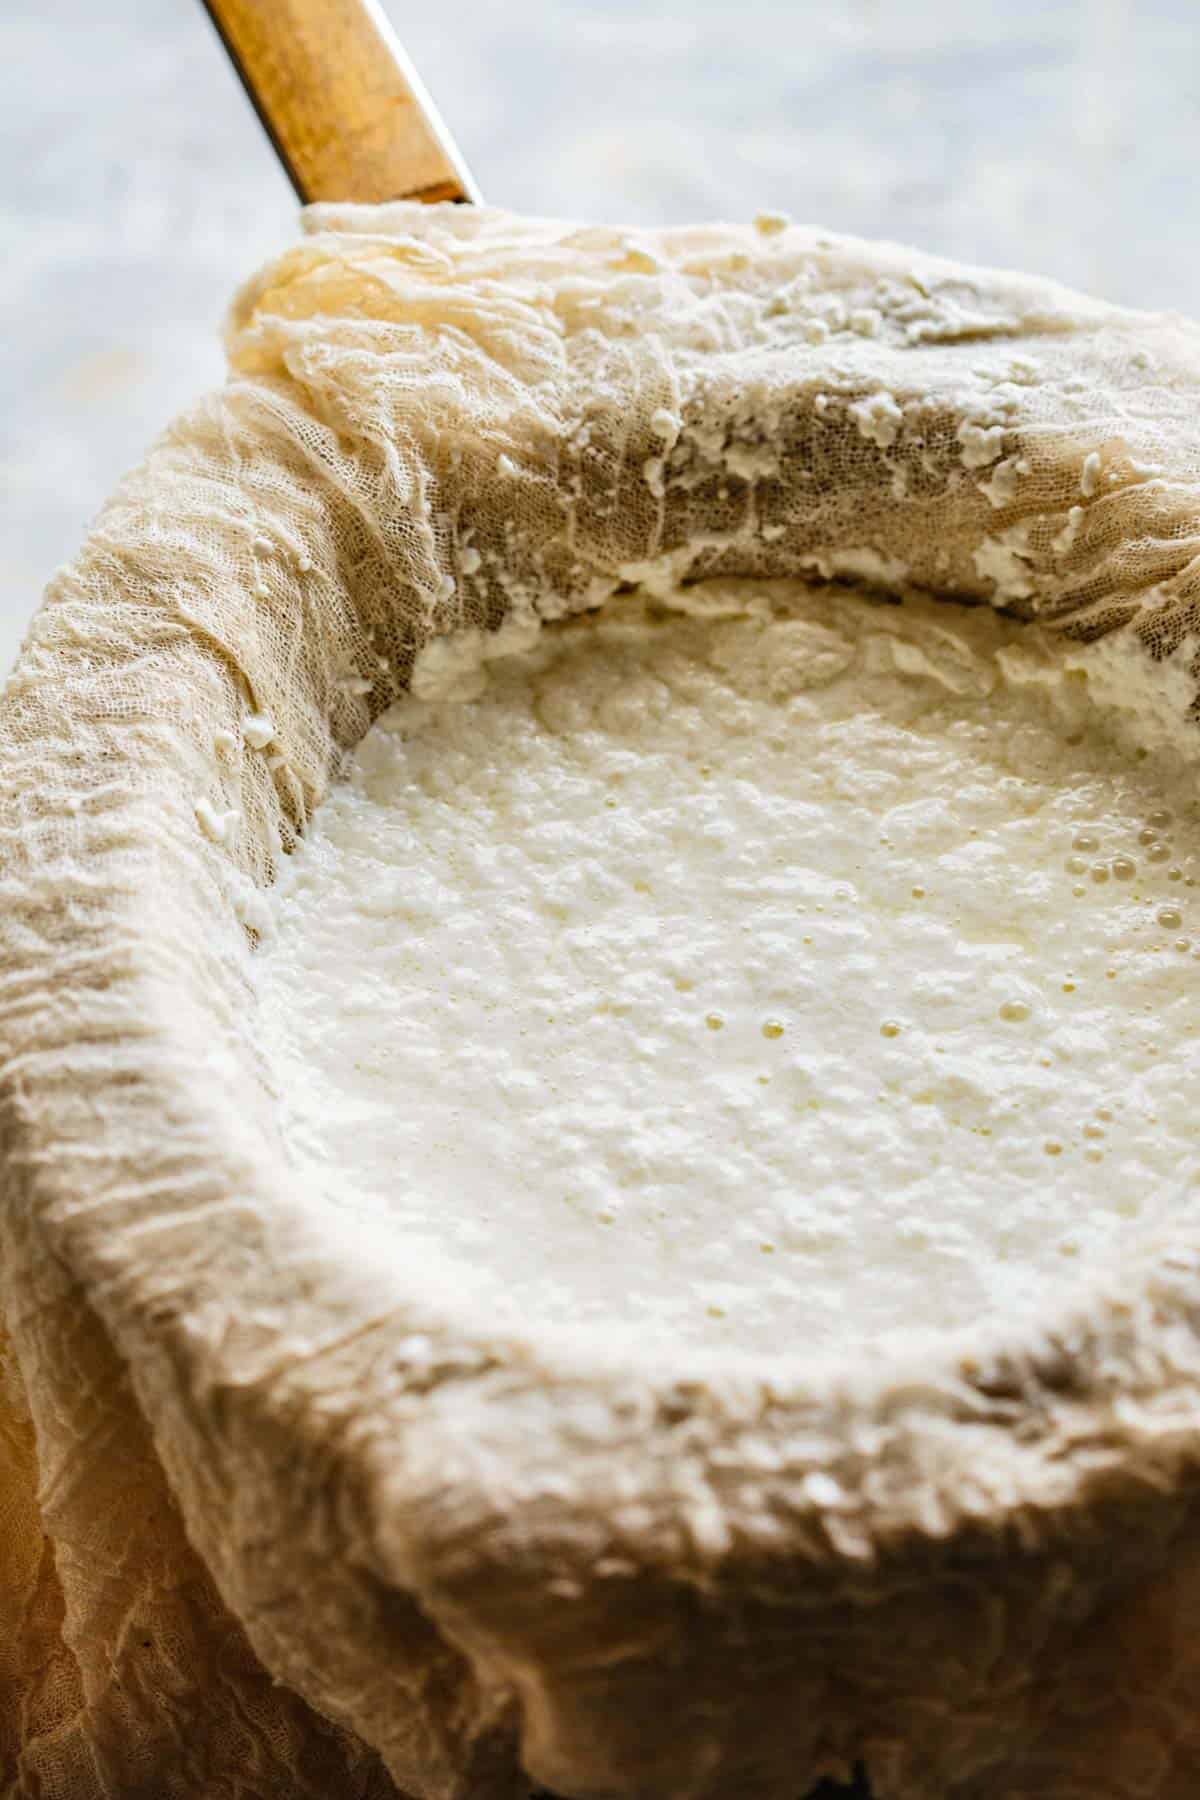
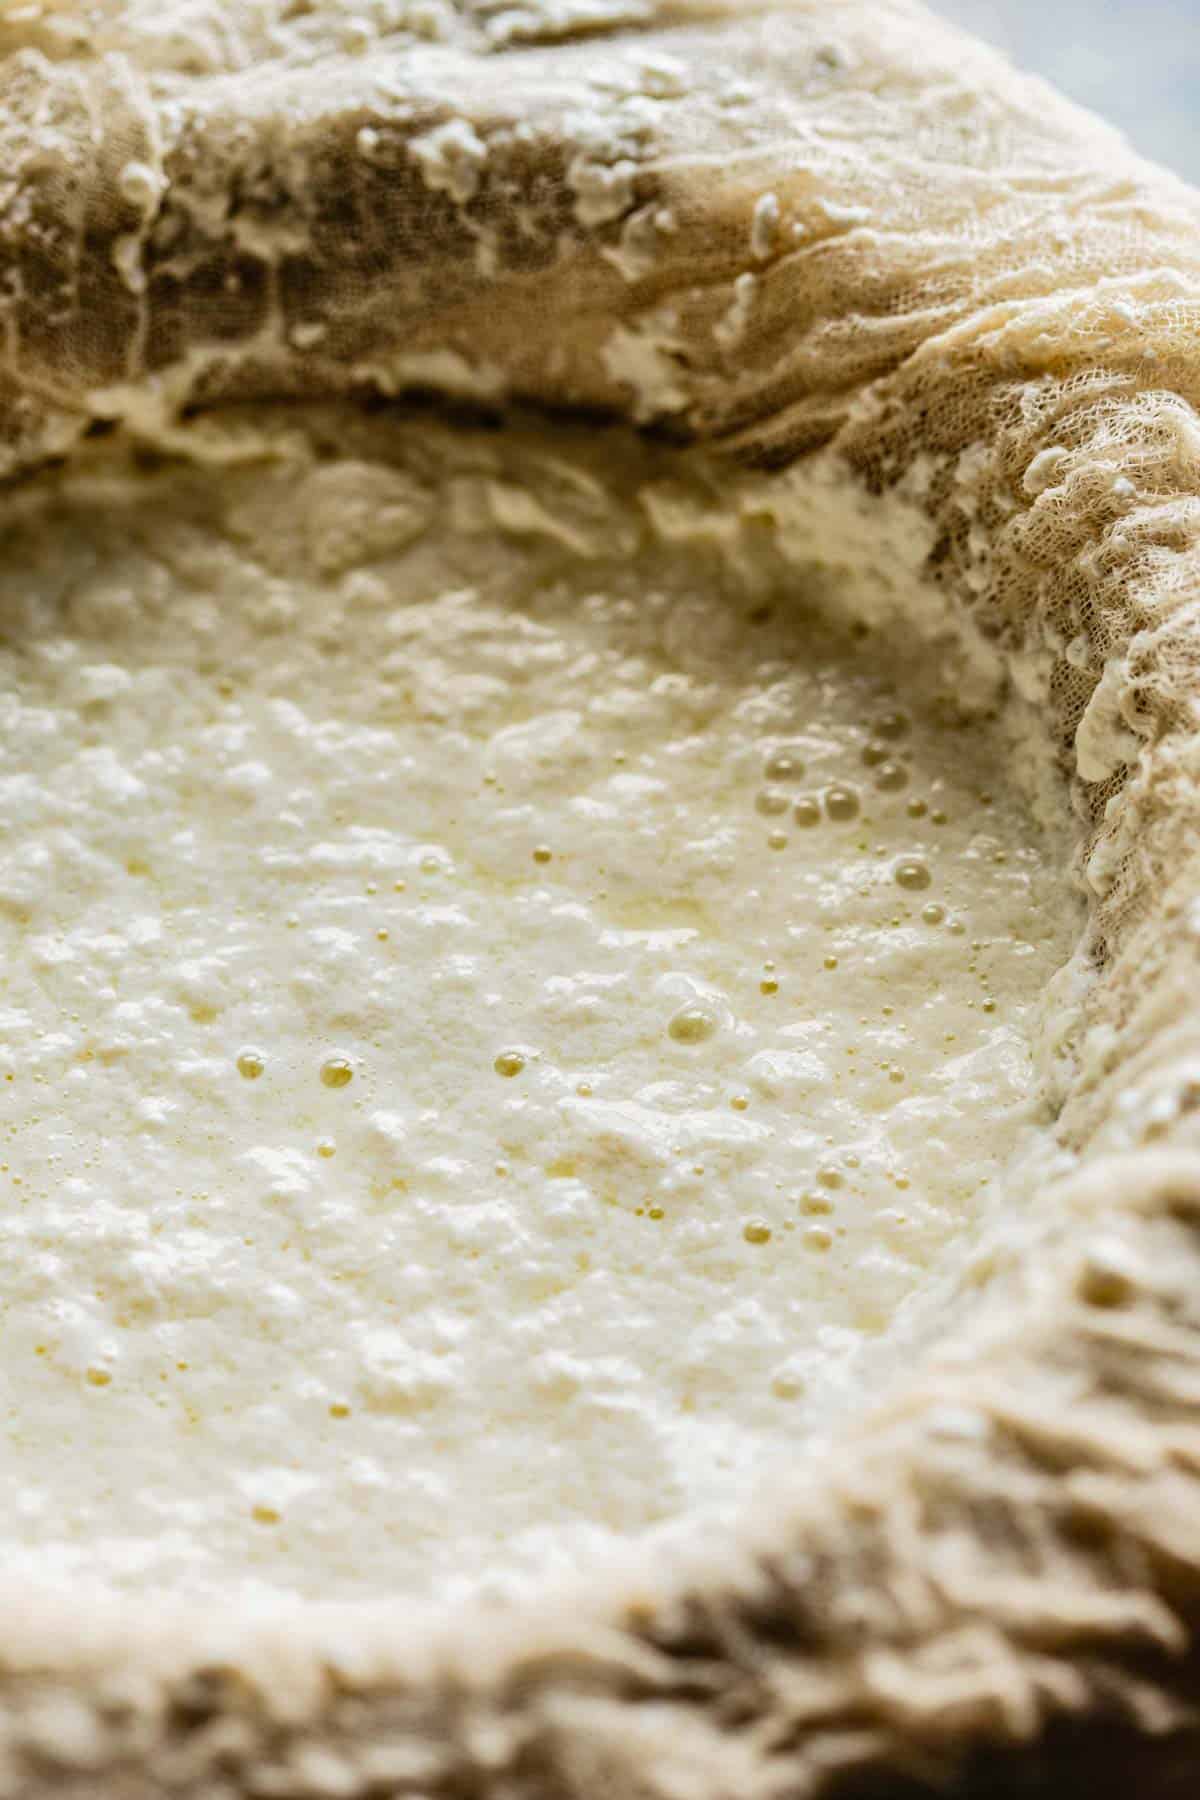
- You will begin to see the milk solids start to separate and rise to the top. Again, don't stir. Set aside for at least 10 minutes to cool, undisturbed.
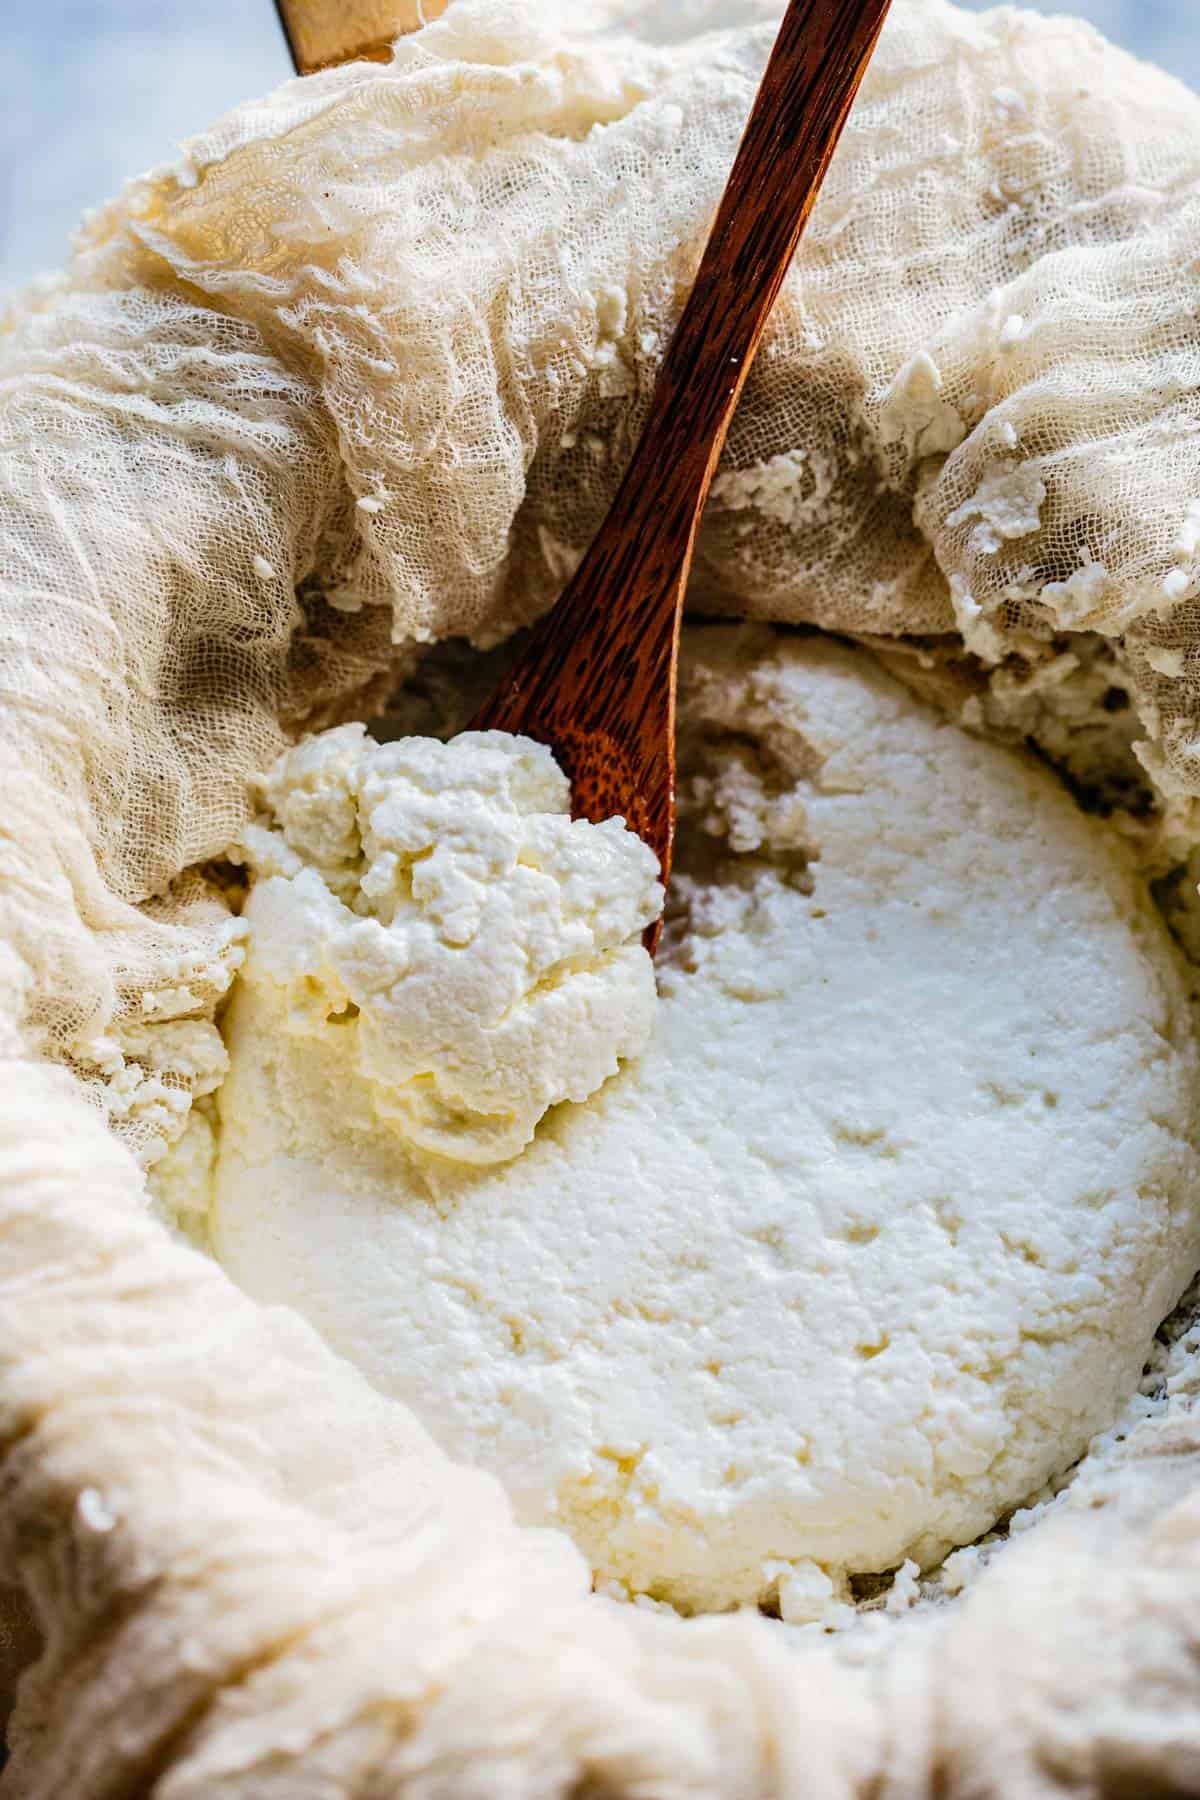
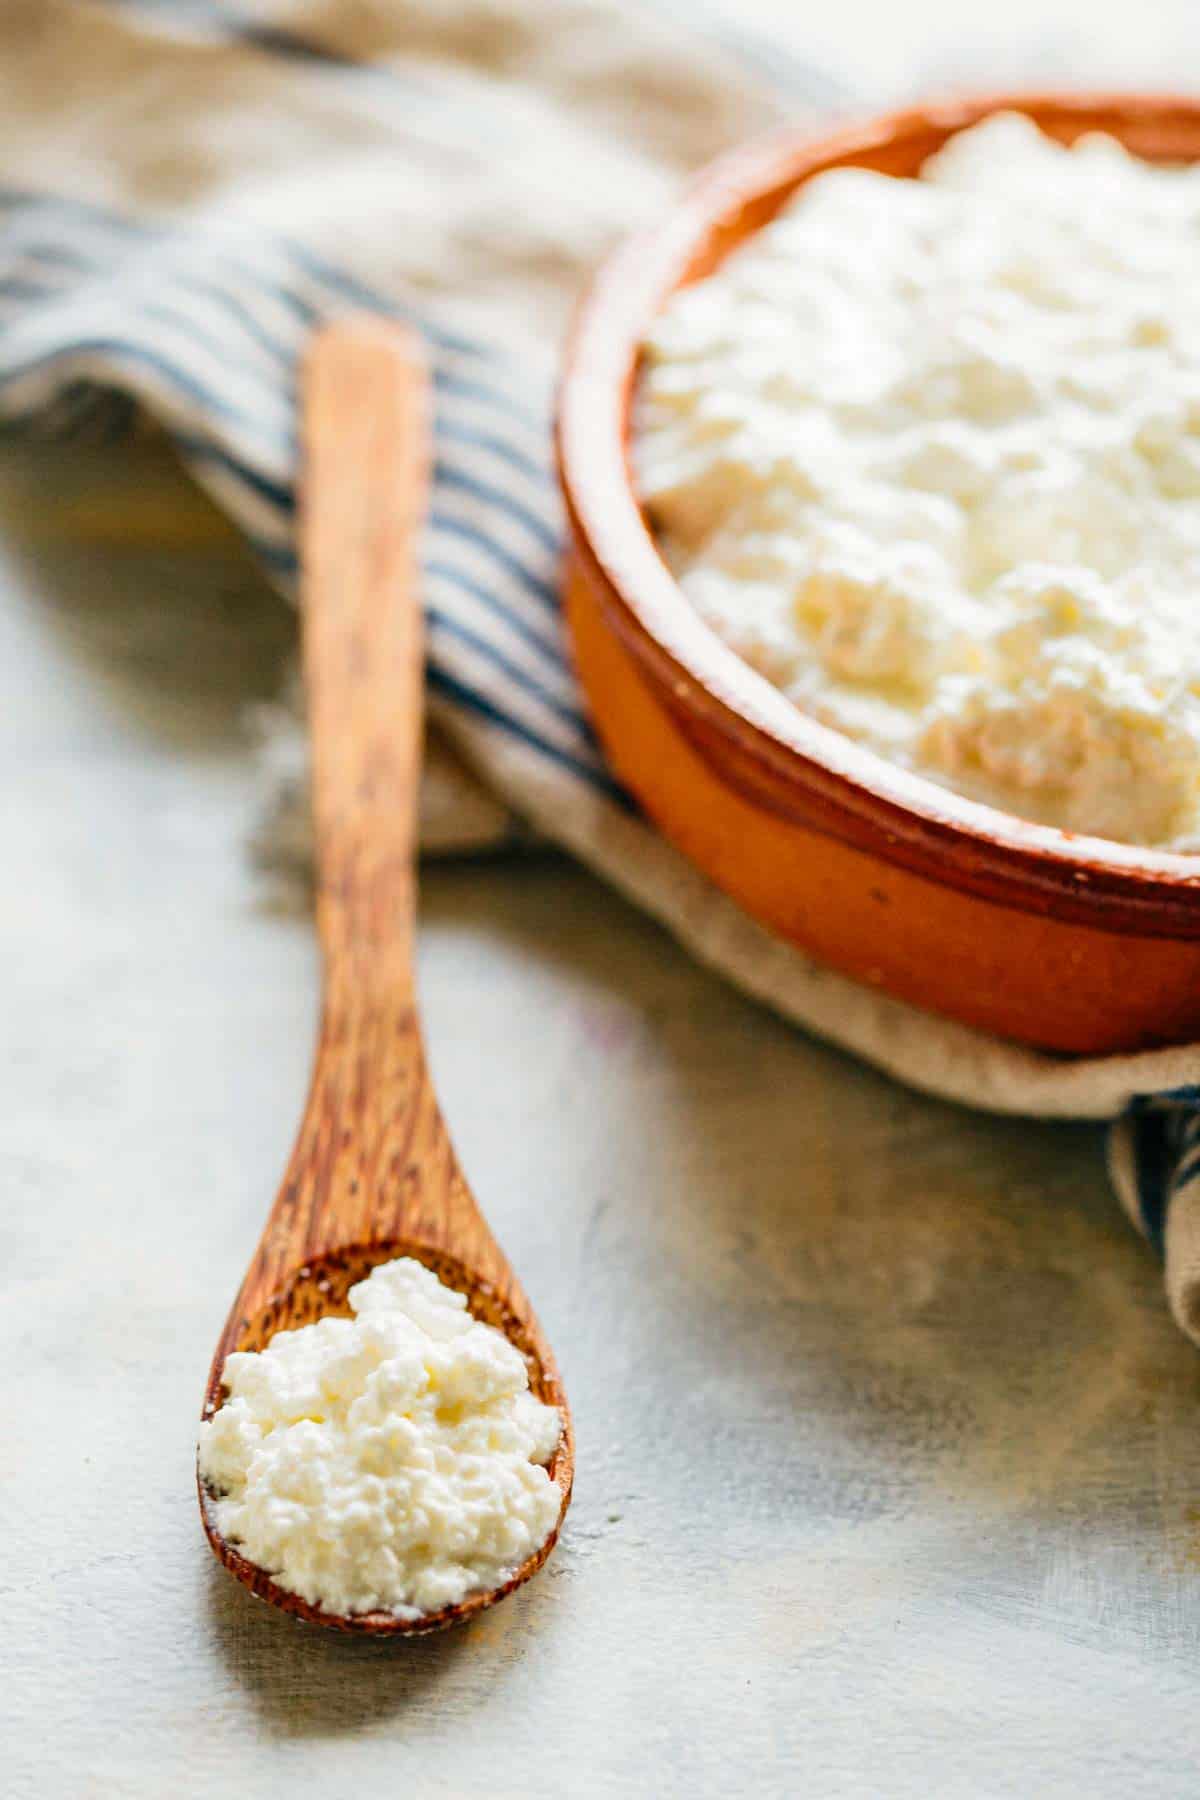
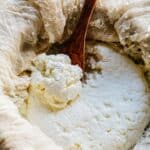
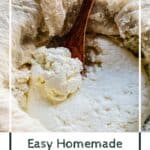
- Line a colander or strainer with a few layers of cheesecloth.
Pro Tip: If you don't have a cheesecloth, a coffee filter or a few layers of paper towels can work too. The paper towels can tear easily when wet, so handle them with care.
- Use a handheld strainer or large spoon to remove the curds from the liquid and place into the colander.
Pro Tip: Use a hand held strainer to scoop out the curds and transfer them to the cheese cloth rather than pouring the whole pot of liquid into it. This will make straining much faster and easier.
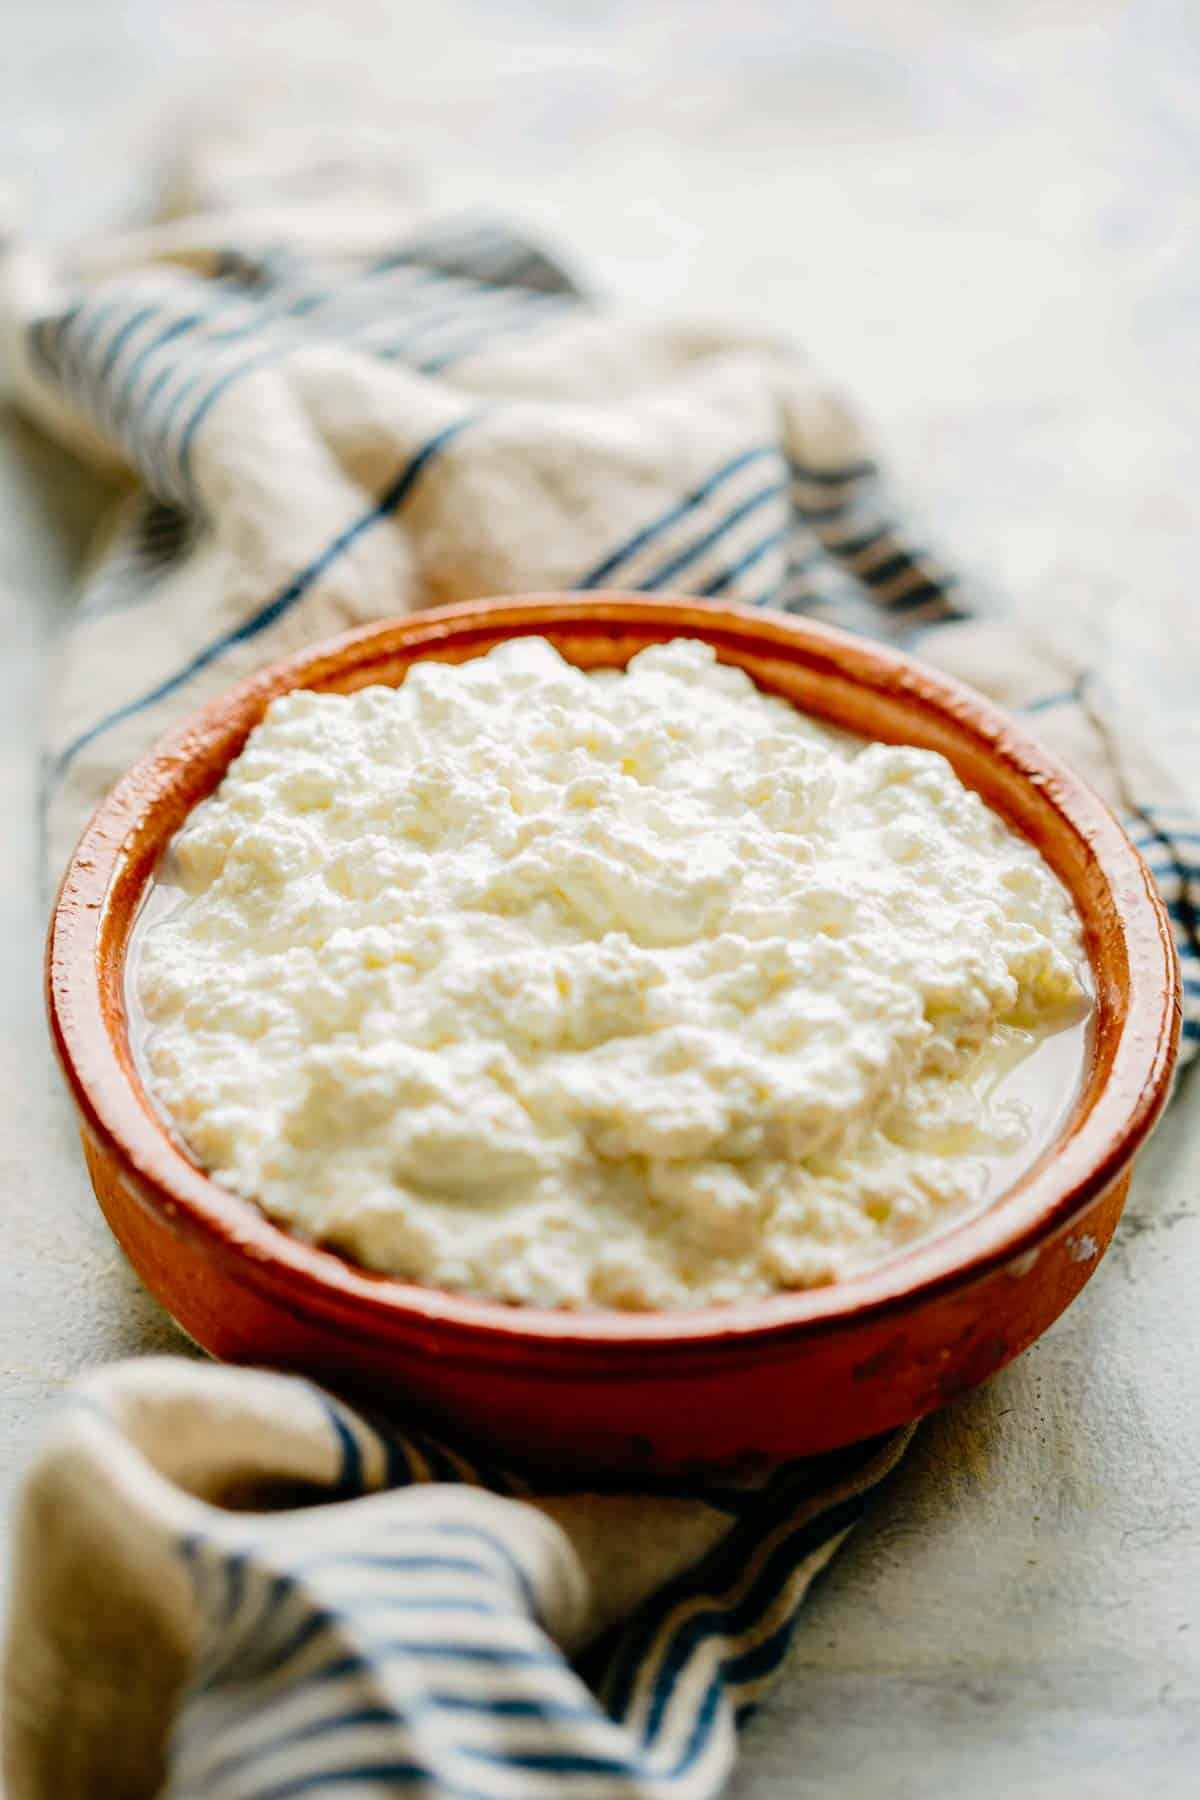
- Allow the curds to drain to your desired thickness - the longer it goes, the thicker it will get.
- Transfer to a container and refrigerate until ready to use. Homemade ricotta cheese will last in the refrigerator for about 5 days or up to 1 week.
Tips for Success
- The leftover liquid (whey) contains lots of protein and nutrients, so don't throw it out! Store it in a container, refrigerate and add it to smoothies and other recipes, like baked goods, in place of water, or use it to soak legumes, nuts or grains. It also freezes well.
- This recipe can easily be turned into Paneer or Queso Fresco by keeping it in the strainer, covering with cheesecloth, then placing a plate along with something heavy (like a large can) on top to weigh it down. Store it in the refrigerator overnight (12-24 hours) with a bowl underneath to catch the liquid. I like to mix in some salt before pressing if I'm going this route.
Serving Suggestions
This easy homemade ricotta can be used to make tons of different Italian recipes!
For breakfast, try it folded into soft scrambled eggs to make them even creamier, or whip up a batch of these extra fluffy lemon blueberry ricotta pancakes!
For dinner, use it in a homemade lasagna, stir it into homemade marinara to make a blush sauce for pasta, or spoon it on top of a Margherita pizza!
It's also traditional in my family to serve a big dollop of ricotta with homemade meatballs or Italian Sunday gravy.
Try it on this grilled zucchini bruschetta for an appetizer or with peas and prosciutto as a delicious side.
My favorite use for it, though, is in dessert. Whether it's an Italian style cheesecake, Sicilian cannoli, ricotta pie or ricotta cake or ricotta cheesecake, you cant go wrong!
FAQs
Homemade ricotta cheese can be used the same way you would use store bought - in lasagna, cheesecake, ravioli, stuffed shells, whipped, in pancakes, etc. That said, my favorite way to eat it is smeared on a piece of toasted bread with a little bit of flaky sea salt and honey. So good!
I prefer to keep the cheese unsalted so that you can use it in sweet applications, but also because I love the contrast of the mellow, creamy cheese with some flaky sea salt sprinkled over top. If you want to add some salt, ¼ - ½ teaspoon will do.
Unlike store-bought, which has preservatives to keep it fresh, homemade ricotta will perish much quicker. It stays fresh for about 5-7 and does not freeze well.
Yes, this cheese does not need to be cooked and can be eaten as-is.
No, they are not the same. Ricotta has a smoother, creamier texture compared to the larger curds in cottage cheese, and has a slightly sweeter, more delicate flavor. Ricotta also contains less moisture and fat than cottage cheese since it's traditionally made from recooking whey rather than fresh milk.


Did you LOVE this recipe? Please leave a star ⭐️ rating and comment and tag your creations @ColeyCooks on Instagram!
Want to Save This Recipe?
Enter your email & I'll send it to your inbox.
By submitting this form, you consent to receive emails from Coley Cooks.
Ricotta Recipe
Ingredients
- 6 cups whole milk
- 2 cups heavy cream
- 3 cups buttermilk
Instructions
- Pour the milk, cream and buttermilk into a large pot and place it over medium to medium-high heat.
- Give it a stir, then let it slowly come up to a simmer (have patience) without disturbing it.
- As soon as the milk just barely begins to bubble, turn off the heat. You don't want it to actually boil, but just barely start to gently simmer (190 ℉ if using a thermometer).
- You will begin to see the milk solids start to separate and rise to the top. Again, don't stir. Set aside for at least 10 minutes to cool, undisturbed.
- Line a colander or strainer with a few layers of cheesecloth *(see note).
- Use a handheld strainer or large spoon to remove the curds from the liquid and place into the colander *(see note).
- Allow the ricotta to drain to your desired thickness - the longer it goes, the thicker it will get *(see note).
- Transfer to a container and refrigerate until ready to use. Homemade ricotta cheese will last I the refrigerator for about 5 days or up to 1 week.
Notes
- Be sure to refrain from stirring the mixture as it comes up to a simmer. This will ensure the curds stay nice and large and don't break up too much, which is what you want.
- Use a hand held strainer to scoop out the curds and transfer them to the cheese cloth rather than pouring the whole pot of liquid into it. This will make straining the ricotta much easier.
- No cheese cloth? A coffee filter or a few layers of paper towels can work too. The paper towels can tear easily when wet, so handle them with care.
- The leftover liquid (whey) contains lots of protein and nutrients, so don't throw it out! Store it in a container, refrigerate it and add it to smoothies and other recipes, like baked goods, in place of water, or use it to soak legumes or grains. It also freezes well.
- Homemade ricotta can easily be turned into Paneer or Queso Fresco by keeping it in the strainer, covering with cheesecloth, then placing a plate along with something heavy (like a large can) on top and storing it in the refrigerator overnight (12-24 hours) with a bowl underneath to catch the liquid. I like to mix in some salt before pressing if I'm going this route.


Made this recipe along with one using vinegar. Hands down this recipe using buttermilk is amazing. I cut it in half and added a pinch of fine sea salt and every time I open my fridge I take a bite. It’s that addictive. I already sent the recipe to brother who makes lasagna and told him he will never buy store bought again. I also made the meatball recipe!! Best recipe I’ve found other than my Italian grandma’s. So much less dense which is so good. I can never seem to get my grandma’s to be that light.
I'm so glad you love the recipe! Thanks for leaving a review 🙂
Hi I’m excited to try this recipe. Can I half the ingredients equally to make a smaller batch?
Also is there a reason why salt isn’t included in the recipe? Many others call for salt.
Thank you. Can’t wait to make this.
Great questions! Yes, you can absolutely cut this recipe in half to make a smaller batch. The reason my recipe does not include salt is so that it is appropriate for both savory and sweet applications. I love eating it with a sprinkle of flaky sea salt on top for contrast! That said, you can absolutely add a pinch of salt to suit your taste - it will not affect the recipe. Let us know how it turns out!
Okay I cut in half. I did your recipe with a dash of salt and then a vinegar recipe. Both easy to make. I just did a taste test and OMG your recipe is so creamy and good I could eat it like ice cream. The vinegar one was good but much firmer and didn’t taste as smooth. Thank you so much. Just sent recipe to my brother
I agree the buttermilk provides the best texture and flavor! Vinegar and lemon juice just aren't the same. I love that you did a side by side comparison!
Very easy to make them to the detailed descriptions. Delicious.
So glad you loved the recipe! Thanks for leaving a review!
This is by far the best ricotta cheese I've ever tasted. I was second guessing how easy it was the whole time, but it worked. The heavy cream makes it.
Thanks Deb! So glad you loved it 🙂
I dont' know if it's the heavy cream or the buttermilk but this turned out better than any homemade ricotta recipe I've ever tried (and I've tried a few). It was soooo creamy, I couldn't stop eating it!
So glad you love it!
Ithis is great as many recipes using ricotta ask for full fat ricotta but stores only carry low fat.
So true! Glad you love it!
I've got some extra raw milk and buttermilk right now (and I ALWAYS have heavy cream on hand!) so I think I will try this.
Question.... Do you wash and reuse your cheesecloth or do you just chuck it? It seems like a lot needs to be used for this.
You only need two layers or so of cheesecloth for this so it's really not that much. But to answer your question, yes! I always wash and reuse for as long as I can (which is usually a while). It holds up better than you'd think. I still have the cheesecloth I used in this video a year ago!
This is awesome! I've heard about making it at home but have always been intimidated- I know I just need to try and it'll be great. Yours looks so good!
Thanks, Allie!! You MUST give homemade ricotta a whirl. You'll be amazed at how easy it is!
Hi Nicole -- love your blog and your videos!
What if you wanted to make a low fat version? Would low fat milk or cutting out the heavy cream work the same way?
Also, how long will it last in the fridge after it's made?
Thanks!!
Thanks, Rebecca!! You can totally make this lower fat buy swapping out the heavy cream for lower fat milk. I wouldn't go totally skim though, as I'm not sure how well it would work. It won't be quite as rich and creamy, but will still be very good!! If you make it with low fat milk, let me know how it turns out!
So, I made it with lowfat milk (1%), instead of the heavy cream. It didn't come out as creamy as yours did -- this could also be because I let it drain for about 10 minutes; I think I'll scoop it out sooner next time. However, it was still delicious!! I'm totally hooked! So simple too, like you said. Thanks again for the post!
Hi! I'm the girl you met you at the Pittsburgh airport a few weeks ago.
I loved your homemade Ricotta video (all your videos I have seen so far are so well done and fun to watch)! I recently made Ricotta for the first time. I used vinegar, and now I want to try again using buttermilk like you recommended.
Thank you!
Hey Joanna! Thank you so much for commenting. I'm so glad to hear you like my videos! You should totally retry making ricotta with the buttermilk - I think it makes a big difference and really gives a much better texture and all around flavor. Report back! Hope you had a great trip. Hope to hear from you again. 🙂