How To Carve A Turkey

Learning how to carve a turkey can be intimidating, but with the proper technique, you'll be able to do it like a pro in no time! This is an easy (and clean) step-by-step method of carving turkey that won't leave you floundering on Thanksgiving in front of your friends and family.

This post may contain affiliate links.

Sliced turkey on a white platter with sprigs of fresh herbs.

Whenever you think of Thanksgiving, one of the first things that comes to mind is food!

Many people live for the medley of homemade side dishes like creamy potato gratin and Brussel sprouts salad with kale and apples. Even desserts such as a classic apple pie are a must.

Of course, the centerpiece of a Thanksgiving meal is usually a big roasted turkey.

If you’re like me, you want to serve something that looks as good as it tastes. I know from experience that carving a turkey can feel intimidating, especially if everyone is watching you do it.

But don't worry - I'm here to help!

One of the first techniques I ever learned as a chef was how to carve a variety of meats, including a cooked turkey. As a trained professional chef, that has come in very handy around the holidays. Not only does carving a turkey properly have visual appeal, but the way you carve your cooked turkey can affect the taste and texture too.

It will come as no surprise that chefs have a few tricks up their sleeves to make the entire process easier and mess-free.

In this blog, I'm going to share with you my tried-and-true method for carving a turkey like a pro!

Why this method works:

  • Easy enough to keep turkey carving simple and quick.
  • No meat left behind! Doesn't leave any wasted meat on the turkey bones.
  • End up with juicier slices of turkey meat.
  • Carving is easily adjustable depending on the size and shape of your turkey.
  • Results in beautiful slices when served at the table.
  • Will leave your guests super impressed!

Helpful equipment

  • Knife - The most useful piece of kitchen equipment you'll need is a sharp carving knife. Having a great carving knife or chef's knife can make a significant difference in how quickly and neatly you can carve a turkey. An electric carving knife is also a good option, but it can sometimes be a bit harder to have control over how you slice.
  • Knife sharpener - Next to a great sharp knife, a knife sharpener (or honing steel) is key. Make sure to run your knife through the sharpener before you begin. You might want to wipe it down and run it through once more if you feel like you're having a hard time cutting through the turkey.
  • Kitchen shears - A good pair of kitchen shears is also helpful for getting through the tougher areas of the turkey, like the joints, as well as any twine wrapped around it.
  • Carving board: You can use a regular cutting board or a special carving board. I recommend getting a carving board with well-etched grooves to catch all of the juices from your turkey.
  • Carving fork - A large metal fork is also helpful for stabilizing your bird as you cut the slices. It's much easier (and safer) than trying to hold it in place with just your hands.
  • Platter - Make sure to have a large enough serving platter to place all your carved turkey on. Alternatively, you can have two smaller platters - one for dark meat and one for white meat.
  • Optional: food safe gloves - Wearing a set of food-safe latex or vinyl gloves can be helpful for keeping your hands clean. You can also opt for silicone grilling gloves, which will keep your hands protected from the hot turkey juices.
A cooked turkey on a wooden cutting board ready to be carved.

Step-by-step instructions

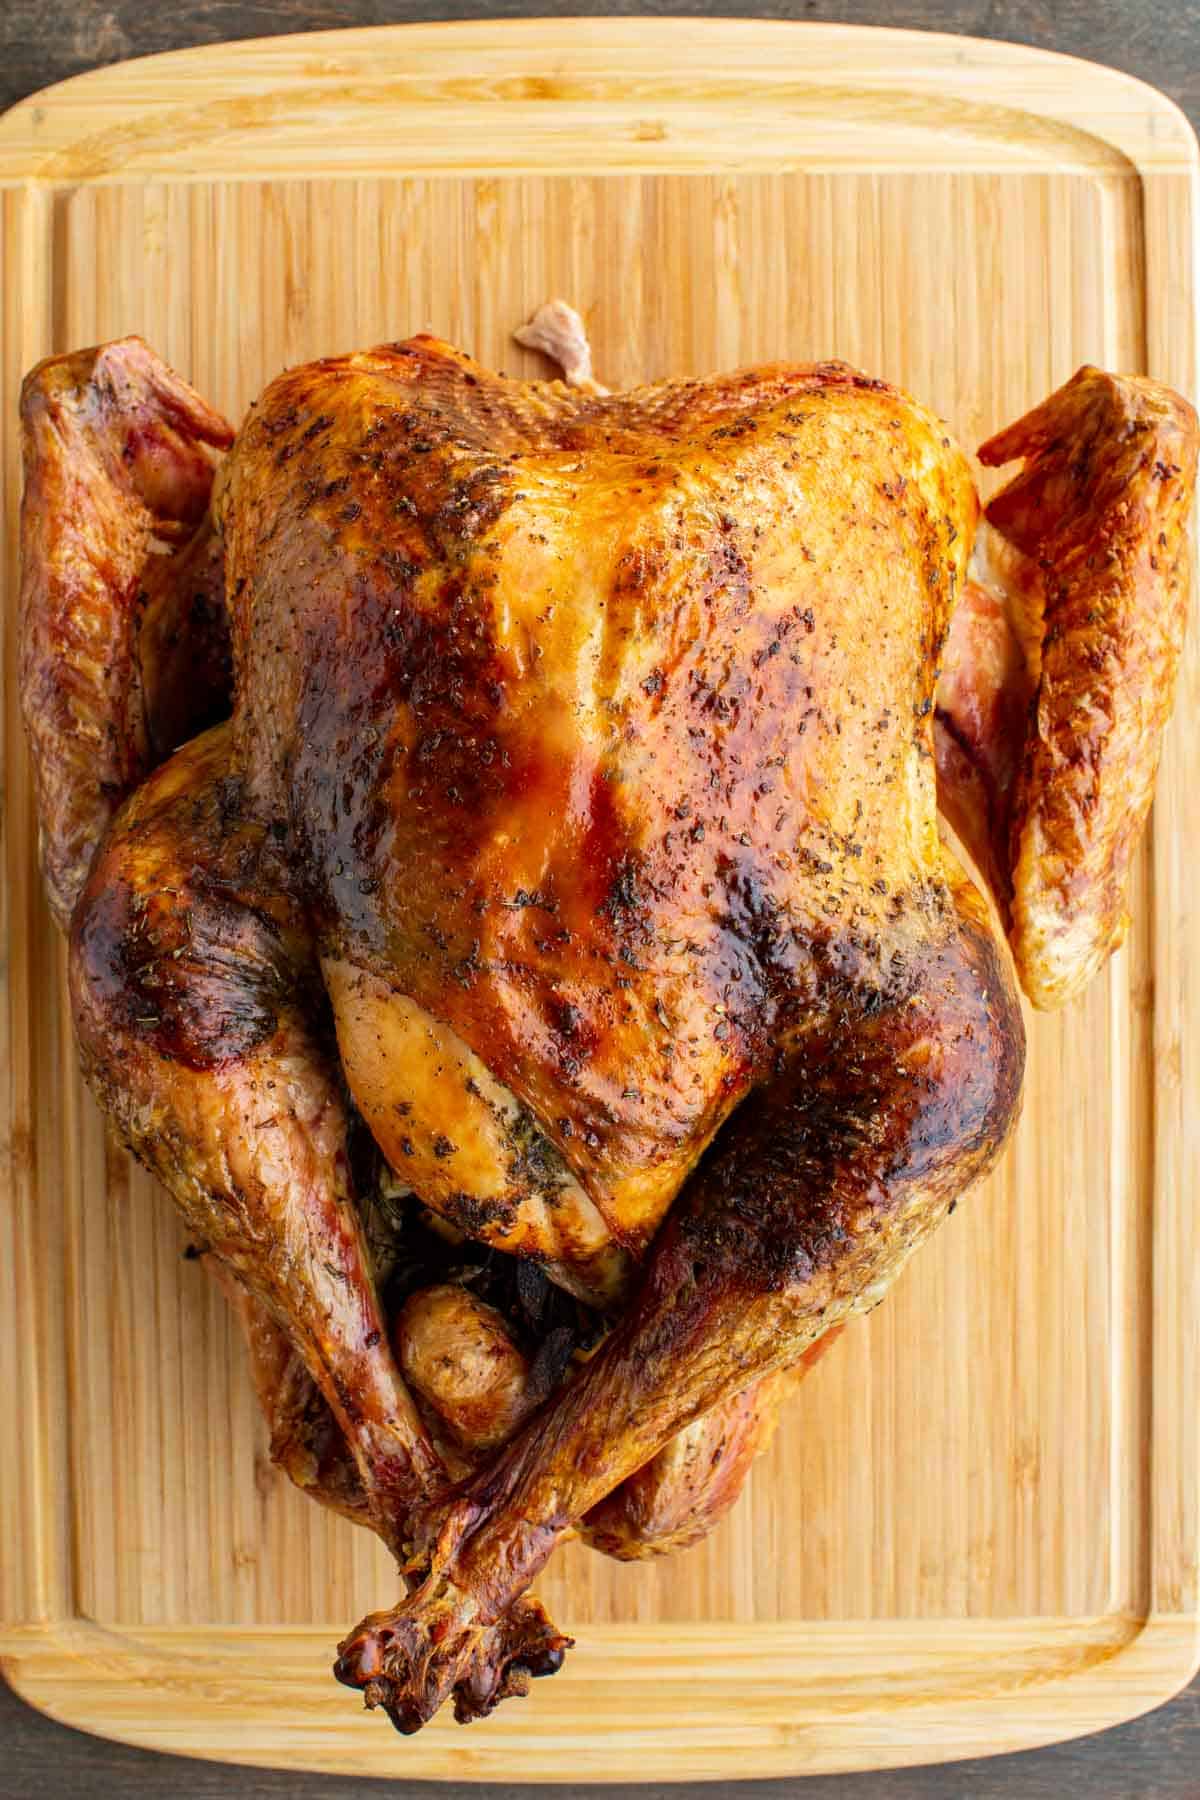
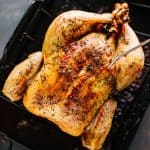
First things first: make sure you have allowed your turkey to rest for a minimum 20 minutes after taking it out of the oven. This will allow for juicier meat, which is always a win!

Removing the leg from a whole roasted turkey.
Removing the wing from a whole roasted turkey.

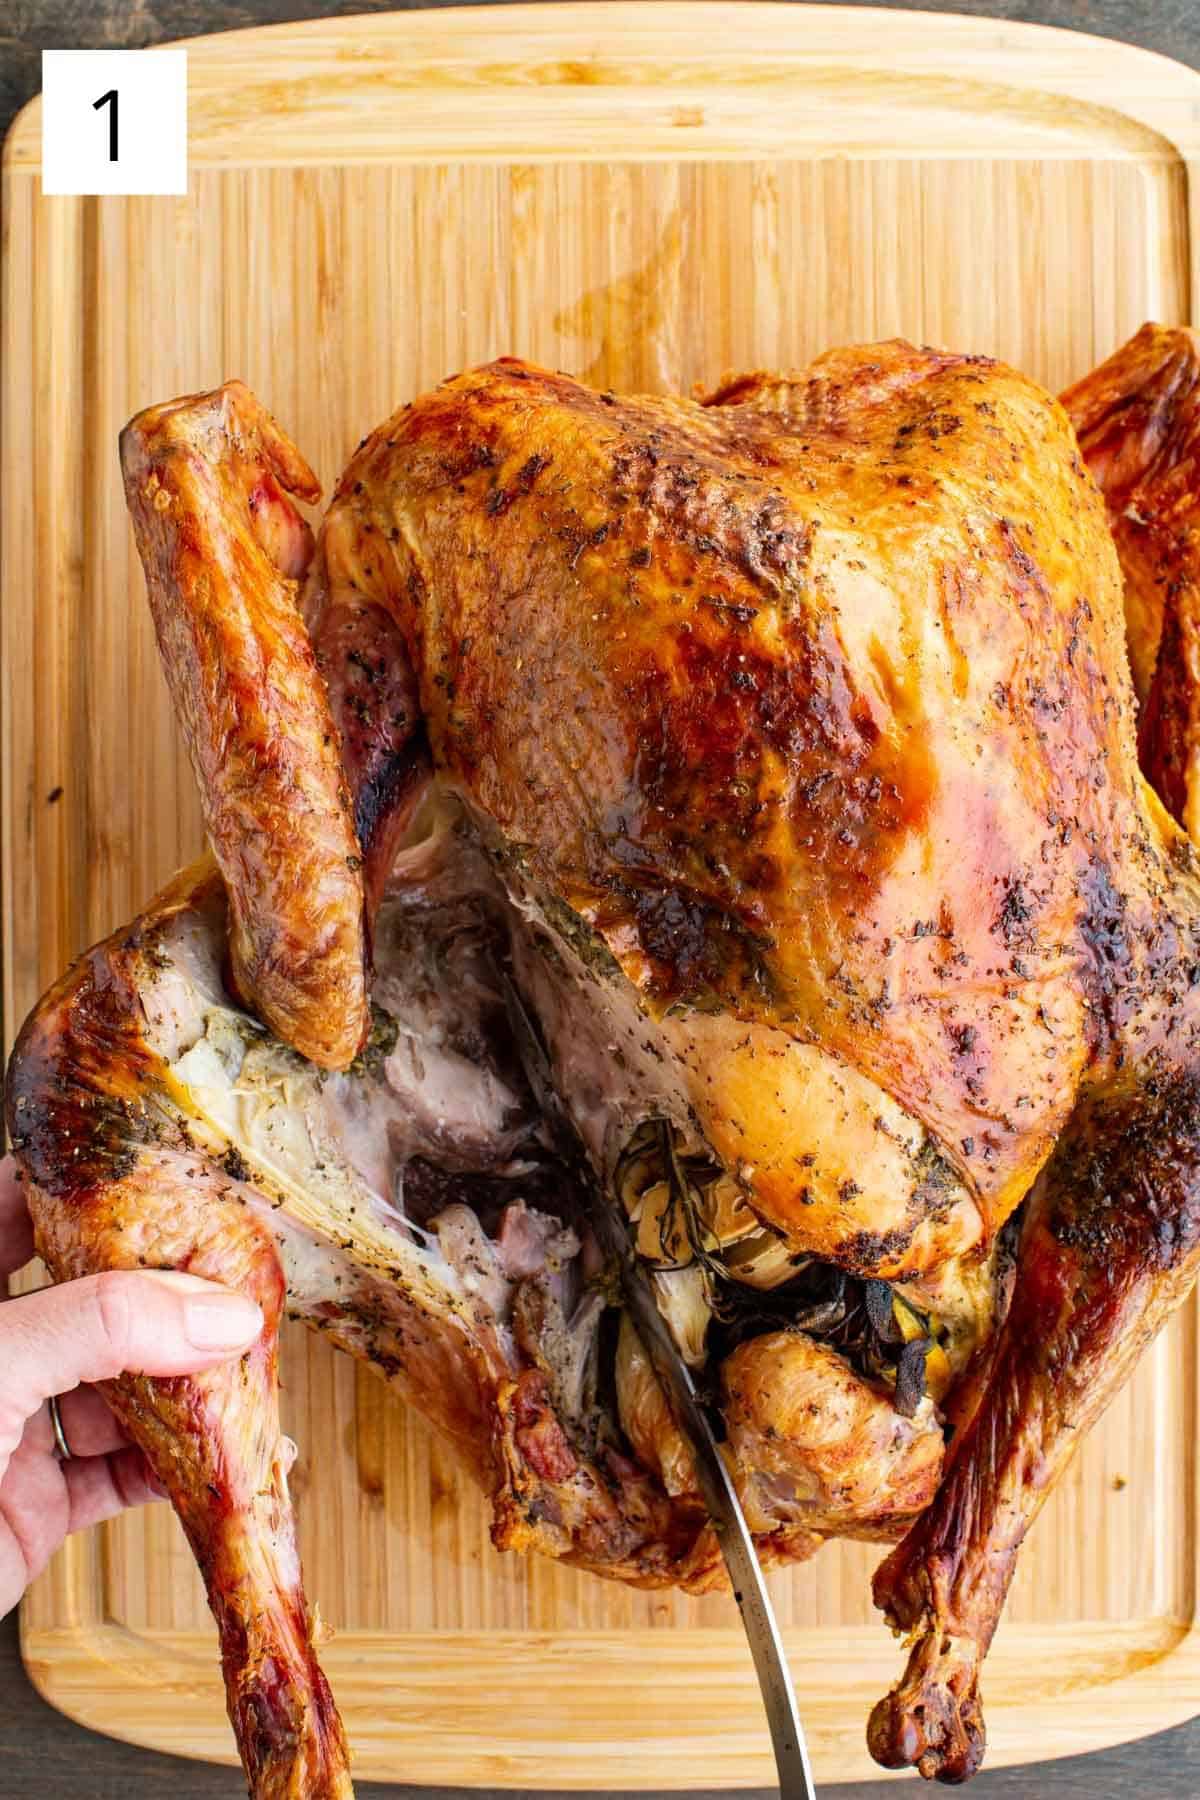
1. Once it's time to carve, carefully remove the turkey legs and thighs by slicing the connecting skin between the leg and breast. Gently pull it away from the breast and cut close to the body with your knife.

Repeat on the other side and cover with foil to keep them warm on the platter.

2. Next, remove the wings by pulling and cutting them at the joints. If they pull off without the drumettes, that's ok.

Pull the drumettes away from the body, slice through the joints, and use the knife to remove the meat from the bone. Transfer the drumettes and wings to the serving platter.

After removing the turkey wings, it's time to learn how to carve a turkey breast.

How to carve turkey breast.
Separating the drumstick from the thigh on a roasted turkey.

3. Locate the breast bone on the top of the turkey using your fingers. Using the carving fork to hold the turkey in place, carefully slice down one side of the breast bone, following its curve, to remove the breast.

Pull the breast outward as you slice, using your hand to assist. Slice horizontally on the bottom if needed to completely remove the breast.

Once you have carved the turkey breasts, remove the carcass from the cutting board and wipe down the board with a wet rag or clean paper towel.

Repeat the process on the other side, then use the knife to carve any remaining meat left on the breast bone. Plate the breast meat and cover with foil to keep it warm.

4. Take each leg and turn them skin-side-down on the cutting board. Locate the separation from the thigh and gently wiggle the knife into the joint while pulling the drumstick apart. Slice through the meat to separate it completely.

Using a knife to wiggle into the joint to pull the drumstick apart from the thigh.
Slicing up roasted turkey breast.

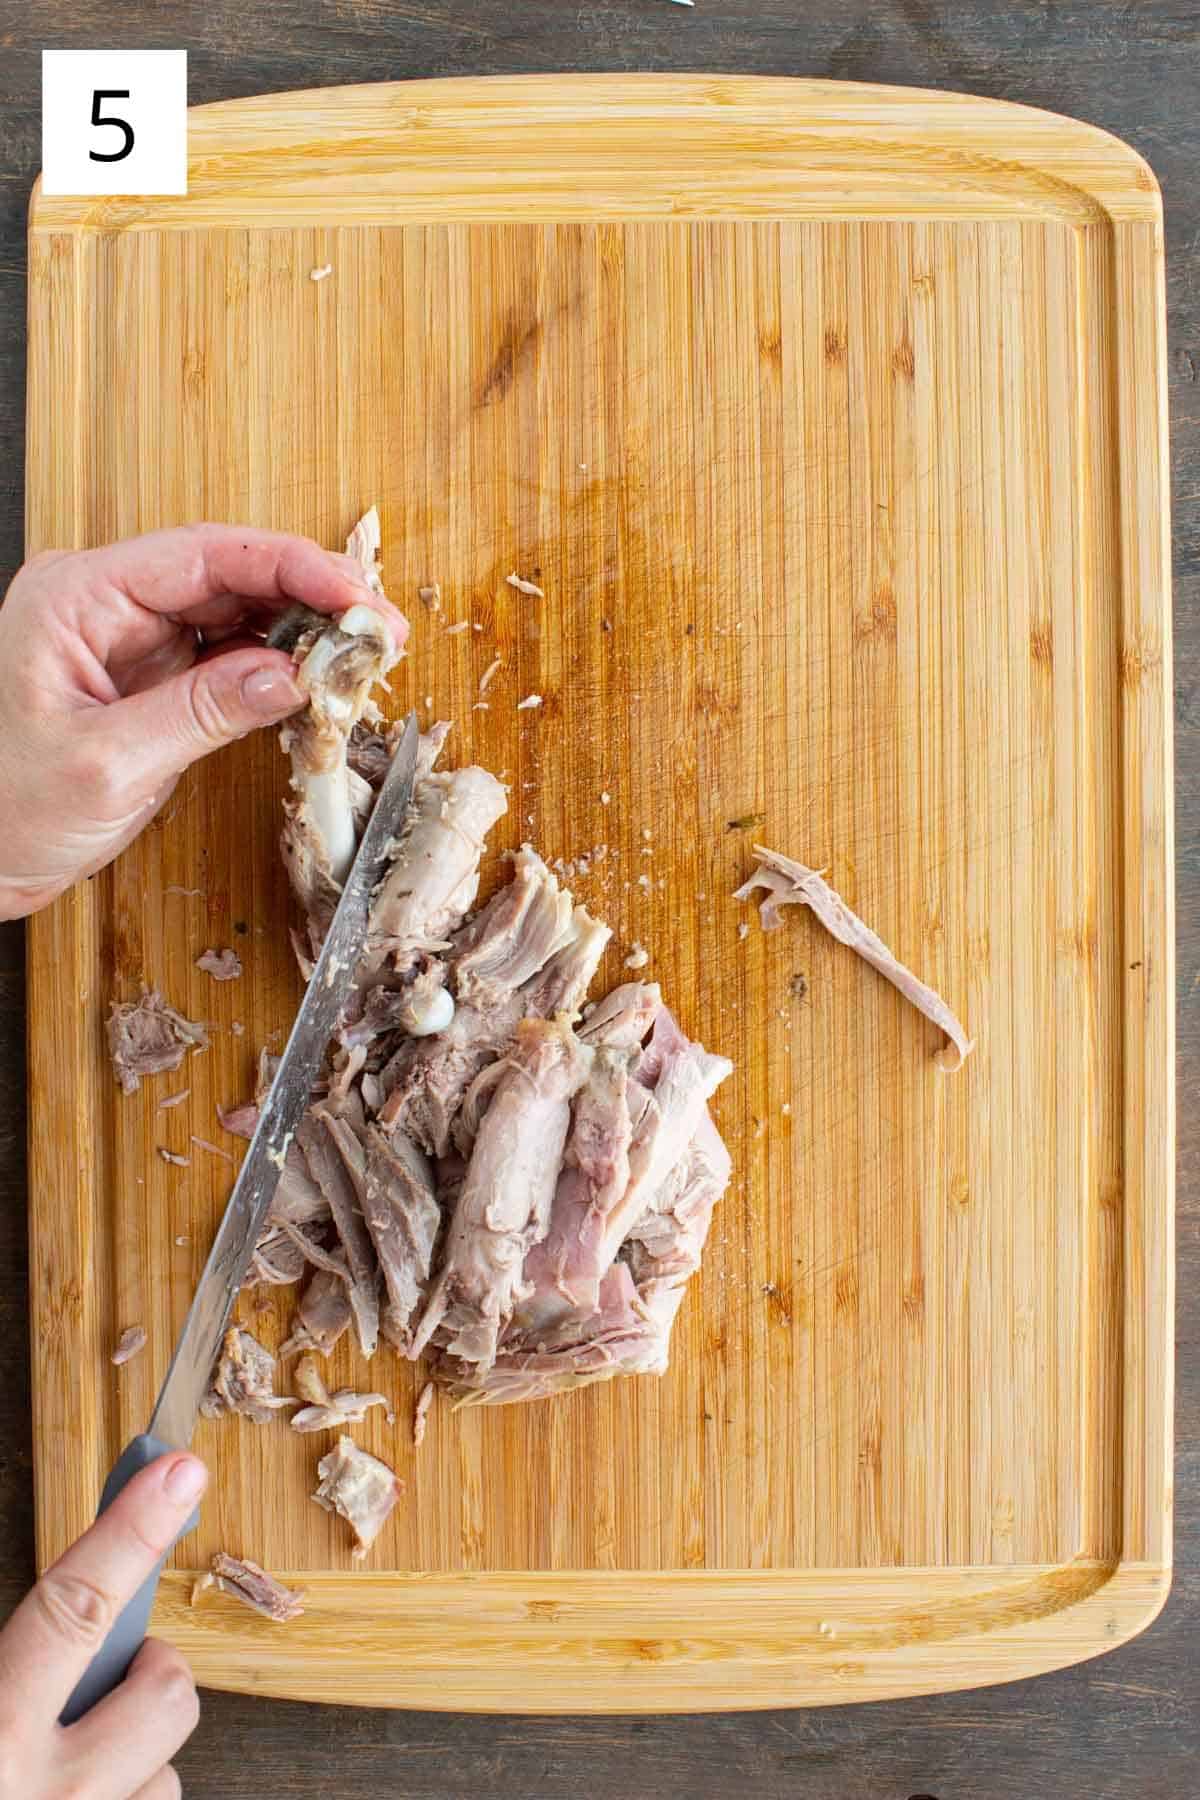
5. Cut or pull the meat from the thigh bone and transfer it to the platter with the drumstick. Repeat with the other leg.

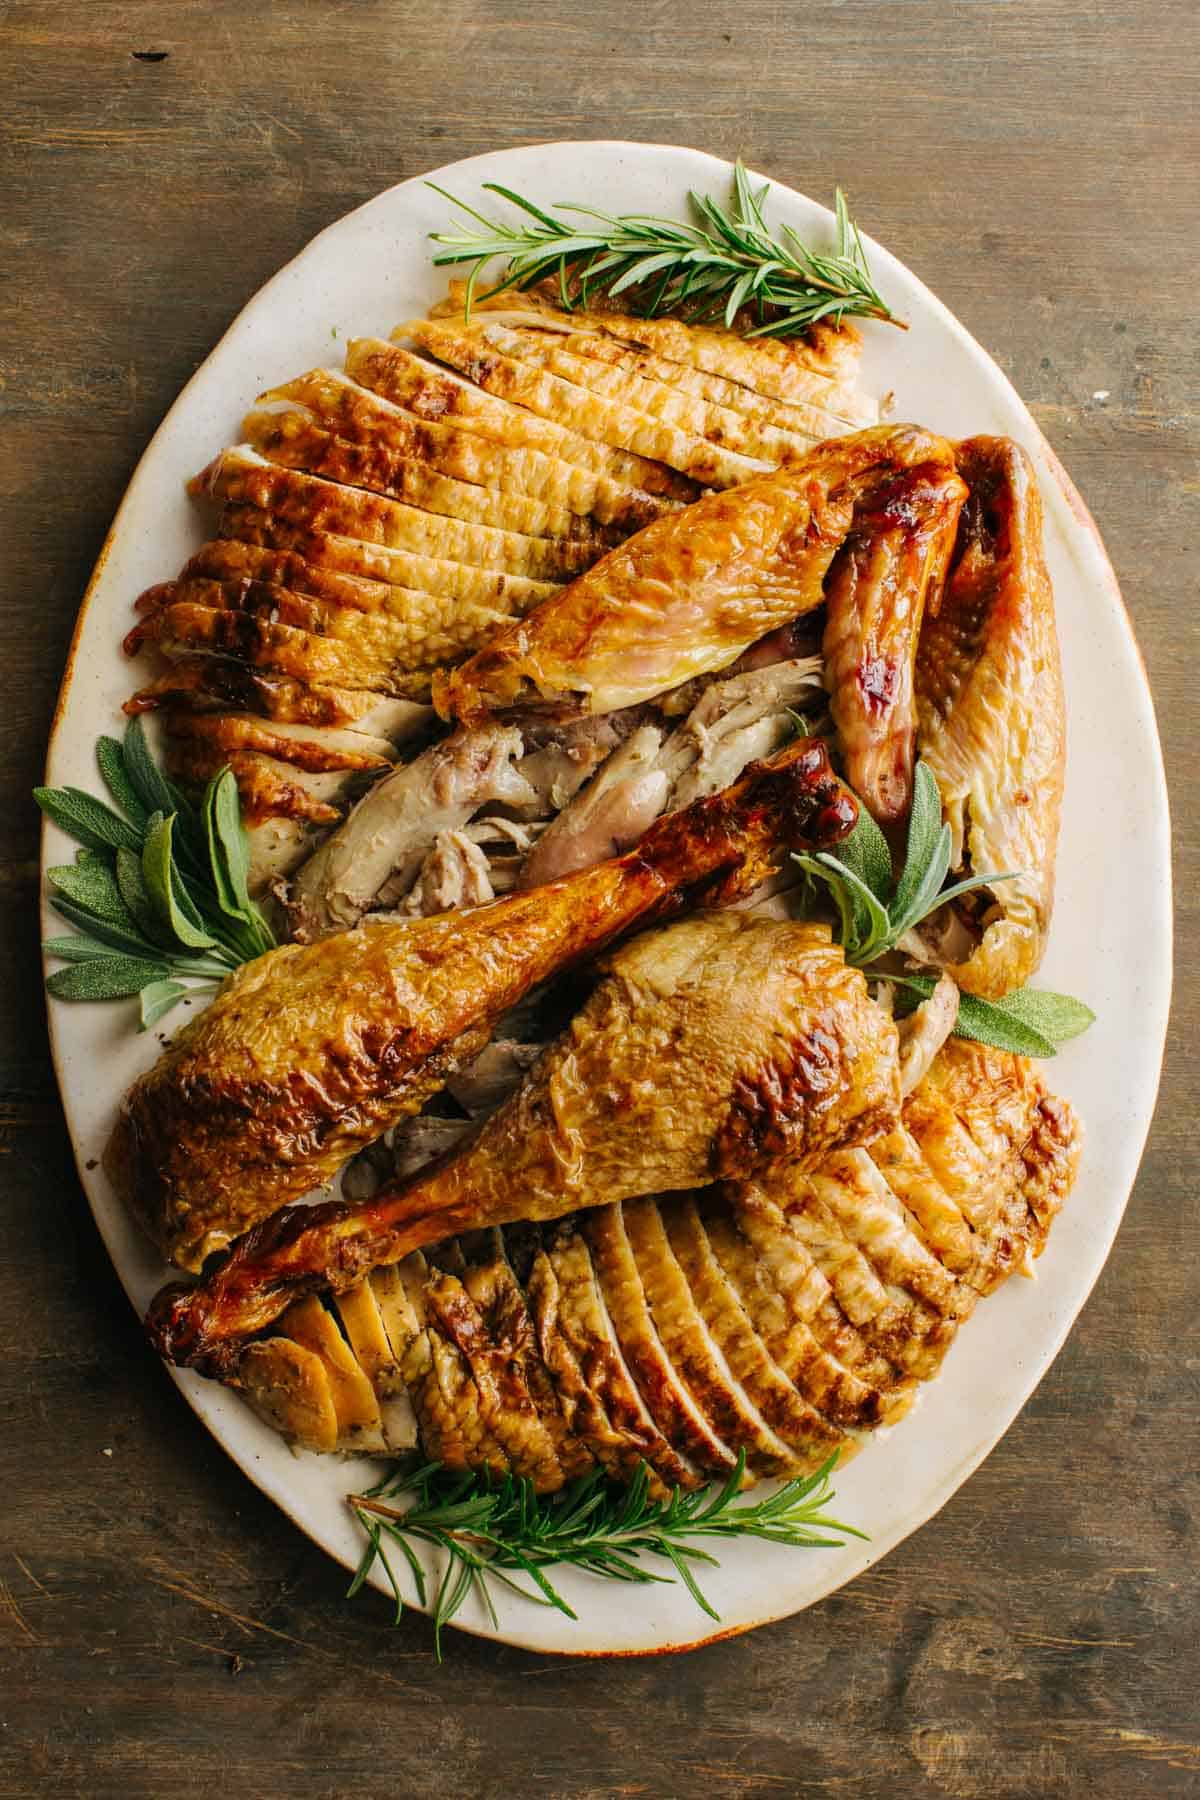
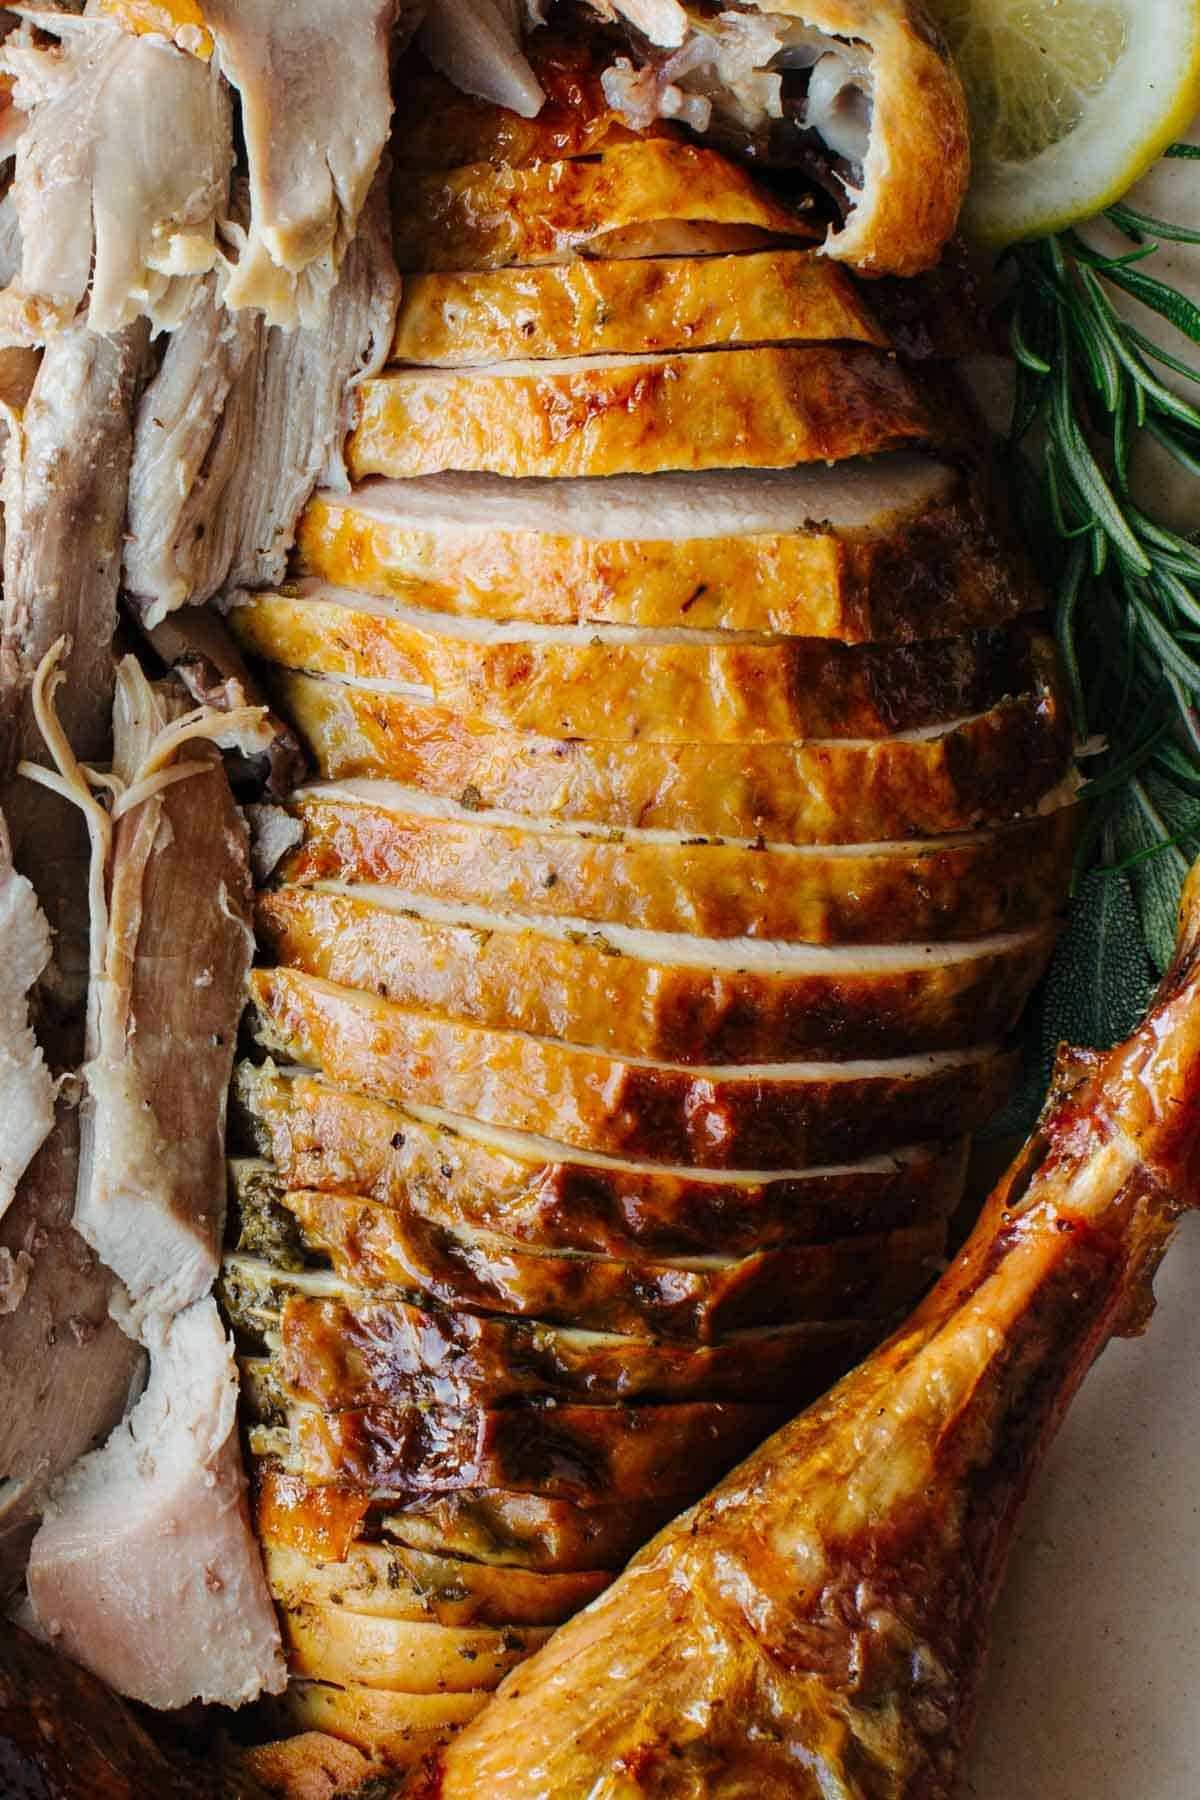
6. When you are ready to serve, place the breasts skin-side up on the cutting board. Slice the breasts crosswise and against the grain into ¼-1/2-inch-thick slices, keeping the skin attached whenever possible.

Transfer the sliced breast to the serving platter.

Finally, garnish with herbs like rosemary and a few slices of lemon, and serve immediately while it's still warm!

Perfectly carved turkey, rosemary and lemon slices.

Note: Have any leftover turkey? Make these turkey pot pies filled with crispy bacon, caramelized onions, and butternut squash! Or make it into crispy carnitas tacos!

Tips for success

  • Let the whole turkey rest for a minimum of 20 minutes once removed from the oven to allow the bird to remain juicy.
  • Remove the twine from the turkey with the tip of your knife or kitchen shears.
  • Use a carving knife or large serving fork to hold the turkey in place so you don't burn your hands!
  • Carve the turkey breasts last to keep the breast meat from becoming dry and cold.
  • If your turkey slices don't look as pretty as you hoped, don't worry - just pile the slices together and add a few garnishes (herbs, citruses, seasonal fruits) to cover it up.
  • Consider using a pair of food-safe gloves to protect your hands and keep them clean.
  • Save the turkey carcass for broths or soups like Italian Wedding Soup! If you're short on time, pop it into the freezer to use later.

FAQs

What kind of knife do I need to carve a turkey?

A sharp carving knife or chef's knife is the most ideal knife for carving a turkey. The best size for a knife is between 8-10 inches. Using an electric knife in the tougher areas is also a great option!

At what point do I carve a turkey?

You should wait to carve the turkey until it has rested for at least 20 minutes after being removed from the oven. This will let the juices redistribute and make carving much easier.

Is it better to carve turkey hot or cold?

You should carve turkey while it is still warm from the oven. Just allow it to rest to give it some time to cool down a little. Carving a cold turkey will be more difficult.

Do I slice a turkey with or against the grain?

Identifying the grain in meat is crucial for ensuring optimal tenderness when carving. The grain refers to the direction in which the muscle fibers align in the meat.

To find the grain: look closely at the surface of the meat, and you'll notice lines or striations that run in one direction. These lines are the muscle fibers, and the direction they're running is what's referred to as the grain.

You should always slice turkey against the grain, as this will make the slices more tender and easier to chew.

How do I carve a spatchcock turkey?

A spatchcock turkey is a technique where the backbone and breastbone are removed from the turkey so that it lays flat on the cutting board.

To carve a spatchcock turkey, start by removing the legs and wings just like you would with a regular bird. Next, cut along either side of the spine until it has been completely removed.

Flip the bird over and press down firmly on both sides of the breastbone until it cracks. Once it has cracked, remove the bone from the meat by slicing it with a knife.

Slice each side into desired portions and serve!

Did you make any of these recipes and LOVE it? Please leave a star ⭐️ rating and/or comment to help other readers!

Want to Save This Recipe?

Enter your email & I'll send it to your inbox.

Save Post

By submitting this form, you consent to receive emails from Coley Cooks.

Sliced turkey on a white platter with sprigs of fresh herbs.
Print
5 from 1 vote

How To Carve A Turkey

Learning how to carve a turkey can be intimidating, but with the proper technique, you'll be able to do it like a pro in no time! This is an easier (and cleaner) step-by-step method of carving turkey that won't leave you feeling embarrassed on Thanksgiving in front of your friends and family. 
Prep Time20 minutes
Total Time20 minutes
Course: poultry
Cuisine: American
Keyword: carving, chicken, cutting, method, poultry, slicing, thanksgiving, tutorial
Yield: 12 servings

Materials

  • 1 whole cooked turkey rested a minimum 20 minutes
  • Sharp carving knife chefs knife, or electric slicing knife
  • Knife sharpener or honing steel - a sharp knife is key!
  • Carving board with a well around it to catch juices
  • Large platter to fit the meat
  • Kitchen shears
  • Carving fork or large serving fork
  • Paper towels or rags to clean your hands knife, and cutting board between cuts
  • Protective food safe gloves optional

Instructions

  • First remove the legs and thighs by slicing through the skin that connects the leg and breast so that it separates. Pull the leg back and away from the breast, splaying it out to the side, then angle the joint upward until you feel it pop. You can push up on the joint from underneath if needed. Use your knife to remove the leg and thigh by slicing through the joint. Repeat on the other side. Place the legs and thighs on a plate and cover with foil to keep warm.
  • Remove the wings by pulling and cutting them at the joints. I find they usually disconnect, leaving the drumette still attached to the breast. If this happens, place them on the serving platter and leave the drumettes until after you remove the breast. Remove the drumettes by pulling them away from the body and slicing through the joints, then use your knife to remove the meat from the bone. Transfer to the serving platter with the wings.
  • Use your fingers to find the breast bone on the top of the turkey, then use long slow strokes with your knife to carefully slice down one side of the bread bone, following the curve of the bone, to remove the breast. Use your hand to pull the breast slightly outward as you slice to help it along. If you can't get the entire breast off this way, slice horizontally on the bottom to meet the top cut to remove the breast completely. Repeat on the other side, then go back in with your knife and carve off any remaining meat that was left behind on the breast bone. Place the breast meat on a plate and cover with foil to keep warm.
  • Remove the turkey carcass from the cutting board and then wipe it down with a wet rag or clean paper towel.
  • Take one leg and turn it skin side down on the cutting board so you can see where it separates from the thigh. Use your knife to wiggle into the joint as you gently pull the drum stick apart from the thigh, then slice through the meat to completely separate. Slice or pull the meat from the thigh bone and transfer it to the platter along with the drumstick, then repeat with the other leg.
  • Place the breasts skin-side up on the cutting board and carefully, using long slow strokes, slice crosswise against the grain into ¼-1/2-inch-thick slices, trying to keep the skin attached to each piece. Use a large chef's knife or bench scraper to transfer the sliced breast to the serving platter and repeat with the remaining breast. Carve the breasts last so they stay warm.
  • Garnish with herbs other decorations and serve immediately while it's still hot.

Video

Notes

  • Use the tip of your knife or a pair of kitchen shears to remove any twine that's tying the legs together.
  • It's very important to make sure your turkey rests for at least 20 minutes, depending on its size, after removing it from the oven. This allows the juices to redistribute so they won't spill out everywhere when you cut into the turkey. It will keep the meat nice and juicy instead. It also makes the bird easier to handle when carving.
  • Make sure your knife is very, very sharp. A dull knife will make carving very difficult.
  • The turkey will start cooling down quickly as soon as it's cut, so it must be served immediately. Make sure all of the sides and other food is prepared and ready to be served before you start carving.
  • Who cares if the slices look perfect? Add more fresh herbs, citrus or seasonal fruits to the platter to add visual interest and hide imperfections.
  • The turkey will be very hot, so use a carving fork or large serving fork to hold the turkey steady as you slice.
  • If your hands are especially sensitive to temperature or if you don't want to ruin your nails, wear a pair of disposable gloves.
  • Reserve the turkey carcass for making stock or soup! If you don't have time to do it now, freeze for a later date.
5 from 1 vote (1 rating without comment)

Did you make this recipe? Please leave a ⭐ rating and review!

Your email address will not be published. Required fields are marked *

Recipe Rating


This site uses Akismet to reduce spam. Learn how your comment data is processed.