Homemade Vanilla Extract
If you've ever wondered how easy it would be to make homemade vanilla extract, you're in luck! This simple recipe only requires two ingredients and a little bit of patience. The result? A rich and flavorful vanilla extract that will take your homemade desserts to the next level.
This post may contain affiliate links.
Have you ever reached for a bottle of vanilla extract while baking, only to find an empty container? Or maybe you've been put off by the high prices and artificial ingredients found in store-bought vanilla extract.
As a professional chef and avid baker, I've experienced both of these frustrations. That's why I started making my own homemade vanilla extract years ago and haven't looked back since!
Making your own vanilla extract is not only super easy, but it's also much more cost-effective and healthier than buying it from the store.
Not to mention the flavor! Baking with homemade vanilla extract truly elevates any dessert you use it in.
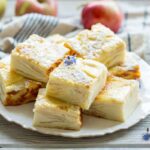
I recently made a bowl of fresh whipped cream to enjoy with a slice of ricotta pear cake, and the difference in flavor from the homemade vanilla extract was astounding.
It's great in a chocolate chip cookie, and really shines with the simple flavors of a classic custard pie. And, my famous fudgy salted caramel brownies wouldn't be the same without the intense vanilla flavor they get from a freshly made bottle of vanilla extract. They're everyone's absolute favorite!
I'm excited to share with you my simple and delicious recipe for homemade vanilla extract. Once you make your own, there's no going back!
For more homemade cooking and baking staples, try this homemade fresh basil oil, homemade Old Bay seasoning, or homemade salted caramel sauce.
Why This Recipe Works
- It's super easy to make at home with just two simple ingredients!
- Much more flavorful than store-bought vanilla extract.
- A must-have staple to have in your kitchen that you'll reach over for again and again.
- Making your own batch of vanilla extract can be more cost-effective compared to the store-bought kind.
- Perfect for gifting to friends and family who love to cook or bake!
Ingredient Notes
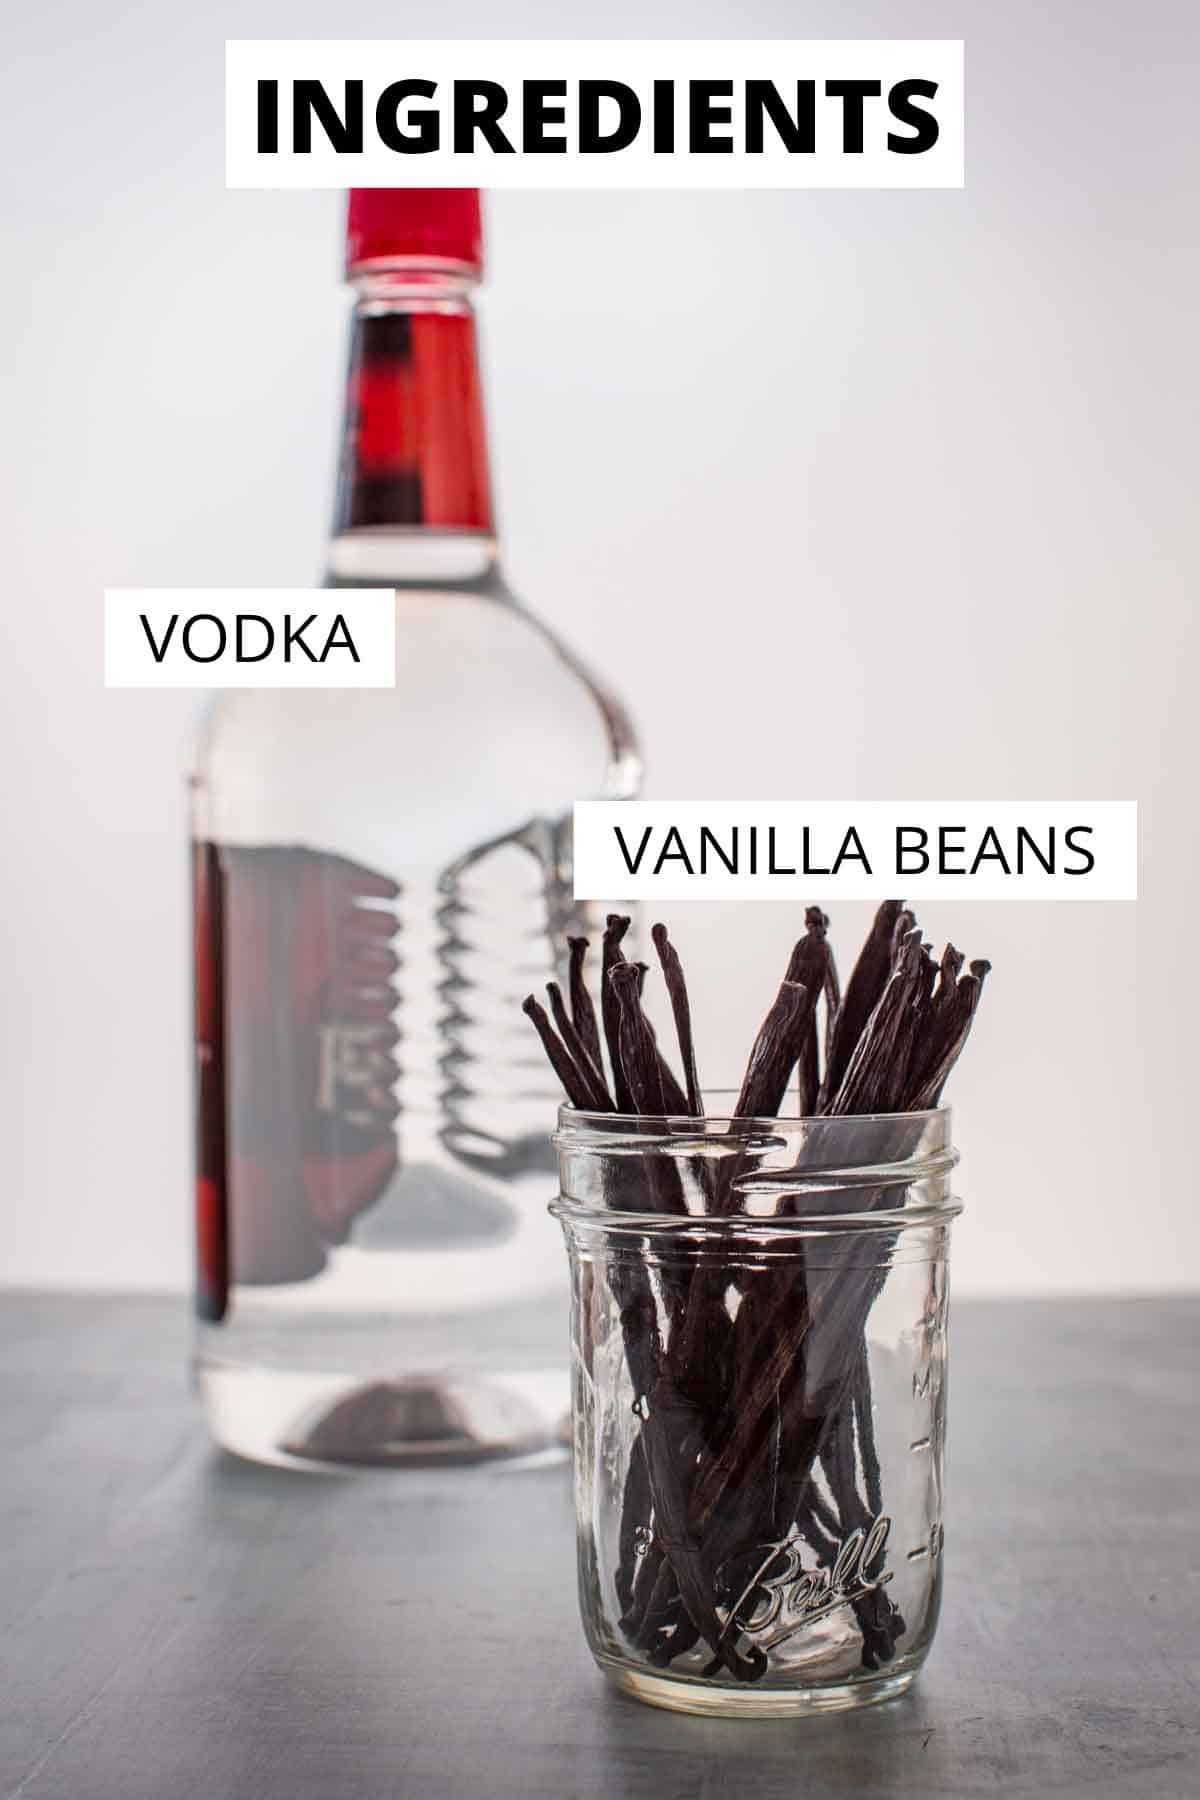
Vanilla Beans - Using high-quality vanilla beans is not really necessary for making the best homemade vanilla extract. It's okay to use "grade B" beans, which are often sold at a discounted price. It will still taste great! Now, there's no hard and fast rule about which beans to select for your homemade vanilla extract. The choice boils down to your preference. Some people enjoy the bold, creamy notes of Madagascar vanilla beans, while others prefer the floral subtleties of Tahitian vanilla beans.
Alcohol - 80-proof vodka is the ideal alcohol for making homemade vanilla extract. It has a neutral flavor that doesn't overpower the vanilla, and it's also readily available in all liquor stores. I recommend using a cheaper brand, as the quality of the vodka doesn't make a significant difference in this recipe. You can also use other types of alcohol like bourbon, rum, or brandy if you want to experiment with different flavors.
*Find the full ingredient list in the recipe card below!
Helpful Equipment
How to make homemade vanilla extract
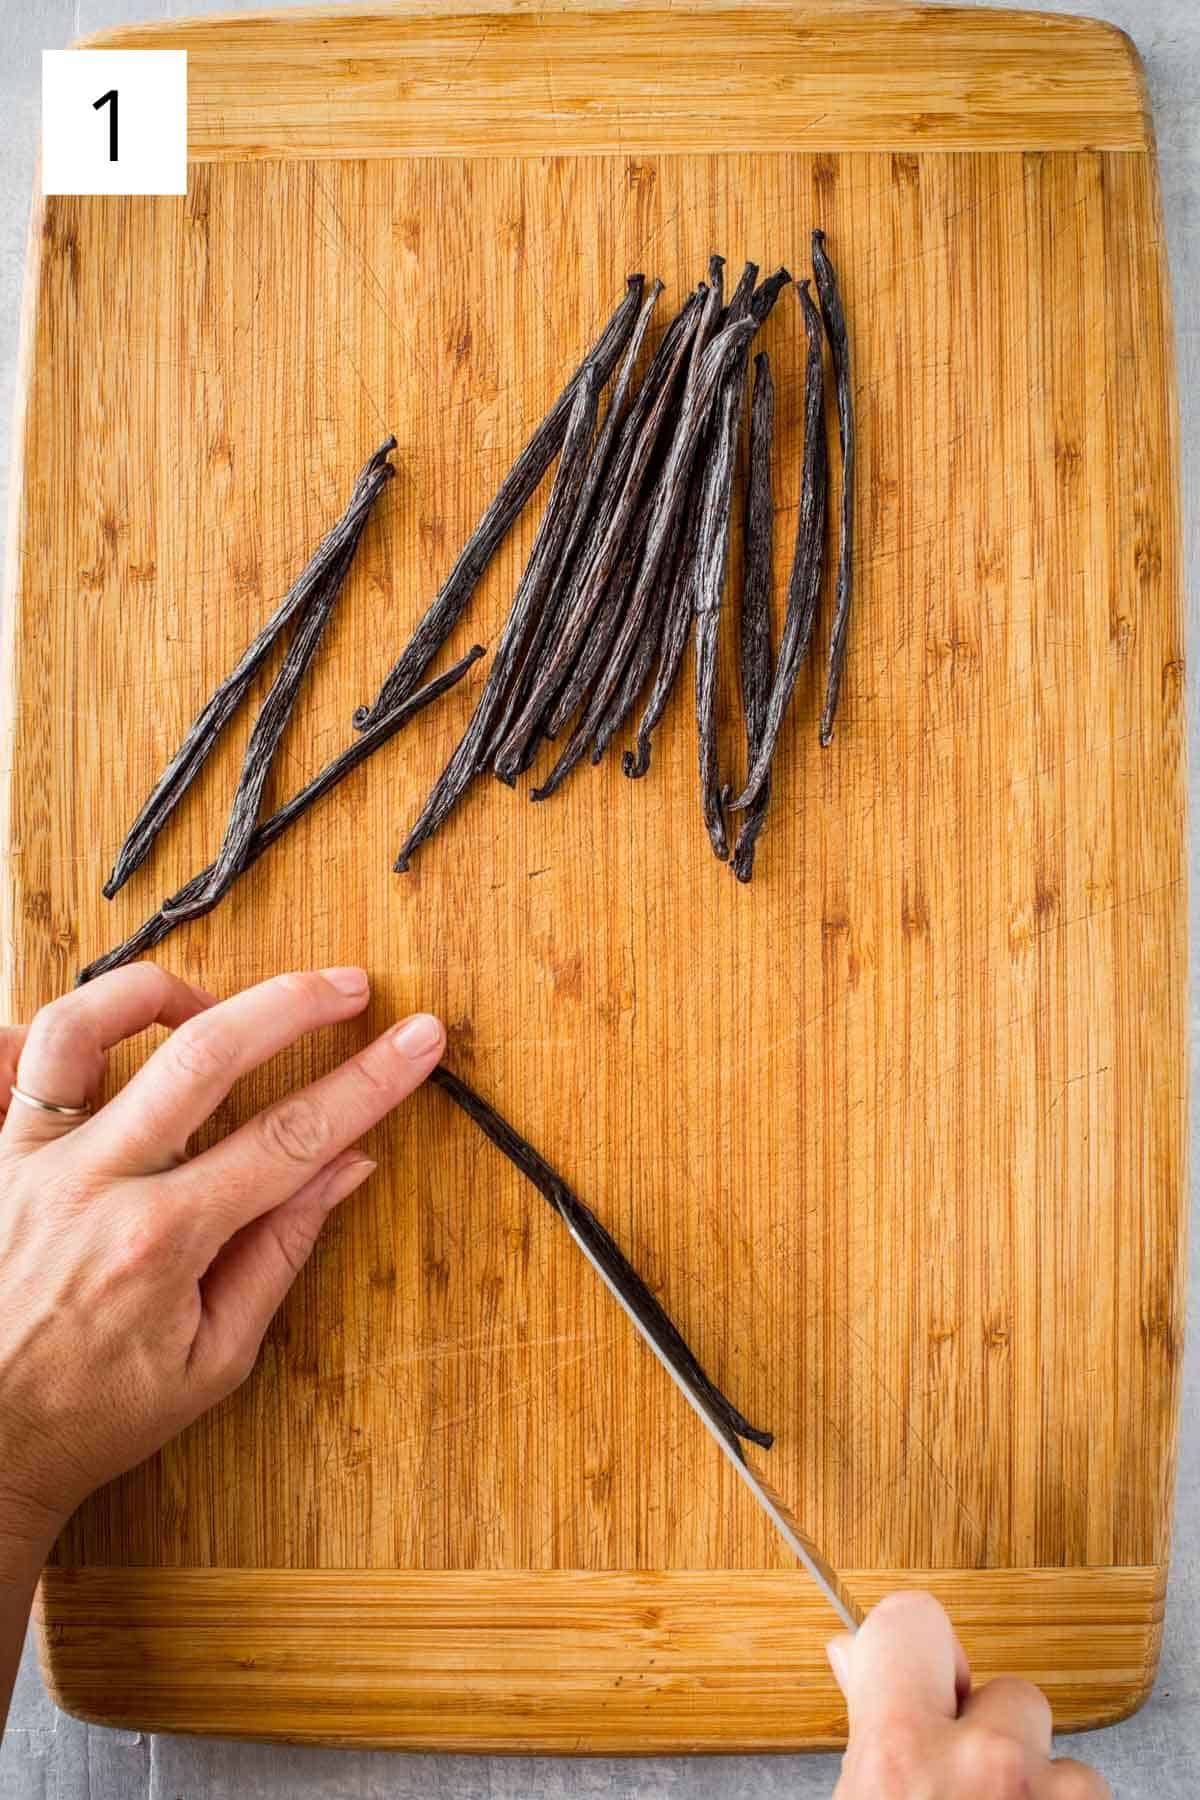

- Grab a sharp knife and make a slit down the center of each vanilla bean. Don't worry, it's easier than it sounds!
- Carefully remove the pour spout from the bottle of vodka. You can use a butter knife or even your fingers, whatever works for you!
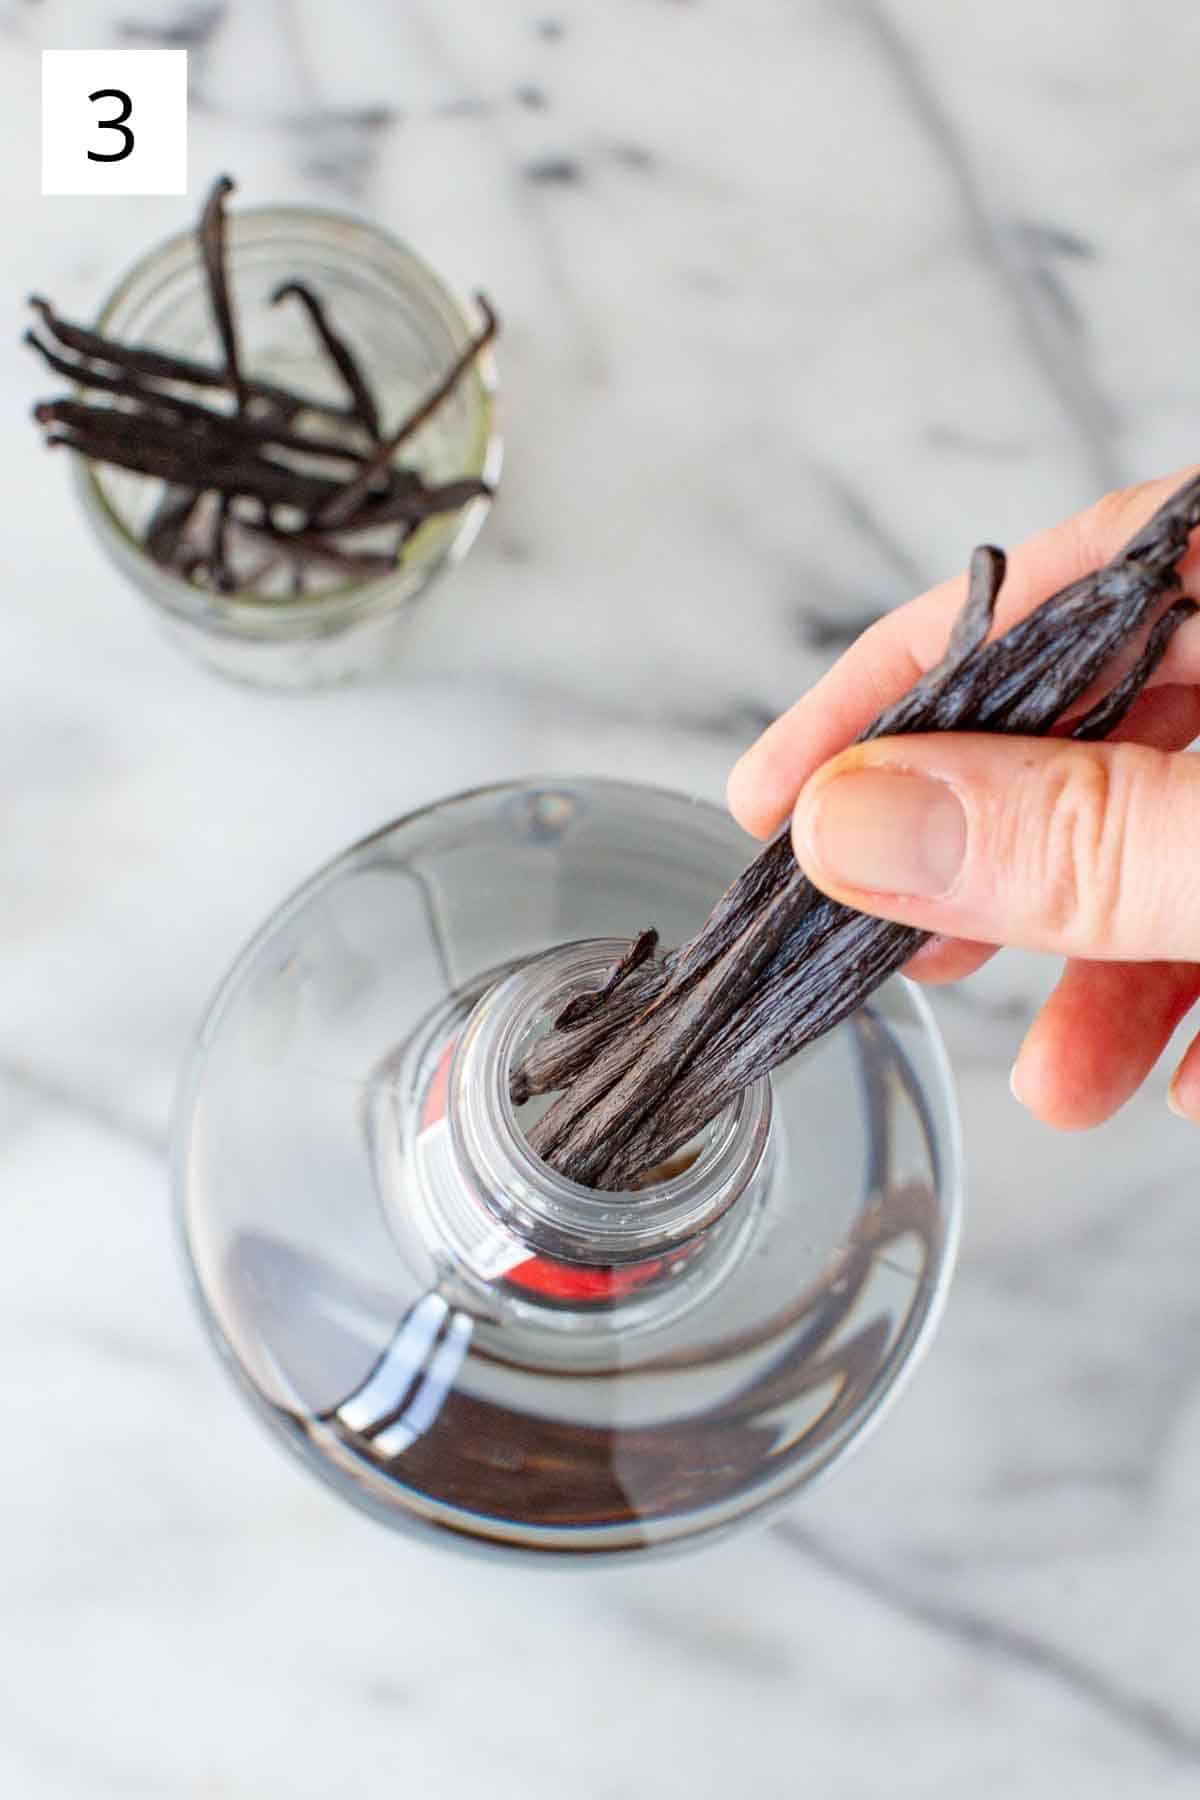

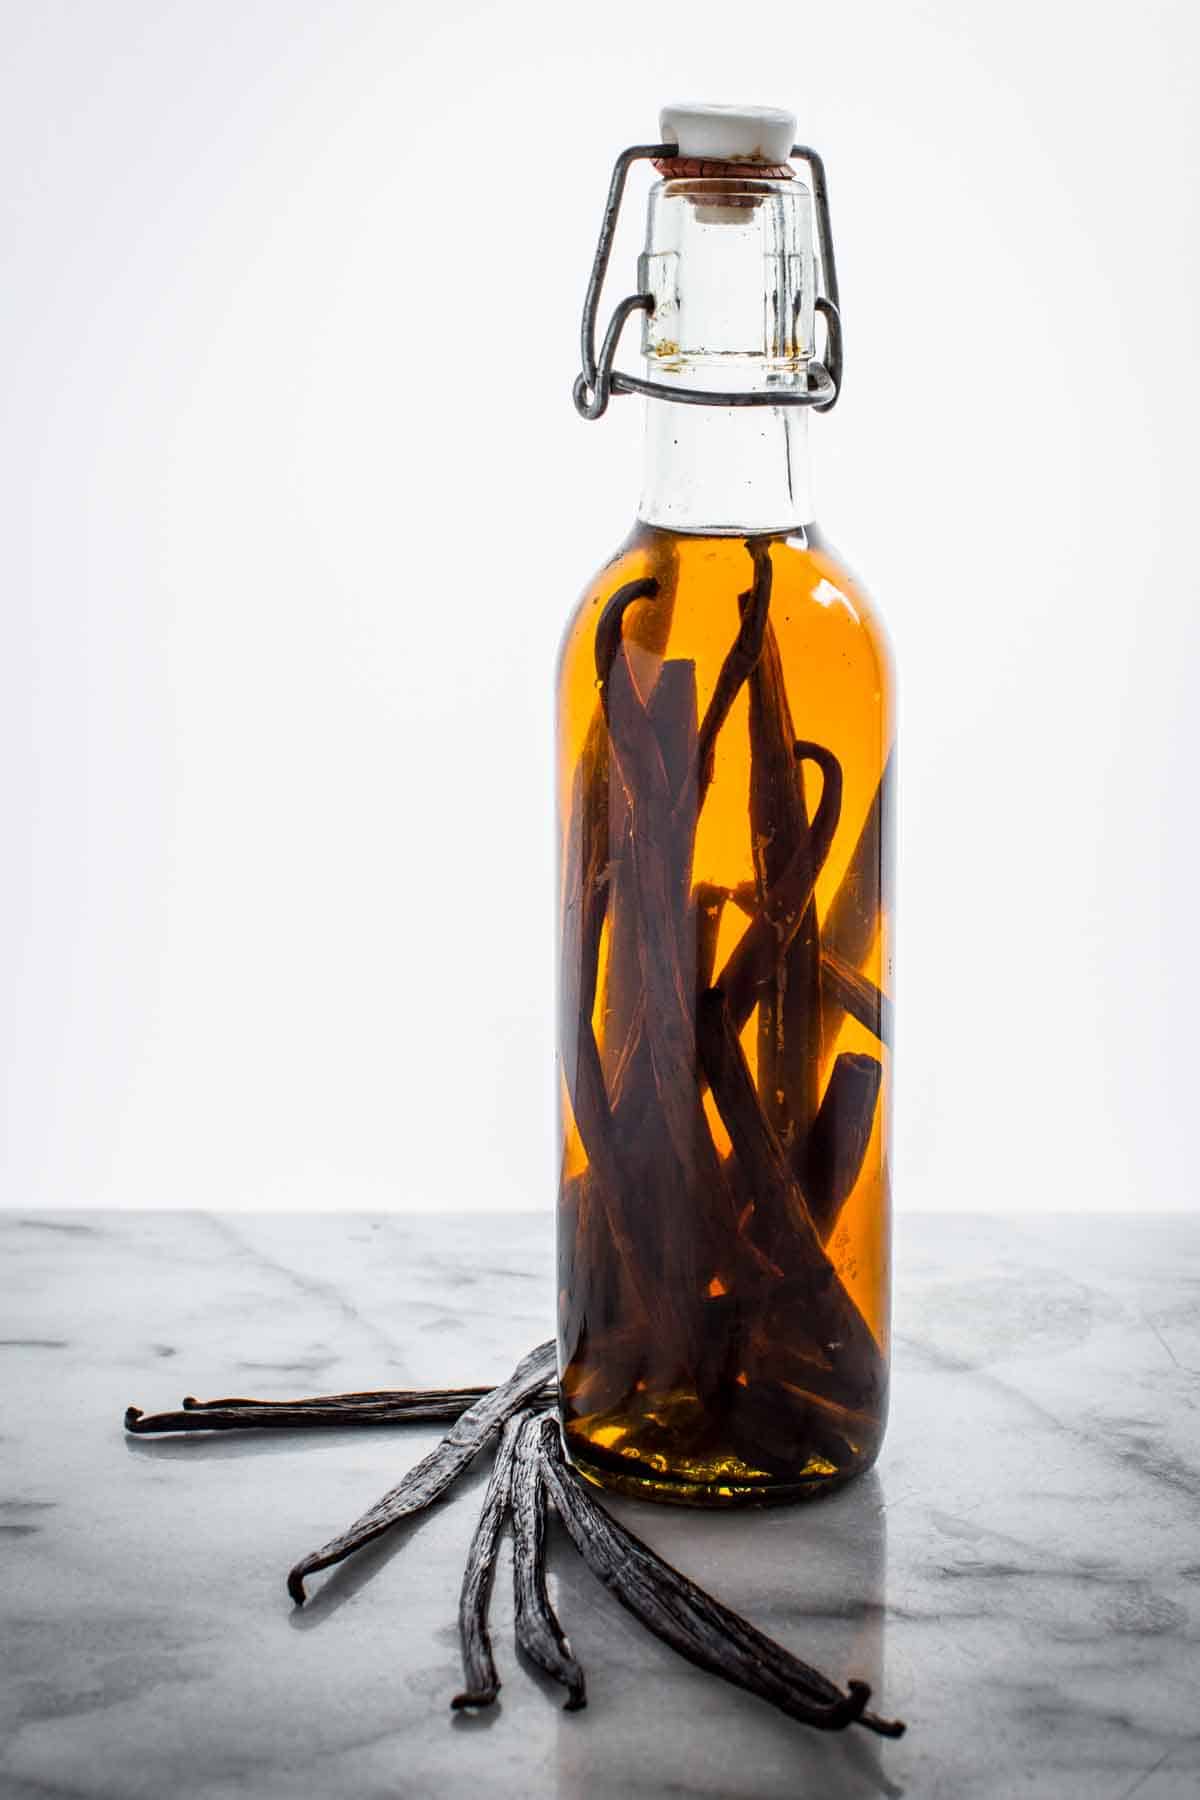
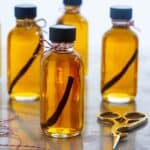
- Now, it's time to add those lovely vanilla beans to the vodka.
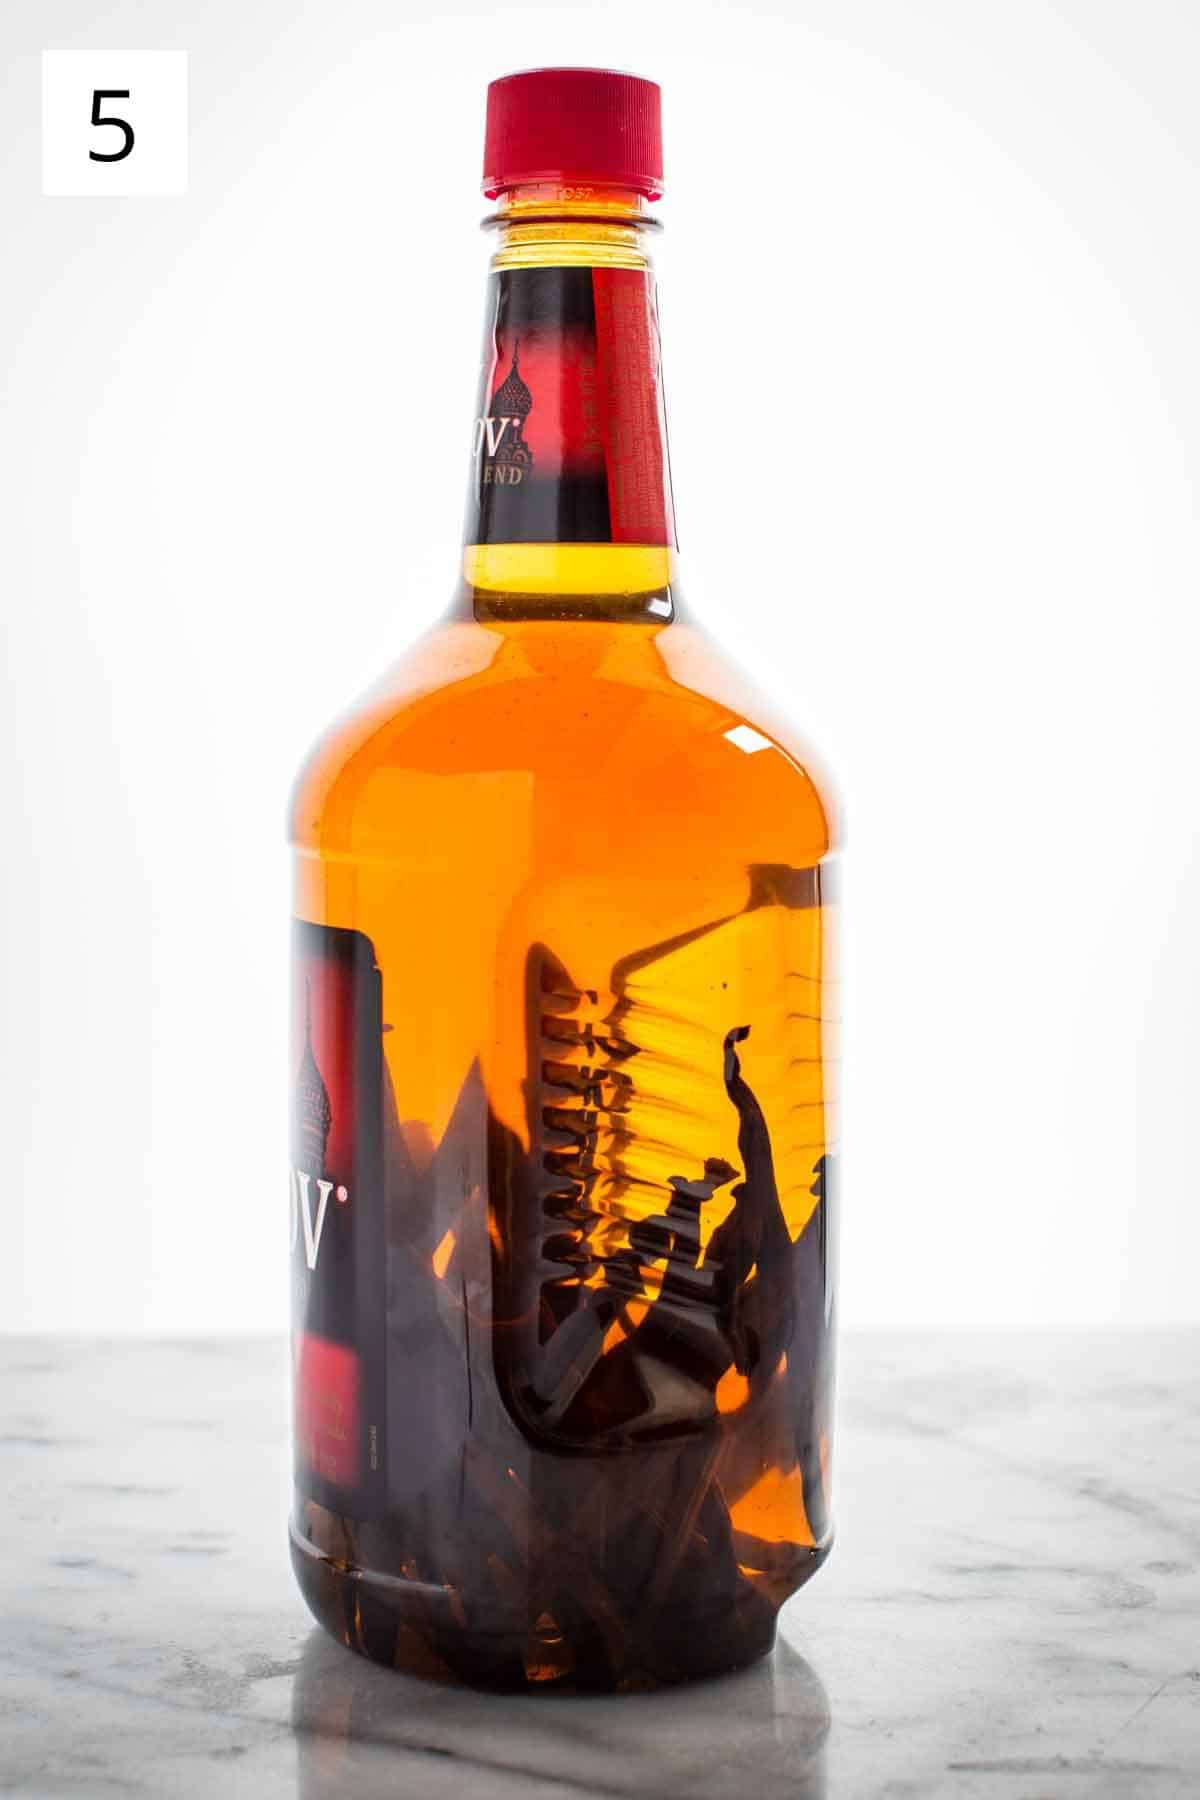
- Put on the cap and give it a good shake. Mix it all up and let the bottle sit in a cool, dark place for at least 3 months. Give it a shake every now and then!
Pro Tip: Don't rush the process, as the longer your homemade vanilla extract sits, the stronger (and better) it gets. The steeping period is essential for developing the aroma and taste. While you can technically use your homemade vanilla extract after 8 weeks, letting it sit for 3 months or more really bolsters the flavor.
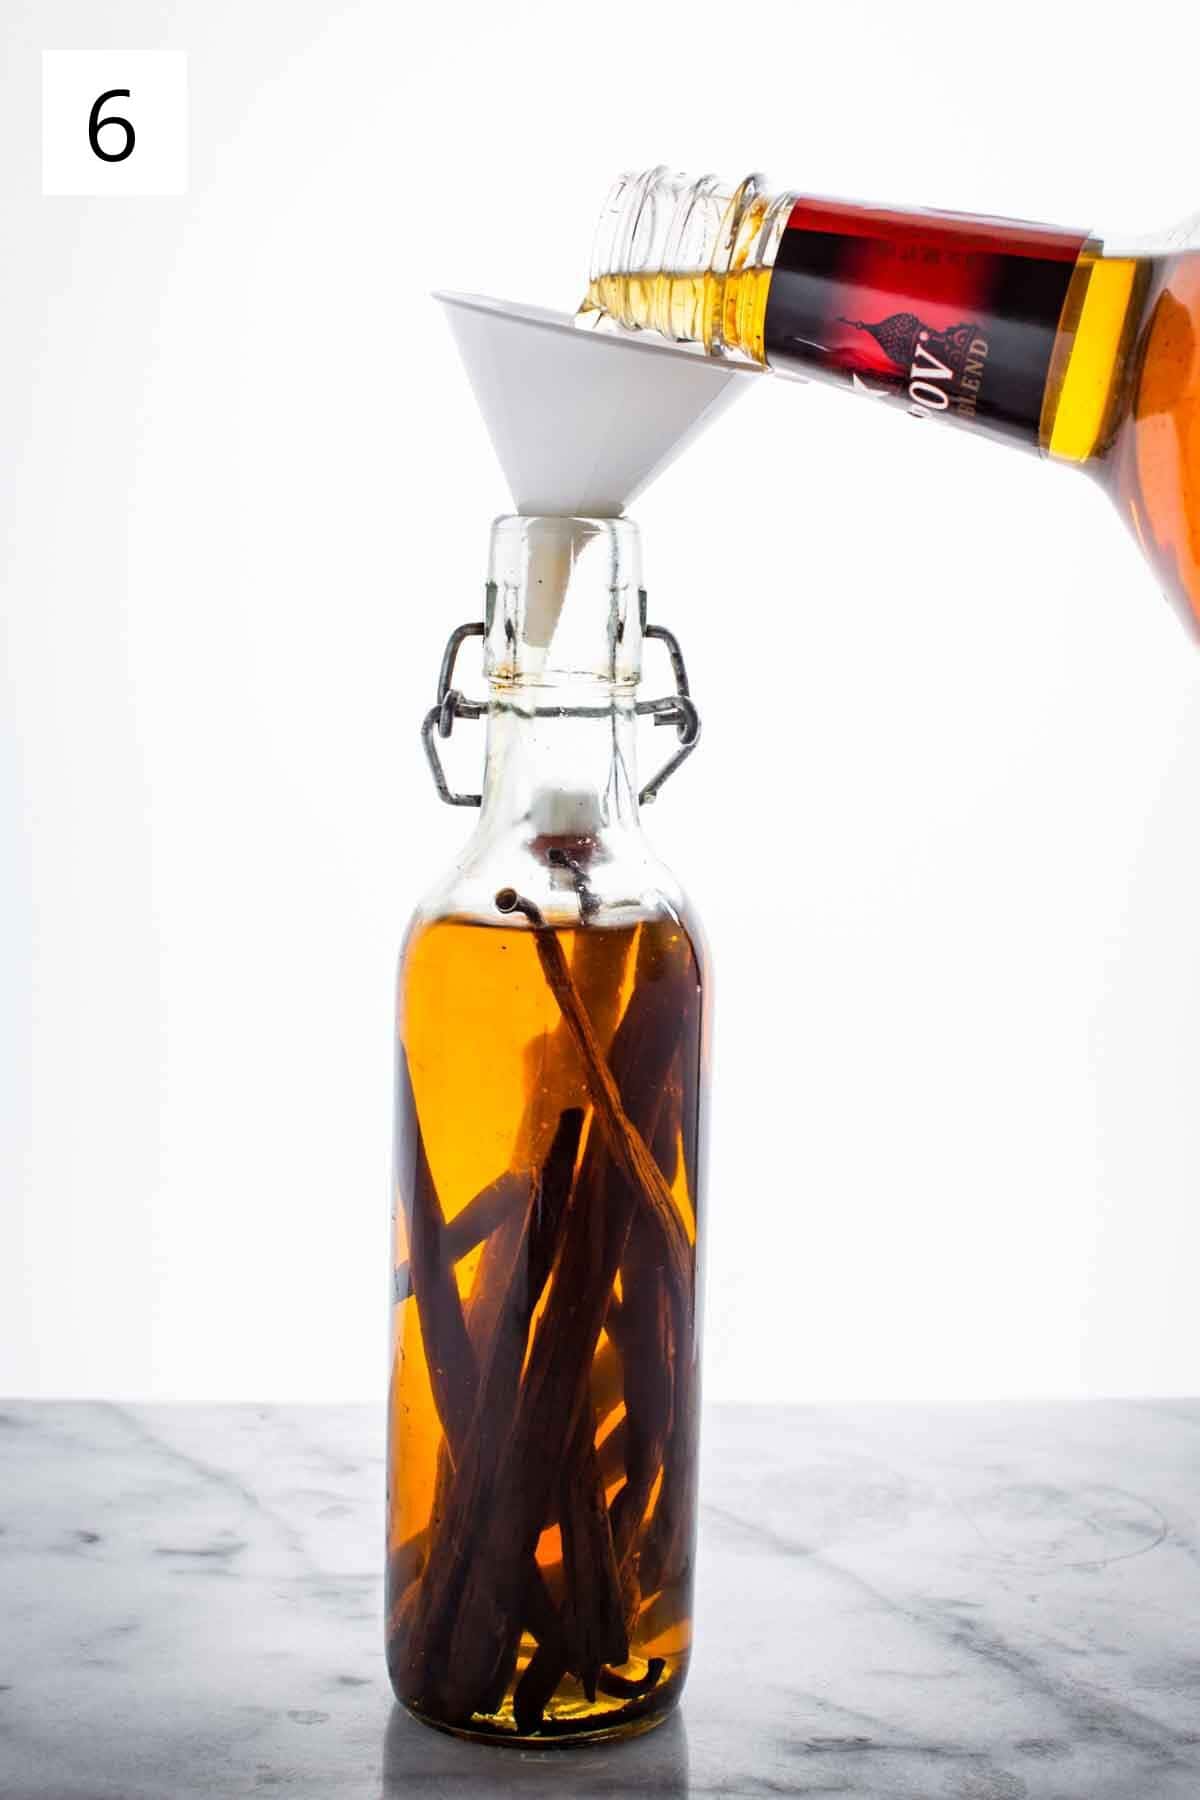
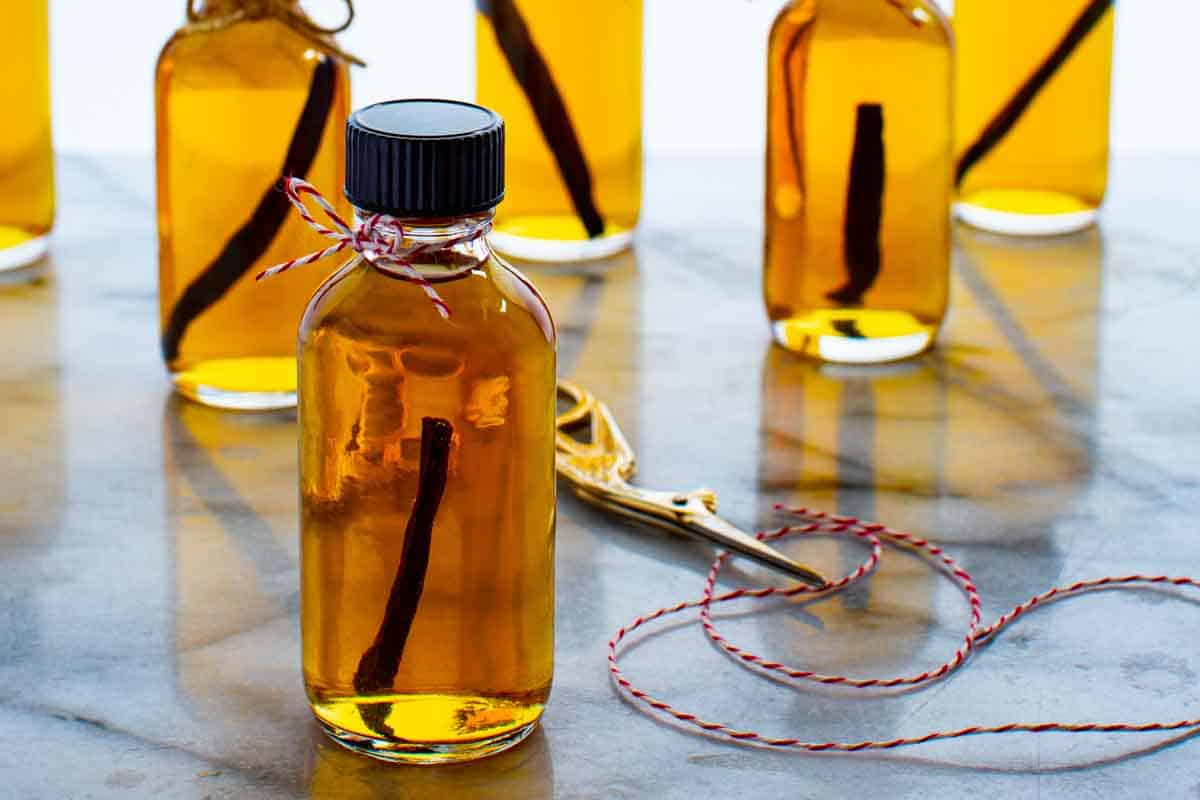
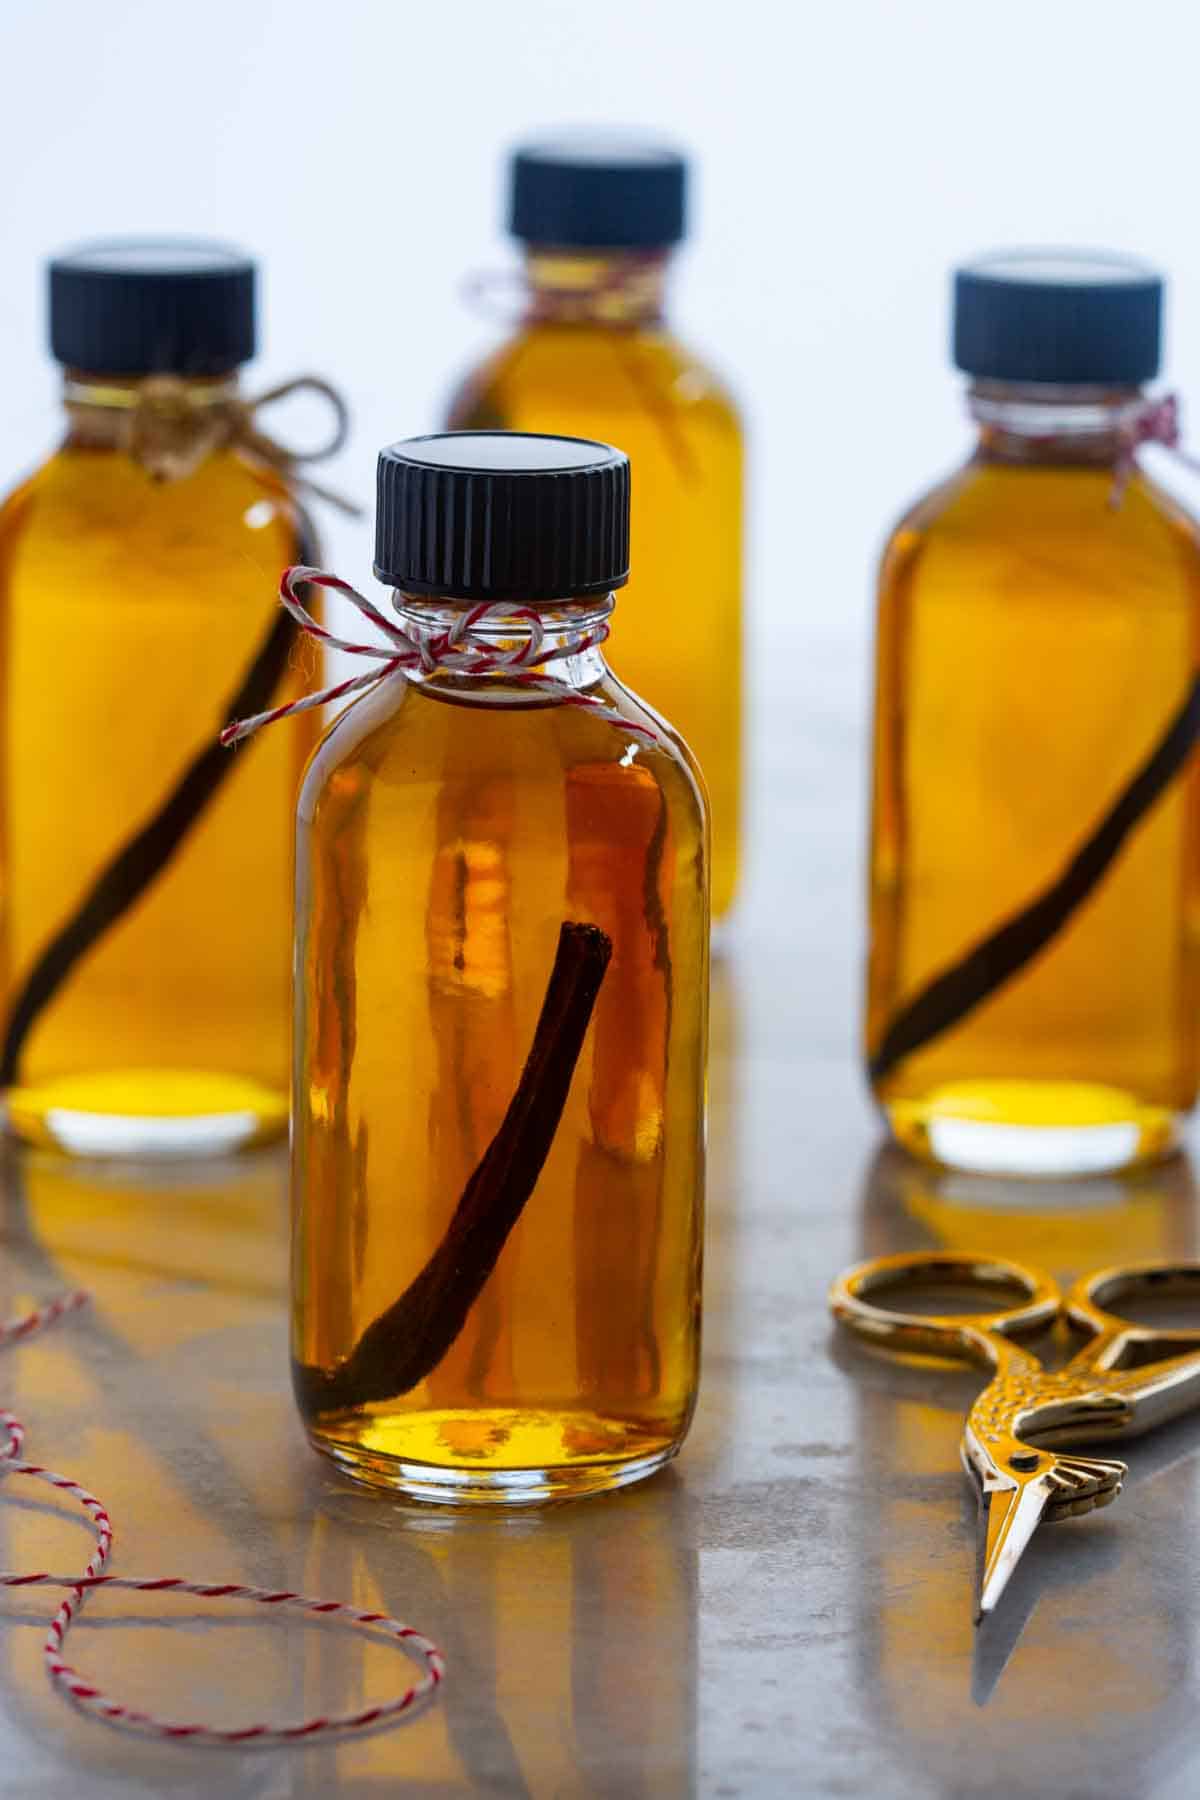
- That's it - You've got yourself some homemade vanilla extract to use whenever you need it.When you're ready, decant the delicious vanilla extract into smaller bottles. Make sure to include a few of the vanilla beans for that extra flavor. It will get stronger the longer it sits!
Enjoy!

How to properly slit a vanilla bean pod
This is a key step in making your homemade vanilla extract, but don't worry - it's easy once you get the hang of it.
- Place the vanilla bean on a cutting board, with one end towards you.
- Using a sharp knife, start at the top of the bean and make a cut down the center, leaving about an inch uncut at the bottom.
Pro Tip: Try to avoid cutting all the way through to the ends - this way, your bean stays in one piece, making it easier to handle.
The most important thing is to expose the inner beans and oils to the vodka, and this method does just that. Don't overthink this step.
The beauty of homemade vanilla extract is in the flavor, not the precision of your knife skills!
Tips for Success
- To store your homemade vanilla extract, choose a cool, dark place. Avoid extreme temperatures, such as those found in a refrigerator or freezer, or on top of a refrigerator. These conditions can cause the flavors to deteriorate over time.
- When your vanilla extract is running low, simply top off your bottle with more vodka and let it sit again for 3-6 months to brew a new batch.
- After making two of batches of extract, don't dispose of your beans just yet. Remove the beans from the bottle and let them dry out. Once they're dry, add them to a canister of sugar. Let this sit for a few months to infuse into the sugar. Perfect for your morning coffee or tea.
Recipes to make with vanilla extract
Once you have made your fresh batch of vanilla extract, there are endless possibilities for using it in your recipes.
You can make classic vanilla desserts like vanilla bean ice cream, crème brûlée, and vanilla cupcakes. Add a splash of homemade vanilla extract to your cold brew coffee or hot chocolate for an extra special touch!
You can even make an Italian mascarpone whipped cream to enjoy with a medley of berries.
Whether you are a seasoned baker or just starting on your baking journey, you'll love this ricotta cheesecake with plums, this pear pandowdy, and these brown butter ginger molasses cookies.
FAQs
When it comes to making homemade vanilla extract, the choice of vanilla beans can directly impact the flavor profile. The two most common types of vanilla beans are Tahitian and Madagascar beans.
Tahitian beans are known for their aromatic, floral, cherry-cherry-like qualities. They're plump and moist, which makes them a joy to work with. These beans are perfect if you're looking for a sweet, slightly fruity vanilla flavor.
Madagascar beans, also known as Bourbon beans, are the most common type used in vanilla extract production. They have a robust, creamy, and sweet flavor with hints of caramel. If you want a classic, strong vanilla flavor, then these are your go-to beans.
Yes, you can make a non-alcoholic version of vanilla extract by using vegetable glycerin and water instead of alcohol. However, the flavor and shelf life will be different from traditional vanilla extract.
As long as the vanilla beans are fully submerged in alcohol and stored in a cool, dark place, homemade vanilla extract can last for years without going bad or developing mold. However, if you notice any changes in color or smell, it's best to discard the extract and make a fresh batch.
No, homemade vanilla extract has a more intense and pure flavor compared to store-bought extracts that often contain added sugars or artificial flavors. The alcohol adds depth and complexity to the vanilla flavor without overpowering it.
Vanilla extract is made by steeping vanilla beans in alcohol, while vanilla bean paste is a blend of vanilla extract, sugar, and thickening agents. Vanilla extract has a more intense and concentrated flavor compared to vanilla bean paste.
Homemade vanilla extract can last for years if stored correctly. Keep it in a cool, dark place, and make sure the beans are fully submerged in alcohol to prevent mold growth. As time passes, the flavor will become more robust and intense.


Did you LOVE this recipe? Please leave a star ⭐️ rating and comment and tag your creations @ColeyCooks on Instagram!
Want to Save This Recipe?
Enter your email & I'll send it to your inbox.
By submitting this form, you consent to receive emails from Coley Cooks.
Homemade Vanilla Extract
Ingredients
- 1 handle 80-proof vodka 1.75 liters
- 30-40 vanilla beans
Instructions
- Carefully remove the pour spout from the bottle of vodka using a butter knife or your fingers.
- Use a sharp knife to make a slit down the center of each vanilla bean.
- Add the vanilla beans to the vodka, put on the cap and give it a shake.
- Let the bottle sit in a cool, dark place for a minimum of 3 months, giving it a shake every so often.
- When ready, decant the vanilla extract into smaller bottles along with a few of the vanilla beans and use as needed.
Notes
- Use the cheapest liquor you can find - there is no need to use high-quality, expensive vodka for this application.
- Swap out the vodka for bourbon, rum, or whiskey for a unique flavor.
- Try to remember to give the bottle a shake whenever you can to help the vanilla infuse.
- The vanilla is ready after 3 months, but the longer it sits, the better it will get.
- To store your homemade vanilla extract, choose a cool, dark place. Avoid extreme temperatures, such as those found in a refrigerator or freezer, or on top of a refrigerator. These conditions can cause the flavors to deteriorate over time.
- Decant it into smaller bottles and give out as gifts, or transfer it to mason jars or larger bottles for personal use.
- You can make vanilla in the individual bottles they will be stored in, but I prefer to make it in one large bottle and decant as needed. It's much easier to get started this way.
- I like to keep the main bottle of vanilla in my pantry and then a smaller bottle on my kitchen shelf with a few vanilla beans that I refill as needed.
- Once the vanilla is all used up, you can refill the bottle with vodka and make up to two more batches. Note that each batch will take longer to brew. I usually have two batches going at all times, so I always have some ready.
- After making two of batches of extract, don't dispose of your beans just yet. Remove the beans from the bottle and let them dry out. Once they're dry, add them to a canister of sugar. Let this sit for a few months to infuse into the sugar. Perfect for your morning coffee or tea.

I have a long ago gifted bottle of grapefruit vodka that I think may work in this recipe --thanks for posting this- !!
I actually don't recommend using a flavored vodka to make vanilla extract. It will change the flavor significantly, especially grapefruit. For best results, use a neutral spirit like plain vodka.
Thanks for letting me know grapefruit vodka for this application is a no go!
You're welcome!