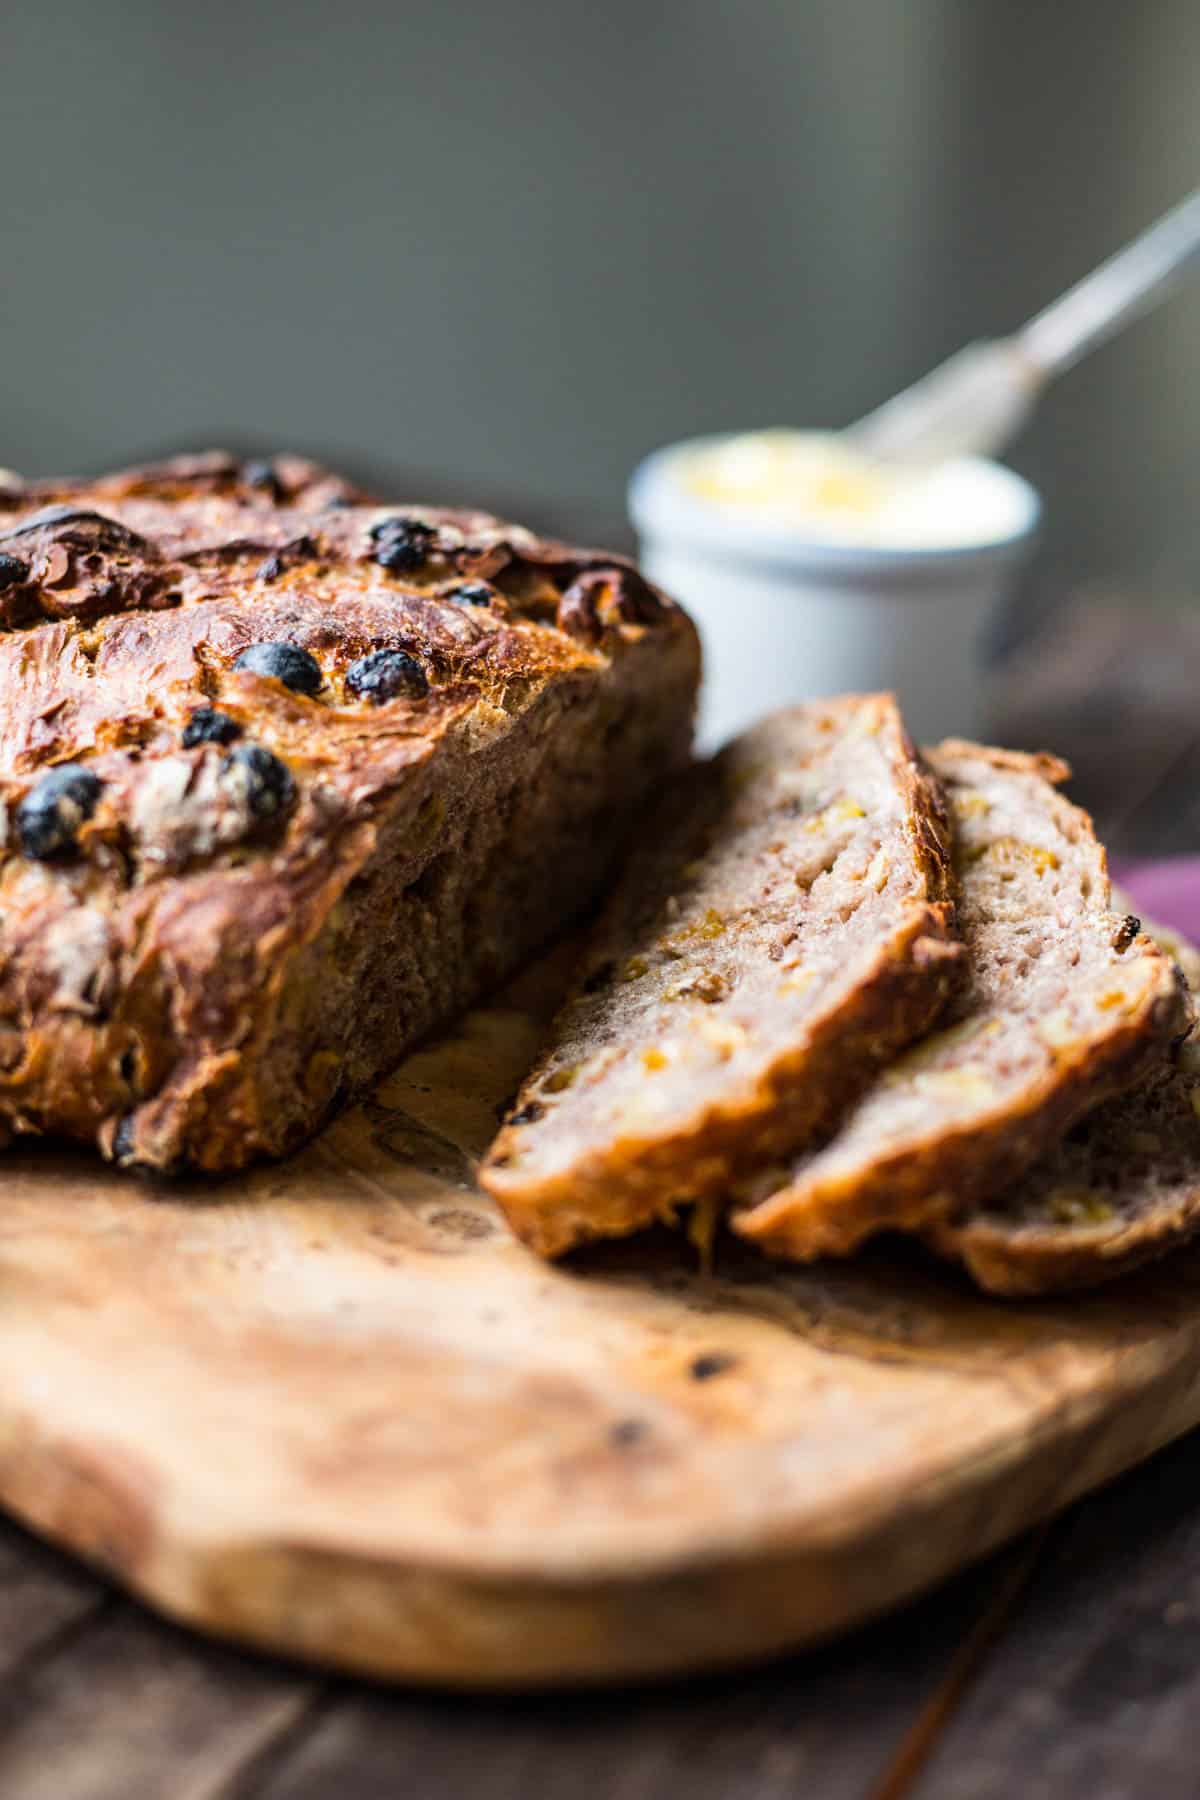
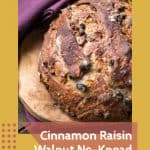
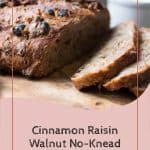
Cinnamon Raisin Walnut No-Knead Bread
This easy no knead cinnamon raisin walnut bread has an incredible texture and flavor with minimal effort. The golden raisins add sweetness and the walnuts add crunch with just the right amount of cinnamon mixed in. Only 15 minutes of active cooking - time does all the hard work for you!
For more easy bread recipes, try my easy focaccia, easy muffin tin popovers, or my Spanish tomato bread.
Why This Recipe Works
- Simple no knead technique adapted from the great Jim Lahey.
- Requires minimal time and effort.
- A long rise develops better texture and flavor.
- Easy for beginners - no experience necessary and only 7 ingredients.
- Makes the best cinnamon toast!
Raisins - I love golden raisins for their fruitiness and color but dark raisins will work just as well.
Flour - All purpose does the trick but you can also use bread flour if you wish.
Yeast - Instant, quick rise, rapid rise, and active dry will all work
*Find the full ingredient list in the recipe card below!
Helpful Equipment

how to make cinnamon raisin walnut bread
- In a large bowl, combine the flour, salt, sugar, cinnamon and yeast.
- Add the raisins and walnuts and mix to coat.
- Pour in the water and stir until just combined.
- Cover with plastic wrap or a damp kitchen towel and place the bowl in a warm, draft free spot to rise for 12-18 hours (I like to do it overnight). The dough is ready when it smells yeasty, is more than doubled in size and is dotted with bubbles all over.
Pro Tip: If making this bread in cold weather, you will likely need all 18 hours for it to rise. In warmer summer months it will rise much quicker. You will know it's ready when it has more than doubled in size and the surface is filled with bubbles.
- Turn it out onto a lightly floured work surface, dust with flour, then turn it over onto itself twice, like a book.
- Gently shape the dough into a ball, then cover with a towel and let rise for an additional hour.
- Preheat the oven to 450℉. Place a large Dutch oven or other oven-proof pot with a lid into the oven as it heats up and leave it in there for at least 30 minutes to get nice and hot.
- Score the top of the dough with a sharp knife, then use a bench scraper to carefully transfer it to the pot.
- Cover and bake for 30 minutes, then remove the lid and allow it to cook for another 10-30 minutes, depending, to let it get deep brown and caramelized.
- Remove bread from the Dutch oven and allow it to cool completely before slicing.

Tips for Success
- Make sure your yeast is active. Check the expiration date and if you've had it for a while, try proofing it in warm water first to make sure it's still alive. Store opened yeast packets in the fridge or freezer.
- The dough should be quite sticky. Avoid adding too much excess flour along the way.
- For the best accuracy, use a kitchen scale to measure ingredients
FAQs
Yes, but you'll have the better results if you mix half wheat flour and half all purpose flour. Using all whole wheat will result in a dense bread.
I don't recommend making this gluten free. Try this Paleo Pecan Streusel Banana Bread instead!
There may have been too much flour added or it may have not risen enough. It will likely need the full 17-18 hours to rise unless it's very warm where you are.
Your oven may run hot (it's common), so check with a separate oven thermometer and make adjustments as needed. Also, make sure the convection setting is not turned on.
Any large oven-safe pot with a cover can be used. Just make sure it's large enough to hold the bread and can withstand a very high oven temperature. If you don't have a lid, you can use heavy duty tin foil, but make sure it's very tightly sealed.
This bread will dry out and go stale within a day or two. The best way to preserve it is to slice it and freeze in a zip-top bag or airtight container. Simply defrost a slice when you're ready to eat or add it straight to the toaster from the freezer.


Did you LOVE this recipe? Please leave a star ⭐️ rating and comment and tag your creations @ColeyCooks on Instagram!
Want to Save This Recipe?
Enter your email & I'll send it to your inbox.
By submitting this form, you consent to receive emails from Coley Cooks.
Cinnamon Raisin Walnut No-Knead Bread
Ingredients
- 3 cups unbleached all-purpose flour (370-390 g) plus more for dusting
- 2 teaspoons salt (12 g)
- 3 tablespoons sugar (43 g)
- 1 tablespoon cinnamon (8 g)
- ½ teaspoon instant yeast (3 g)
- 1½ cups luke-warm water (355 ml)
- 1 scant cup walnuts
- 1 scant cup golden raisins regular raisins are fine
Instructions
- In a large bowl, combine the flour, salt, sugar, cinnamon and yeast.
- Add the raisins and walnuts and mix to coat, then pour in the water and stir until just combined.
- Cover with plastic wrap or a damp kitchen towel and place the bowl in a warm, draft free spot to rise for 12-18 hours (I like to do it overnight). The dough is ready when it smells yeasty, has more than doubled in size and is dotted with bubbles all over.
- Turn it out onto a lightly floured work surface, dust with flour, then turn it over onto itself twice, like a book. Gently shape the dough into a ball, then cover with a towel and let rise for an additional hour.
- In the meantime preheat the oven to 450℉. Place a large Dutch oven or other oven-proof pot with a lid into the oven as it heats up and leave it in there for 30 minutes to get nice and hot.
- Score the top of the dough with a sharp knife, then use a bench scraper to carefully transfer it to the pot.
- Cover and bake for 30 minutes, then remove the lid and allow it to cook for another 10-30 minutes, depending, to let it get deep brown and caramelized.
- Remove bread from the Dutch oven and allow it to cool completely before slicing.
Notes
- It will likely take at least 16 or the whole 18 hours for the bread to rise unless it's very warm where you are.
- Bread will keep, wrapped tightly, at room temperature for up to 3 days. I prefer to slice the bread then place it in a zip-top bag and freeze it. Slices can be removed straight from the freezer and toasted for best results.
- Make sure your yeast is active. Check the expiration date and if you've had it for a while, try proofing it in warm water first to make sure it's still alive. Store opened yeast packets in the fridge or freezer.
- The dough should be quite sticky. Avoid adding too much excess flour along the way.
- For the best accuracy, use a kitchen scale to measure ingredients.
Nutrition
This post may contain affiliate links.

So easy and delicious! Family always requests it for gatherings. Thanks!
I'm so glad you love it! Thanks for your review!! <3
I make this bread every week as my husband and I have a slice each day. We have even made it while away on vacation! I actually make 1-1/3 times the recipe so it lasts longer. I usually make it with 3 cups stone-ground whole wheat flour and 1 cup white bread flour; I use active dry yeast and have started adding 2 T vital wheat gluten. It is a winner. I have the recipe memorized at this point.
I loved reading this comment! Thanks so much for taking the time to leave a review. So happy you enjoy this recipe and make it so much! 🙂
The recipe says 450 the video says 425, which one should I use?
450! Apologies for the error
Wow! This was perfect! It was just what I was looking for. I love raisin walnut bread and the cinnamon in this recipe was a nice addition too. I have made bread but never a no-knead bread. It has made me a believer! I followed the recipe exactly except I used parchment paper to bake it in the dutch oven. I was also scared that it wouldn't hold it shape during the last rise so I used a colander as a baton (just without the extra dusting of flour). The bread would have held it shape just fine for the last rise. I am now a believer in no-knead bread!
Thank you for leaving such a detailed review! I'm so glad the recipe worked out well for you. It reminded me that I'm also due to make a loaf. 🙂
Lovely recipe but is there no way to make this lovely bread without a dutch oven?
I don't have one and the prices are now outrageous
Thank you so much
Rosalee
You can use any type of pot or bakeware with a lid that is oven safe up to 500 degrees. You can try baking it without, but the covered pot helps to retain the heat better and mimic that of a professional a bakery.
Can I use bread flour for the walnut raisin no-knead?
Yes, absolutely!
I was a little worried because my dough didn't rise very much overnight, but it did bubble. I went ahead and baked in anyway and it turned out wonderful. I used a bread pan, covered the top with foil and left it in my oven for 45 minutes. It came out perfect and tastes great. Add a little butter and it's even better.
So happy it worked out for you, Jenna!
What size duty oven? 4 qt is what I have.
Dutch
a 4 quart Dutch oven will be too small. You need a 6 quart or larger
I made this today as the recipe is written but used pecans and regular raisins. I took it to game night and shared it with friends. It was so good. I had my piece with cream cheese.
So easy to make and so good!!
SO glad you enjoyed it!
I had recent success in making pizza crust and calzone dough (after years of failure though not really sure why when I see how easy it is) and came across this recipe somehow and decided to try it As it is my favorite kind of bread from fancy bakeries. I am not really much of a baker and this was my first attempt so I tried to follow the recipe very exactly and read Through the reviews and comments. Preparing for a dense first draft, I also read a whole bunch of troubleshooting tips on other websites BUT. It turned out absolutely perfect and I could not have been more proud!!! I proofed it inside the oven which I turned on for about a minute and then turned off. I did this because it is below 65 in my house. I left it for a full 18 hours. It was insanely sticky so I thought I failed so I read more troubleshooting tips and it did not necessarily sound like a problem so I managed to work with it and it was fine. I probably should have just put the water in more slowly /as needed and not have felt the need to add every last drop. I will make this again and feel confident to try other recipes as well. I am truly getting my moneys worth out of this Dutch oven I got this year. It’s perfect for rustic bread recipes but I also make yogurt in it.
I toasted my walnuts first, used a combination of golden and brown raisins. I thought the recipe sounded heavy on the salt compared to other recipes even though I am very pro salt but I went with it and it was good. Oh, I did dare to use a half cup of white whole wheat flour. Thanks Coley!
So happy to hear this turned out well for you! Thanks for your lovely comment 🙂
I am so glad you added the weights of the ingredients, however do double check the cinnamon. A tablespoon weighs about 5 grams.
thank you for the feedback!
This bread makes the best cinnamon toast and always comes out delicious!
SO glad you enjoyed it!
I forgot to add the cinnamon last night and the dough has already risen. Can I add the cinnamon in now, before baking? If so, how?
Hmm. I would sprinkle the cinnamon over top and gently fold it in. It wil still be delicious if it’s not fully incorporated but more of a cinnamon swirl. Please report back and let me know how it works out!
Thank you for your guidance! I added the cinnamon before folding the dough and baked it as usual. The finished bread was just as beautiful and delicious as always. Thanks for your advice and quick response. You saved the day!
So glad it worked out!!
Hi! I am wondering if you can make this recipe without a dutch oven?
You really do need the dutch oven, or a very large oven safe pot with a lid. The heavier, the better. You can bake it uncovered in a pan and I'm sure it would turn out okay, but you won't get the same crust as if you used the Dutch oven.
Hi
Can I use half the quantity or will it be small? if yes for the half, do I need to just use half of all ingredients?
I've never tried it but I don't see why not. Yes, your loaf will be small and therefore will require a much shorter bake time. If you do it, let me know how it turns out!
I had the same experience as another baker in that the dough didn’t rise enough and felt dense after 16 hours. Since I only used a portion of the yeast package I proofed the rest and it foamed up beautifully so it wasn’t my yeast. I ended up putting the dough into my food processor with the dough blade and added the extra proofed yeast and a bit more flour and it rose very nicely and was good when baked. The processor pretty much decimated the raisins and walnuts though so I’ll give it another try in the future. The temperature was a bit too high as well so I’ll have to adjust it lower next time so my crust doesn’t scorch (I baked as directed and only did 5 additional minutes with the lid off but it scorched on the top and bottom). I do t know what could have gone wrong, I followed the recipe initially until I could see it was going to be wasted if I didn’t do something. Could it be altitude? I am at 4500 feet. It’s also winter so it may not have been warm enough in my house (I put the dough into a slightly warm oven initially but it didn’t stay warm overnight). The flavor and texture are both quite good but the crust was ruined and I really like whole raisins and walnut chunks so it was disappointing.
I'm sorry this didn't work out for you. The amount of yeast called for and oven temperature in the recipe are both correct. There are a few things that could have happened - If the water you added to the dough was too warm it could have killed the yeast which would have caused it not to rise. Similarly, the oven you put it in to proof may have been too warm at first and could have killed the yeast that way as well. It also could have had to do with the altitude (unfortunately I have no experience with high altitude baking) or could have needed to take longer because of the cold temperature. As for the crust getting scorched in the oven - again, the temperature may have to be adjusted for the altitude or your oven may just run hotter (many do - get an oven thermometer to be sure). Yeast doughs can be finicky and again I'm sorry this didn't work out, but I hope you give it another try!
Not happy with finished product. Produced a load that is very tight and heavy. Thinking only a half teaspoon of yeast just isn't enough.
I'm sorry this didn't work for you, Marie. How long did you let the dough rise overnight? Did it fully double in size? If not, you may have needed to leave it longer or there's a chance your yeast was bad. I would give it another try!
Easy, delicious no knead bread
thank you!
Hi would you know if active yeast would work for the recipe? Thank you
absolutely!! go for it. 😀
I love those photos. So warm and cozy. We're actually getting a "cool" front this weekend, so I think it's time for me to give this bread a shot.
So excited to hear about that Chile trip! Please eat some seabass for me. I know it's not a sustainable choice, but damn it's worth the occasional splurge.
Do it! And please have that extra slice for me. Now about that Chilean seabass... is it actually from Chile? I'm with ya though... Not sustainable, but sooo buttery and delicious.
They're really Patagonian toothfish, and they do fish for them there, but I guess they're not that popular on menus. Hope you have an amazing trip. Can't wait to hear about all the food and see all the pics!
I am usually obsessive about researching anything and everything about a place before I go, but there's not a whole lot about Chile out there (at least for towns were headed to). That said, I didn't see any mention of Chilean sea bass in any of my searches. I wonder if they call it something different there? They must! Right? I will be sure to do some digging once I'm there to find out, and if it's on the menu, I'm ordering it. When in Rome...
Coley This bread recipe has been a favorite of the family ( grand children) since I baked the first loaf. The night before I start three loaves. I add more raisins, more walnuts and more cinnamon than the recipe calls for. I spend the whole morning baking and doing other chores. I prefer a dense moist bread so I bake thirty minutes with the the lid on and 12 to 15 minutes with the lid off. Married 50 years; my wife loves the bread and the fact that I cleanup the baking dishes.
Thank you so much for this amazing comment, Tom! I'm so happy to know how much you and your family love this recipe. 🙂