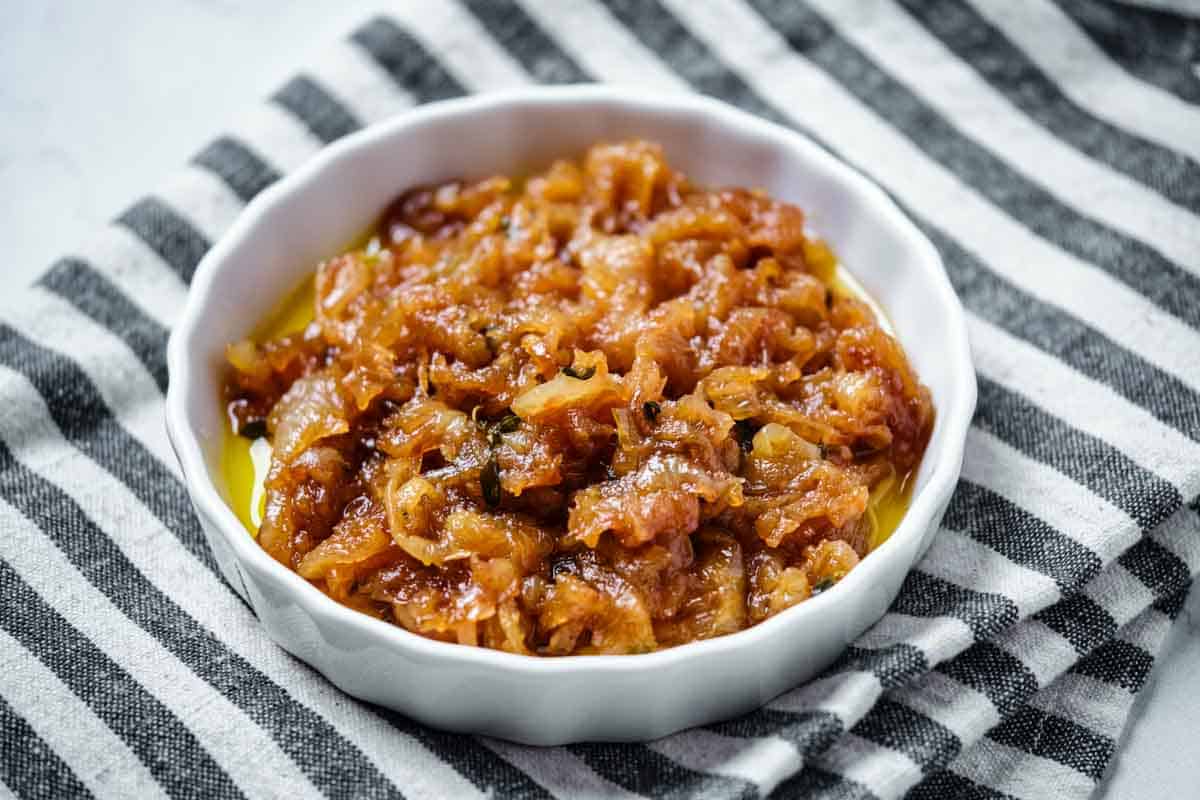
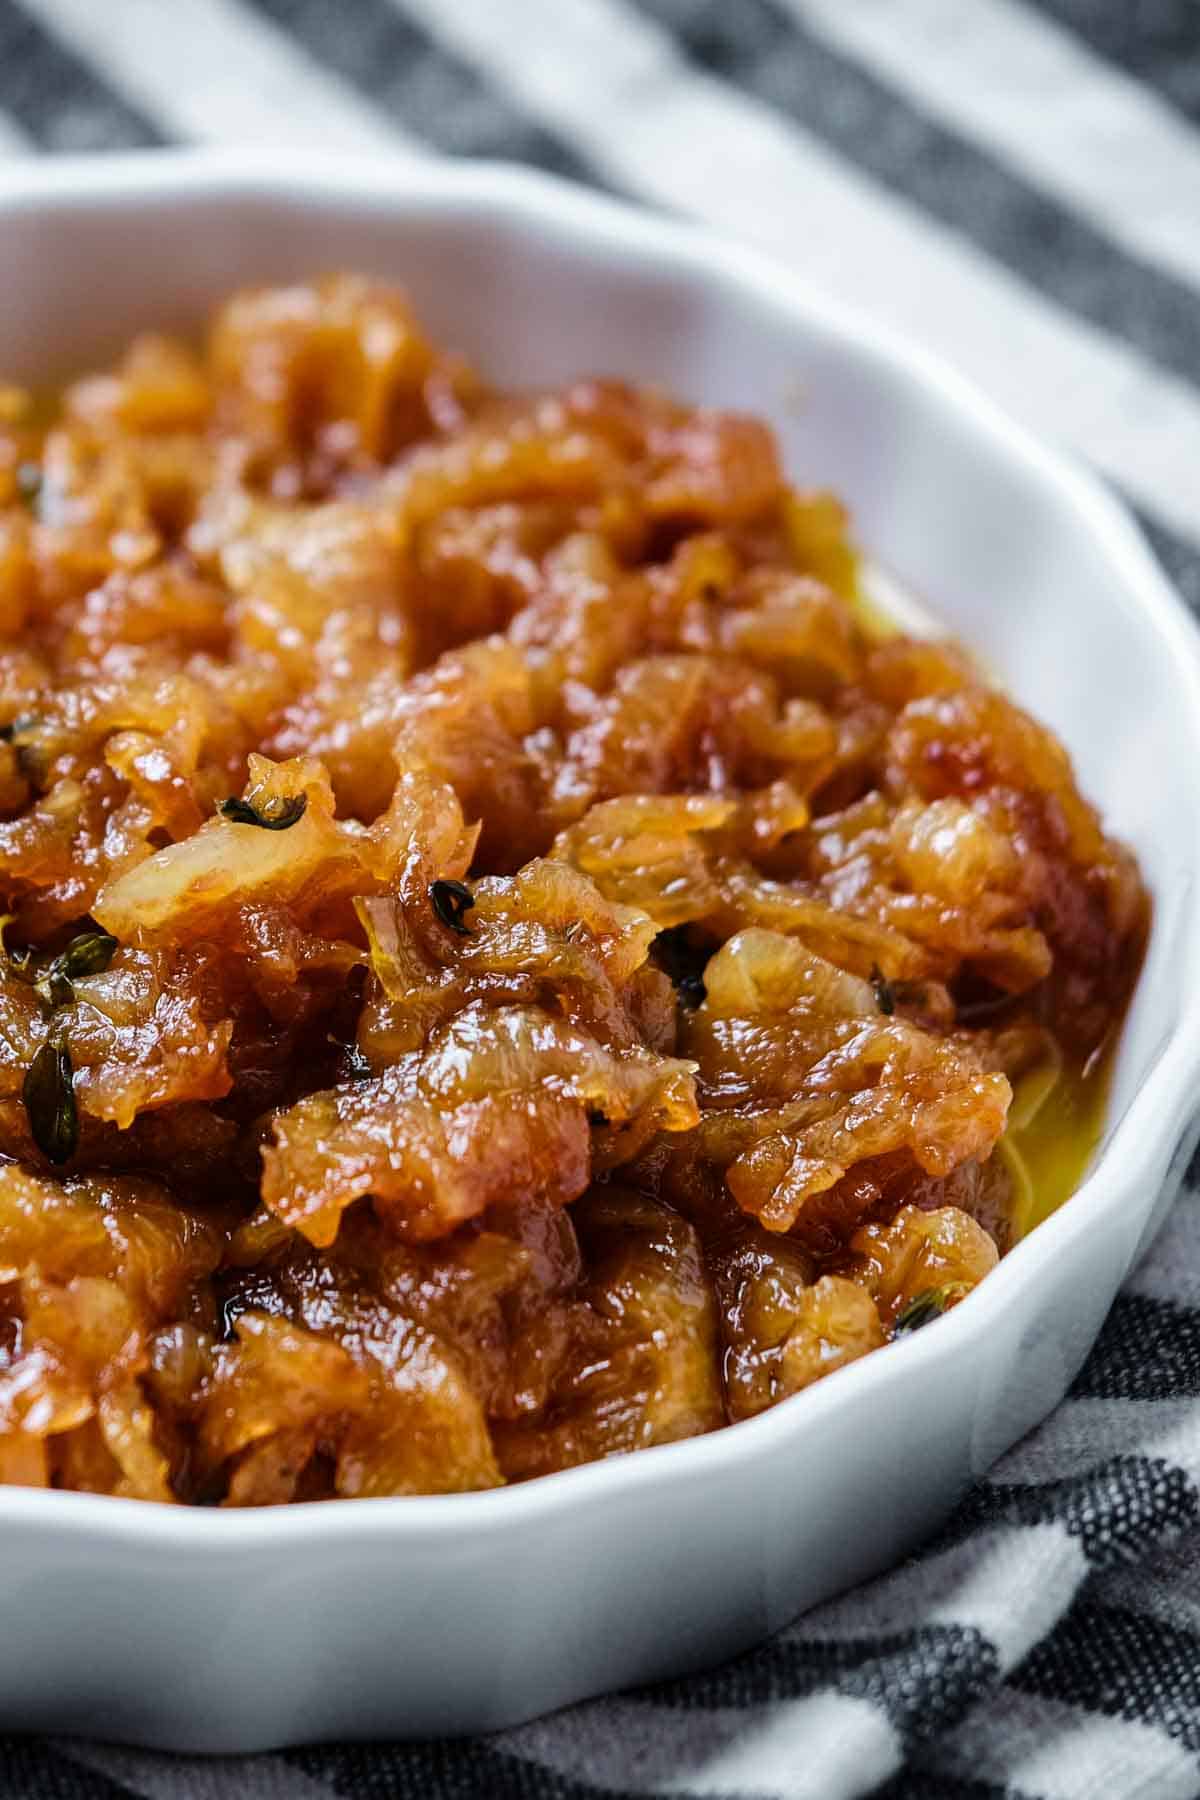
Sweet, deeply caramelized onions add an amazing depth of flavor to any dish, making it a must-have in any kitchen. This easy, fool-proof method only requires three basic ingredients and a few optional add-ons for the best caramelized onions you can make!
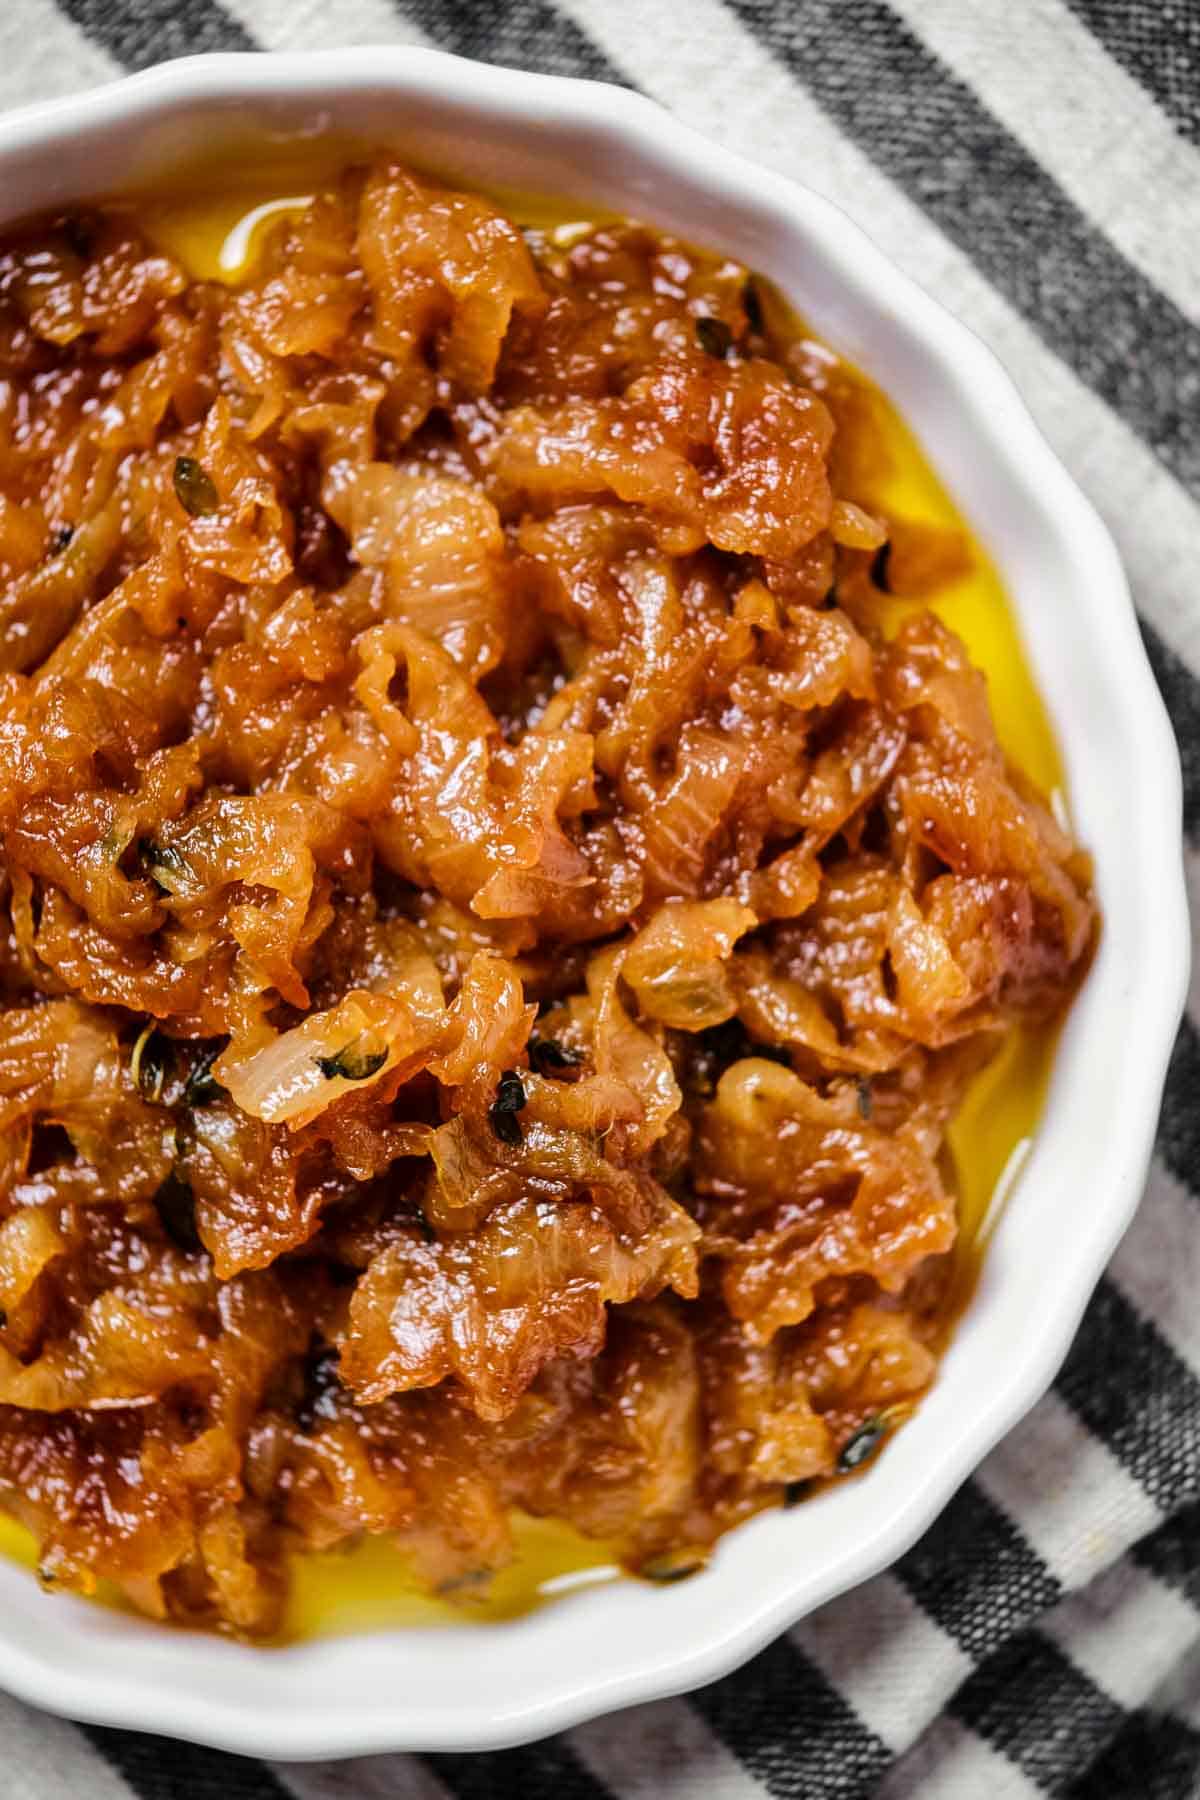
There is nothing quite like the rich, complex flavor of properly caramelized onions. This easy caramelized onion recipe uses a super straightforward cooking process to coax out the onion's natural sweetness to develop a deeply caramelized flavor.
Caramelized onions are a secret weapon in my cooking. They're the easiest way to add so much flavor to a variety of dishes, and my favorite way is on a melty French Onion Grilled Cheese Sandwich. I also love them in savory pies, like as a base layer in this fall inspired Brown Butter Pumpkin Galette and they make the perfect addition to these turkey pot pies.
The best part is that these sweet golden onions freeze beautifully. I like to make a big batch of these onions and freeze them in ice cube trays to make them easy to access for future recipes.
The Caramelization Process
Cooking yellow onions slowly allows the flesh to soften and break down, causing the natural sugars to release. As the onion layers cook down, the sugars and amino acids create a Maillard reaction, turning golden brown and developing a rich, deep, sweet flavor.
This process does take some time, so don't believe anyone promising a quick caramelized onions recipe. To properly make sweet caramelized onions it will take more than a couple of minutes, but they only require a little time doing actual hands-on work.
Why This Recipe Works
- No-fail recipe - you can't mess these up!
- Use as few as three ingredients or jazz it up for more flavor.
- Takes time but is worth the wait.
- Freezes easily for later use - make a big batch!
Ingredient Notes
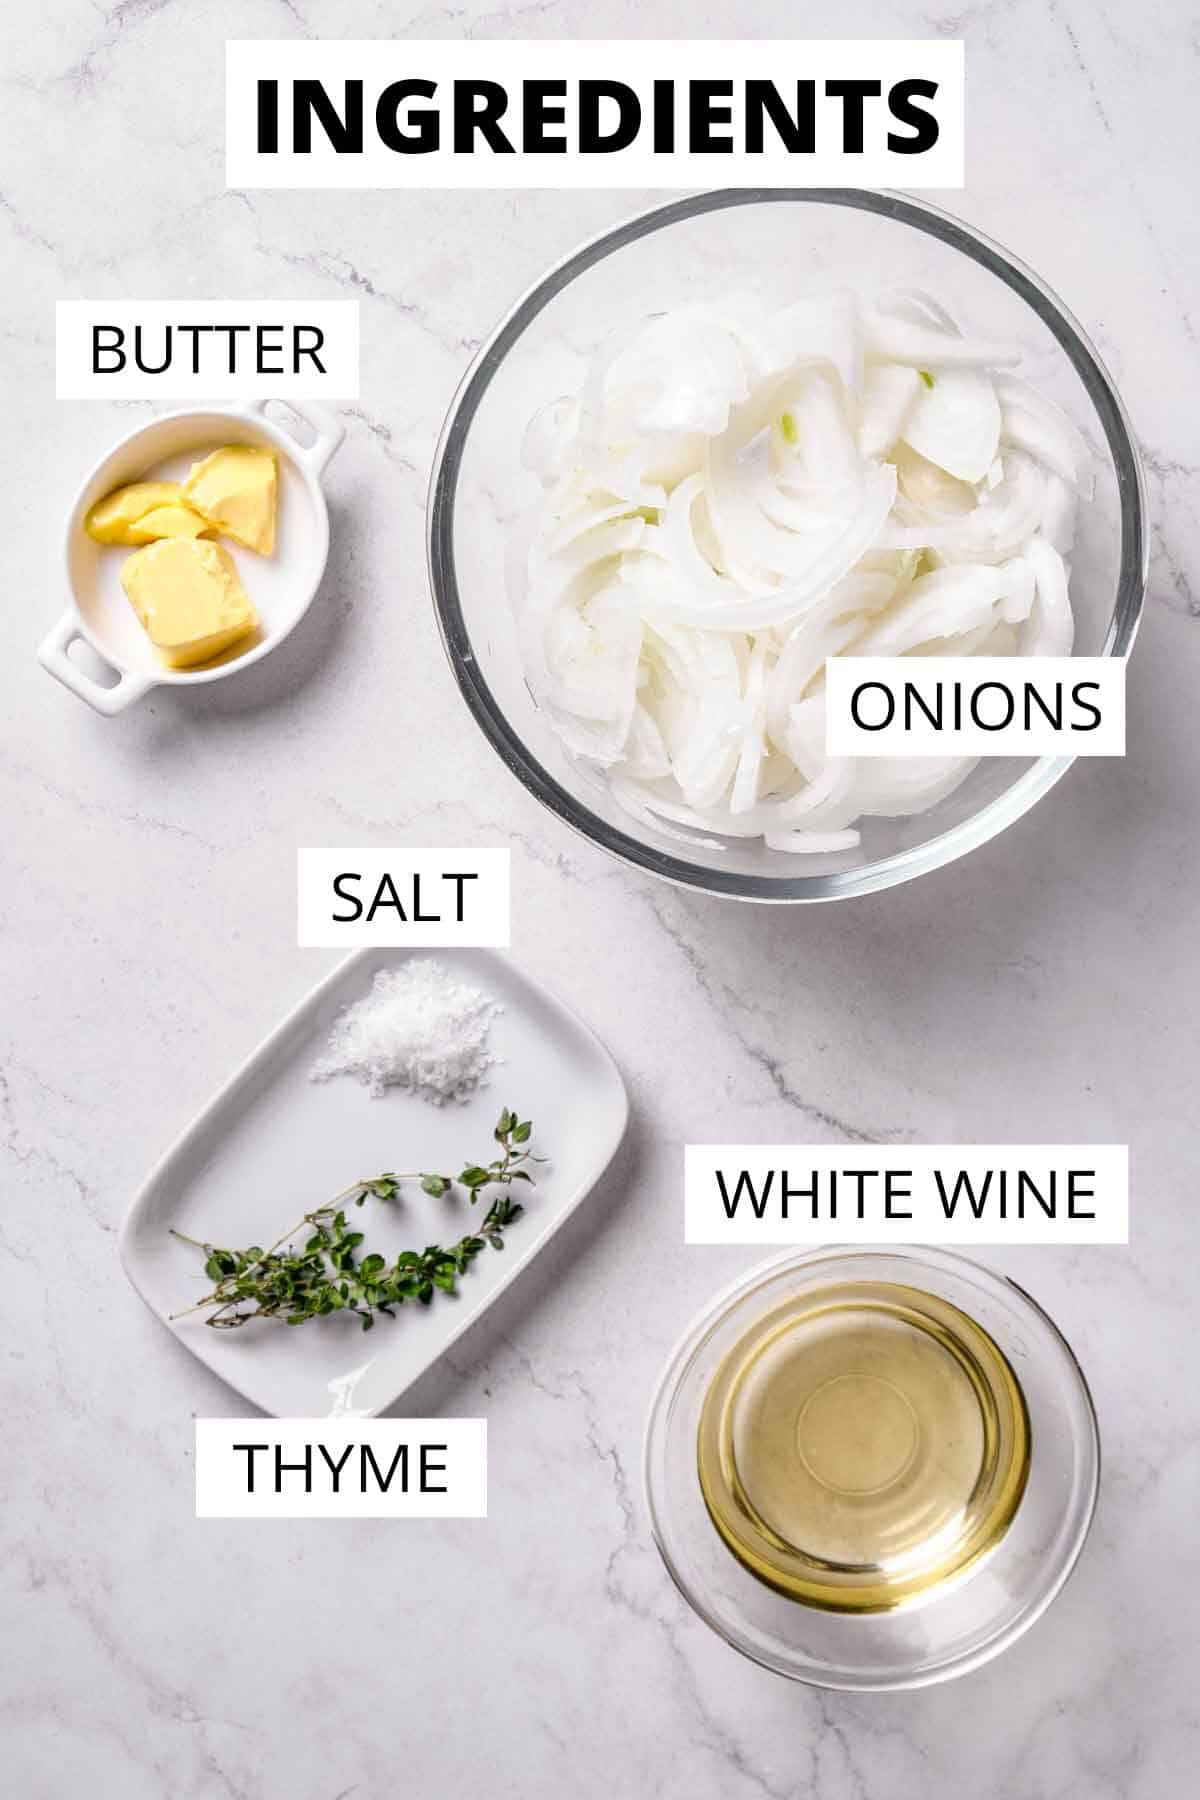
- Onions - you can use Spanish onions or sweet onions for this recipe. Sweet onions, like Vidalia or Maui, have more sugar and will caramelize a bit better, but either work. You can actually caramelized any kind of onions, even red onions or a variety of onions if you like. The number of onions needed will depend on their size, but this
- Fat - You can use butter, olive oil, vegetable oil or whatever type of fat you prefer. But you need something to cook the onions in.
- Thyme - Optional, but it adds a savory, earthy flavor. of earthy and minty flavor to the caramelized onions. Other woody herbs like rosemary or sage can also be used.
- White Wine - Optional, but adds an extra layer of flavor and acidity. You can also use sherry, brandy, or a fortified vinegar like sherry vinegar or balsamic vinegar. You can also use chicken stock, vegetable broth or beef stock.
*Full ingredient list with quantities is in the recipe card.
Helpful Equipment
- Mandolin Slicer - To get the thinnest, most even onion slices.
- Large Skillet – Wider is better for increased surface area. A Cast iron skillet works well.
- Rubber Spatula or Wooden Spoon – To scrape the browned bits from the bottom of the pan.
Step by step instructions
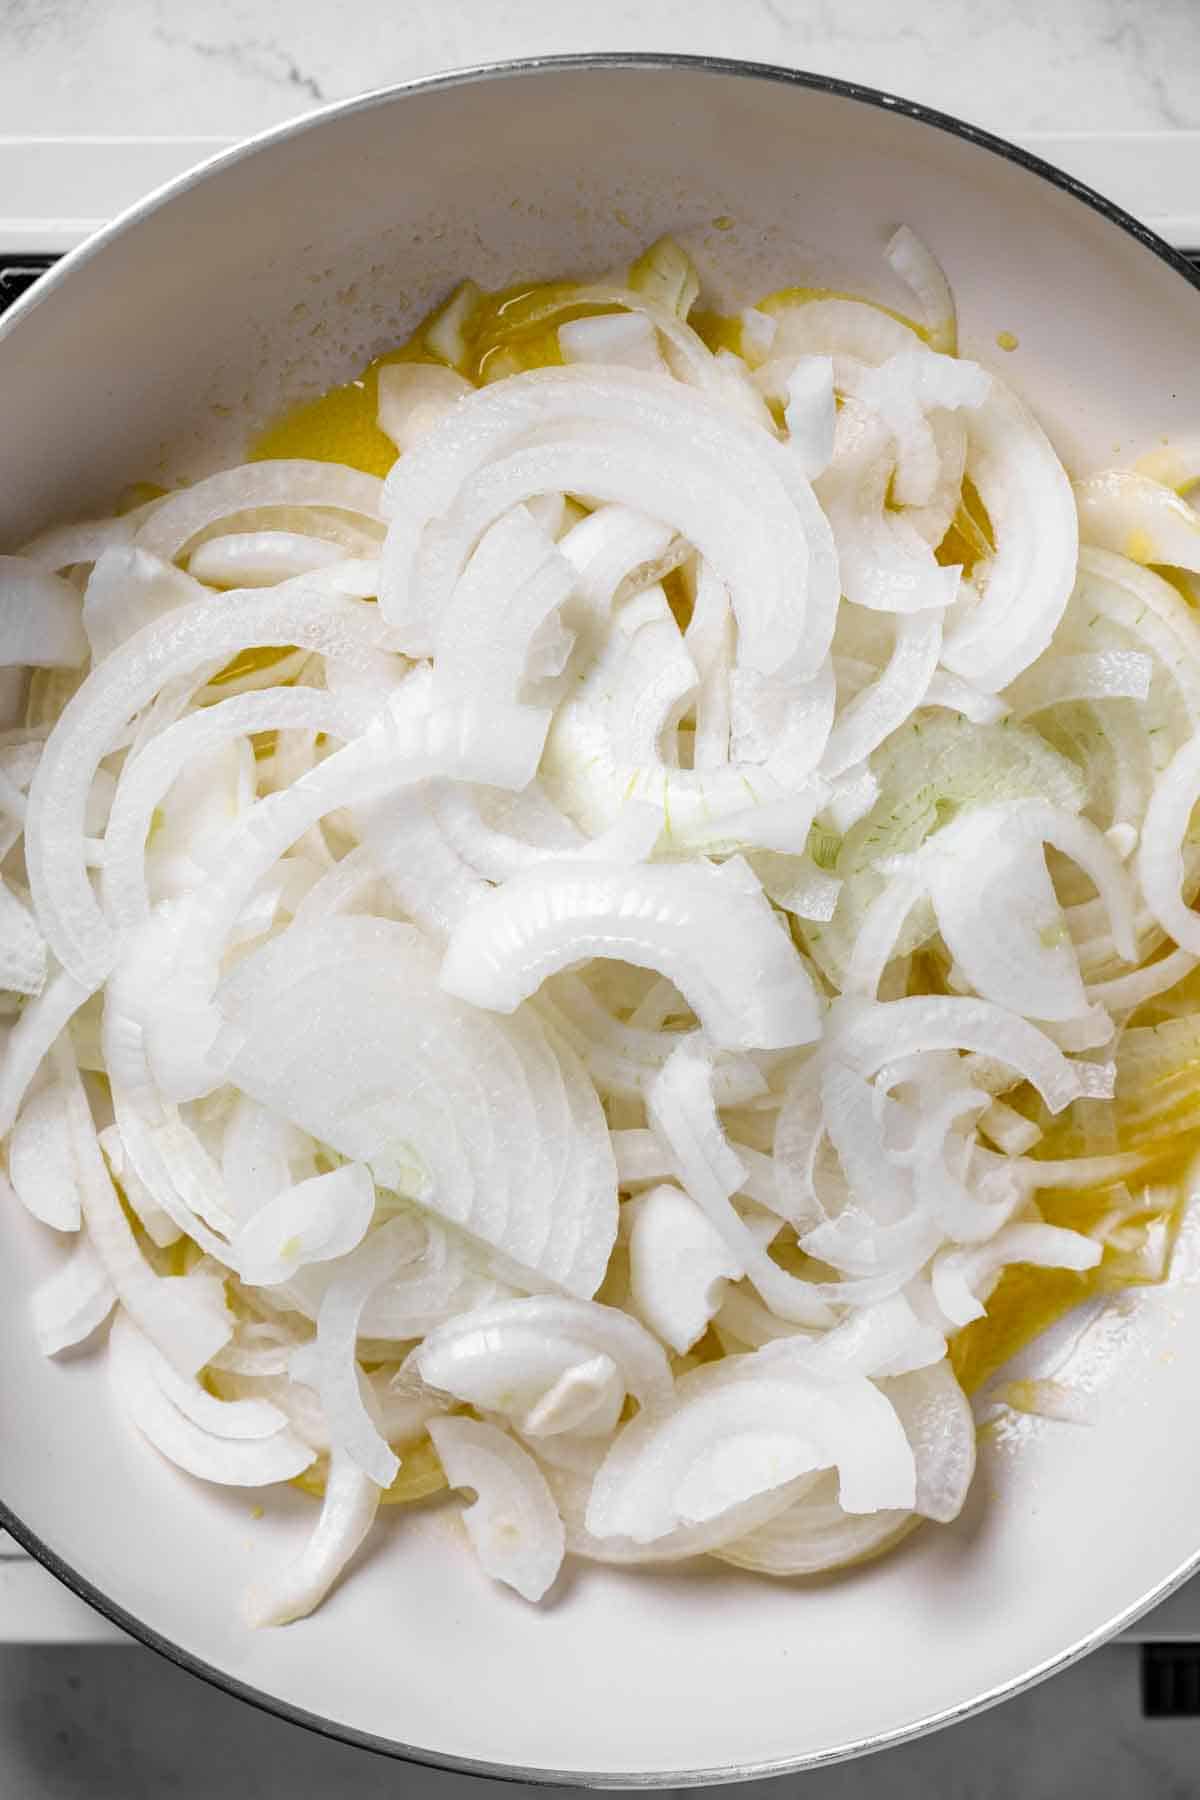
- Heat the butter or oil in a pan over medium heat and drop in the onions. Season with kosher salt, stir, and then pour in about ¼ cup of water.
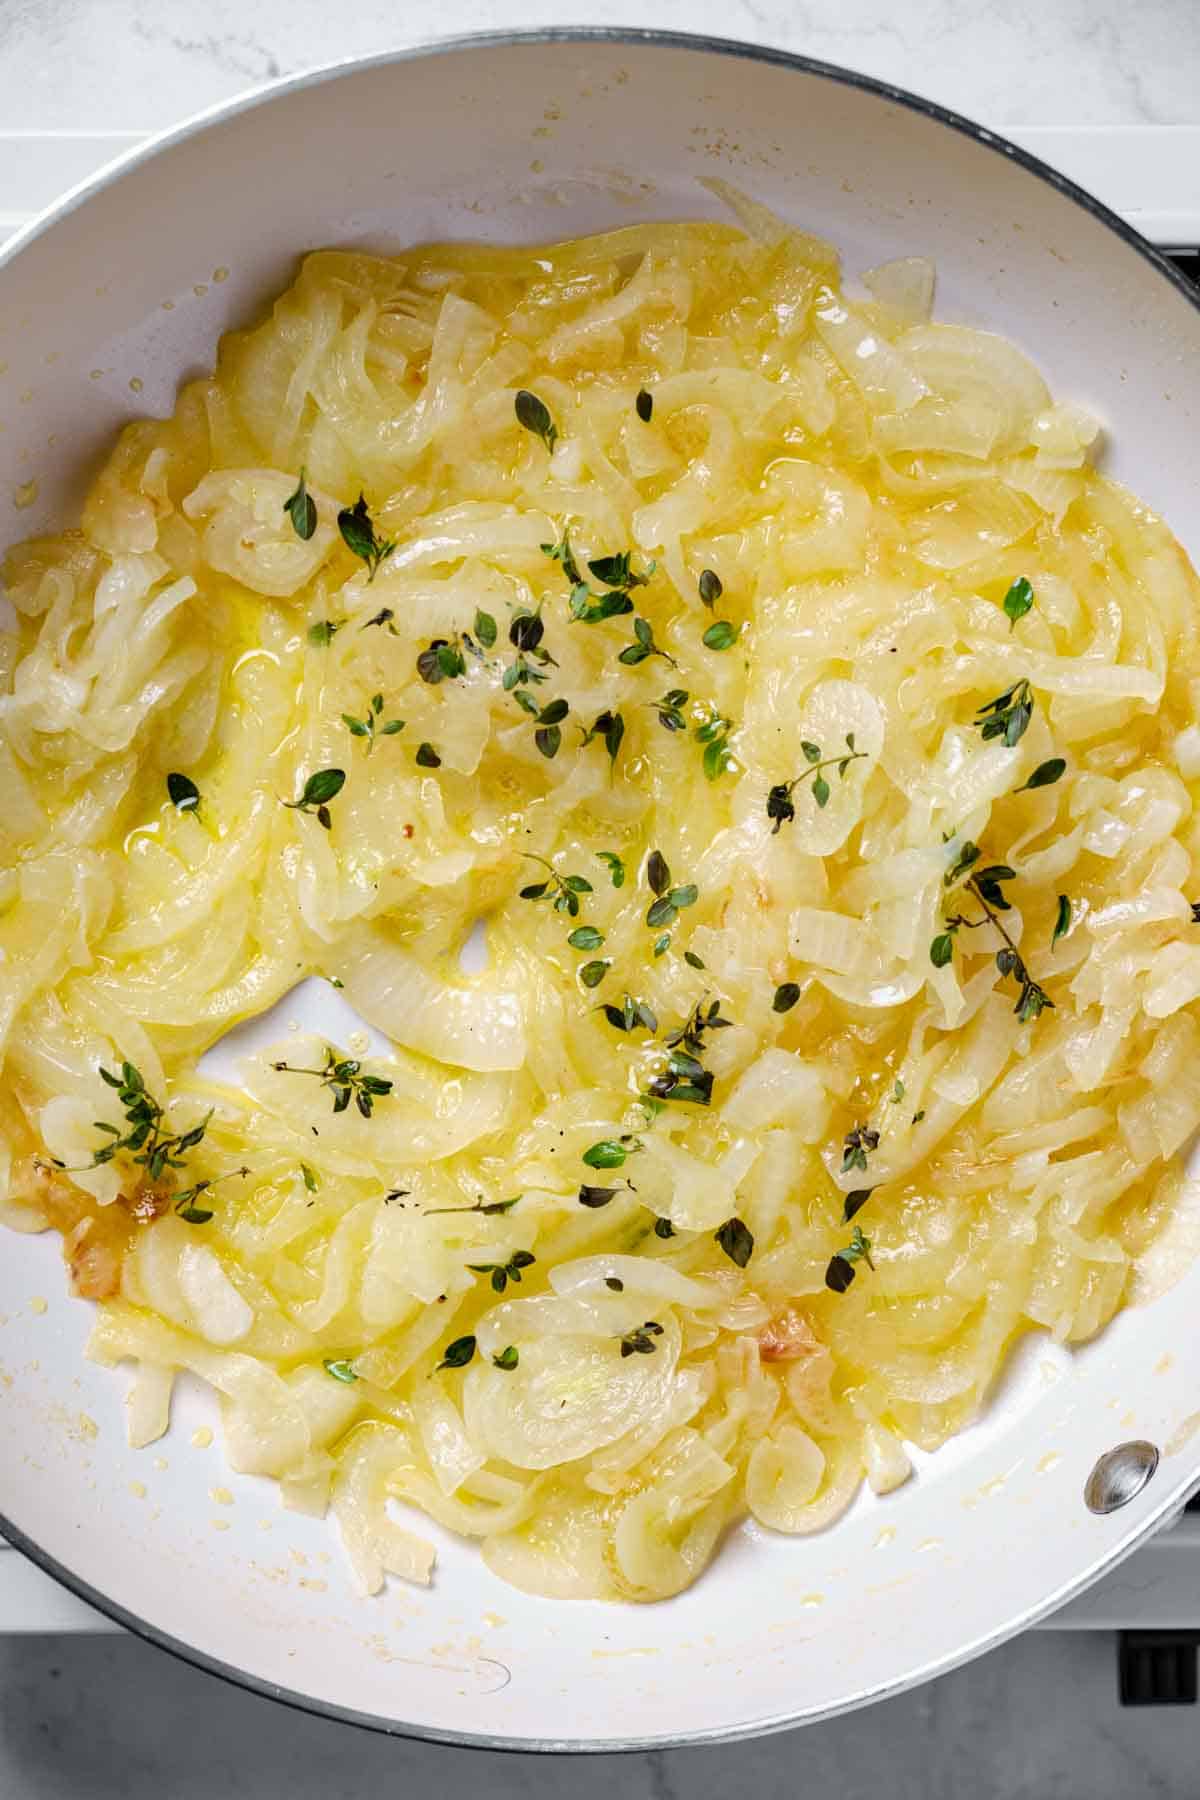
- Cover, and let cook for about 10 minutes. Open the lid, give them a stir, then cover and cook for another 10-15 minutes until they become very soft. Continue cooking, uncovered, and allow the liquid to evaporate.
- Stir in the thyme and black pepper, if using, then once all the liquid has dried up, deglaze the pan with the wine. Be sure to scrape up any brown bits on the bottom so they can dissolve in the liquid.
- Once the wine evaporates, deglaze the pan again with a few tablespoons of water, scrape the bottom, and cook until the pan dries out again.
- Continue this process until the onions reach a deep golden brown color. It can take up to an hour for this to happen.
- Remove the pan from the heat, let cool then transfer the onions to a container.
Tips For Success
- Slice the onions as thinly and evenly as possible. Keeping the root end of the onion attached while you slice makes it easier.
- Be attentive and check on your onions frequently. A few seconds can make the difference between perfectly cooked and burnt.
- Be patient. The key is to cook the onions slowly to coax the sugar and flavors out, and this will take time.
Serving Suggestions
- Slather them on burgers or sandwiches. Add some long hot peppers to make it spicy!
- Top Neapolitan pizza dough with caramelized onions, mozzarella, homemade ricotta cheese and gorgonzola for a delicious pizza!
- Use them as a base for French Onion soup or stir into Greek yogurt to make a French onion dip.
- Stir them into a soup or a sauce for meats or chicken dishes.
How to store
Allow the onions to cool, then place them in a jar or sealable container and store in the refrigerator for up to one week. For longer storage, the onions can be frozen for up to 6 months.
I like freezing them in ice cube trays, then transferring them to a zip-top bag for small individual-sized portions that are ready to use whenever I need them.
FAQ
I like it best when my caramelized onions are a deep brown color because they have a really deep, complex taste. However, some prefer it a bit lighter, which takes less time.
I like when my caramelized onions basically melt like a jam, but they shouldn't be mushy. Make sure they are sliced thin and that you don't add too much liquid when deglazing the pan.
I prefer caramelized onions when they are pure, but some people do like to add sugar to speed up the caramelization process.
Related Recipes

Did you LOVE this recipe? Please leave a star ⭐️ rating and comment!
How to Make Caramelized Onions
Ingredients
- 2 tablespoons butter or olive oil
- 2 large Spanish or sweet onions thinly sliced*
- ½ teaspoon salt
- ½ teaspoon fresh thyme leaves optional
- ½ cup dry white wine
- water as needed
Instructions
- Heat the butter or oil in a pan over medium heat and drop in the onions. Season with salt, stir, and then pour in about ¼ cup of water. Cover, and let cook for about 10 minutes. Open the lid, give them a stir, then cover and cook for another 10-15 minutes until they become very soft. Continue cooking, uncovered, and allow the liquid to evaporate.
- Stir in the thyme, if using, and then once all the liquid has dried up, deglaze the pan with the wine. Be sure to scrape up any brown bits on the bottom so they can dissolve in the liquid. Once the wine evaporates, deglaze the pan again with a few tablespoons of water, scrape the bottom, and cook until the pan dries out again.
- Continue this process until the onions reach a deep golden brown color. It can take up to an hour for this to happen, so be patient, and don't take your eyes off of the pan for too long. The onions can turn from perfectly caramelized to burnt in a matter of seconds.
- Remove the pan from the heat, transfer the onions to a container, allow to cool and store in the refrigerator for up to one week. For longer storage, the onions can be frozen for up to 6 months.
Video
Notes
- Slice the onions as thinly and evenly as possible. Keeping the root end of the onion attached while you slice makes it easier.
- Be attentive and check on your onions frequently. A few seconds can make the difference between perfectly cooked and burnt.
- Be patient. The key is to cook the onions slowly to coax the sugar and flavors out, and this will take time.
Did you make this recipe? Please leave a rating and review!